In the 2025.1 release, we extended the email functionality to include a new GraphAPI solution for sending invoices and statements, in addition to the existing SMTP and EasyMAPI options.
To use this new feature, you need to create and configure a delegated application in Microsoft Entra ID with the right permissions.
Although this page describes how to set up Microsoft Entra ID, direct any issues to your IT department or Microsoft support, as MYOB offers limited support for integration issues outside of the Exo Business application.
For the most up-to-date help, see the Microsoft website:
Prerequisities
To set up Graph API, you need:
-
Access to Microsoft Entra ID (formerly Azure AD).
-
Administrative rights to create and manage applications.
Creating the Entra ID application
Register the application
-
Sign in to the Microsoft Entra admin centre.
-
Browse to Identity > Applications > App registrations and select New registration.
-
Enter a display Name for your application, e.g. “Exo Business Email Integration”.
-
Specify who can use the application in the Supported account types section. We recommend selecting Accounts in this organisational directory only.
-
Set the Redirect URI to http://localhost:8080/callback .
-
Click Register.
Configure API permissions
-
After registering the application, go to the API permissions section.
-
Click Add a permission and select Microsoft Graph.
-
Choose the necessary permissions:
-
email
-
Mail.ReadWrite
-
Mail.Send
-
offline_access
-
openid
-
profile
-
User.Read
-
-
Click Add permissions.
Grant admin consent
In the API permissions section, click Grant admin consent to ensure the application has the required permissions.
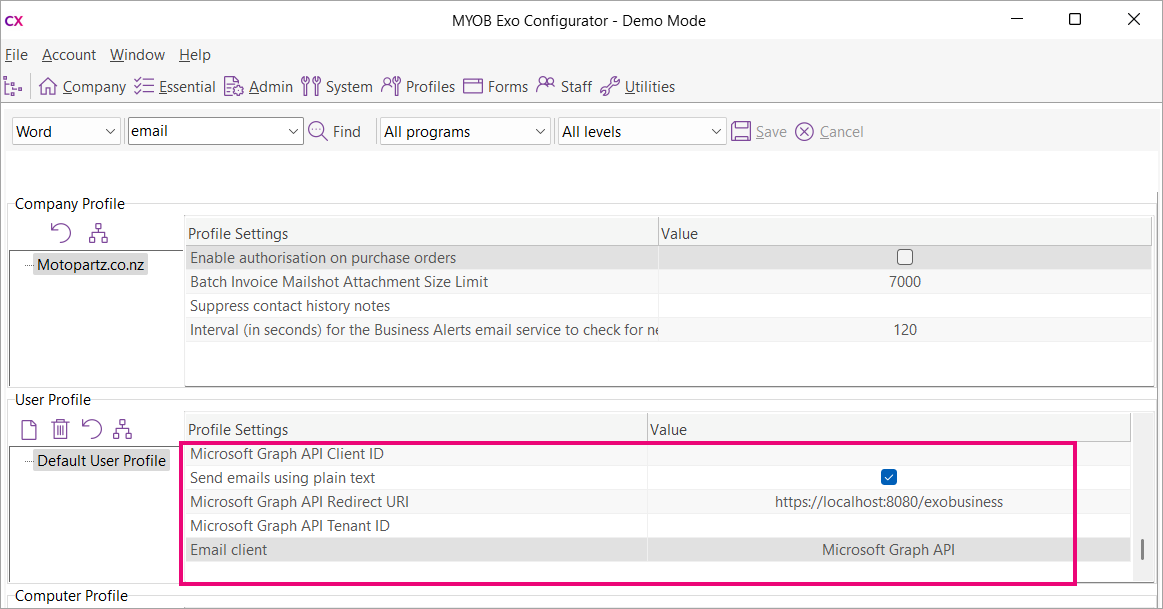
Set up Graph API in Exo Config
After creating the Entra ID application, you can log in to MYOB Exo Configurator to set up Graph API.
-
On the toolbar, go to the Profiles section.
-
Set the Email client user profile to Microsoft Graph API.
-
In the new Microsoft Graph API Client ID and Microsoft Graph API Tenant ID user profiles, enter the IDs that you configured in Entra ID.
-
Enter a redirect URI in the new Microsoft Graph API Redirect URI user profile. The default URI is https://localhost:8080/exobusiness.
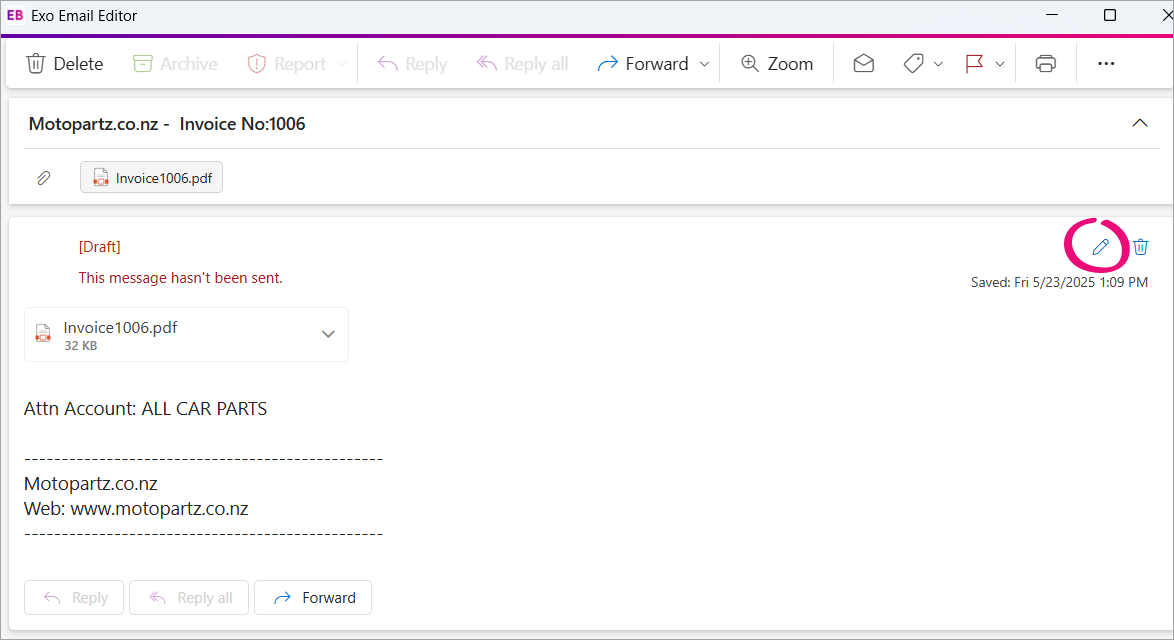
If the Confirm before sending email profile is selected, then when you send an email it’ll open in a read-only mode. To edit the recipient’s email address or the body of the email, click the edit icon. This is a limitation of Graph API.