The Roster screen is where you build and review your roster. It has filters, settings, and tools to help effectively and efficiently view and build your roster.
This page is about the various views, filters, and tools available. For information about creating a roster, see Creating a roster and assigning shifts.
Check your filters When building your roster, click Roster filters to make sure you can see everything you need. If in doubt, tick everything!
![]()
View options

These options let you choose the roster period you want to view, and how the roster view is grouped. Once you've chosen your views, the Refresh Roster button will update the screen based on your choices.

Primary and secondary grouping

The roster groupings determine how the shifts are organised into rows on the roster screen. You can group by Employee, Location, Position, or Cost Centre.
The optional secondary grouping (on the right), gives you a more powerful view of your roster, just note that you can't drag and drop shifts while using a secondary grouping.
Roster period

These let you select what time period is shown on the roster. The period chosen is also used to select shifts for bulk actions, so make sure you've chosen the right period before clicking Publish or using the Tools menu.
When using the Day view, the roster will show an hourly breakdown of the shifts. For longer periods, it will show a daily view.
When viewing longer periods, use the scroll bar at the bottom of the screen to see the full roster.
Action buttons

The action buttons are tools to let you edit, filter, and analyse your roster in a variety of ways.
The available buttons are:
Add a new shift

Edit sales forecast

Copy shifts

Colourisation options

Costing details display options

Breakdown display options

Roster filters

Tools

Publish
Roster filters
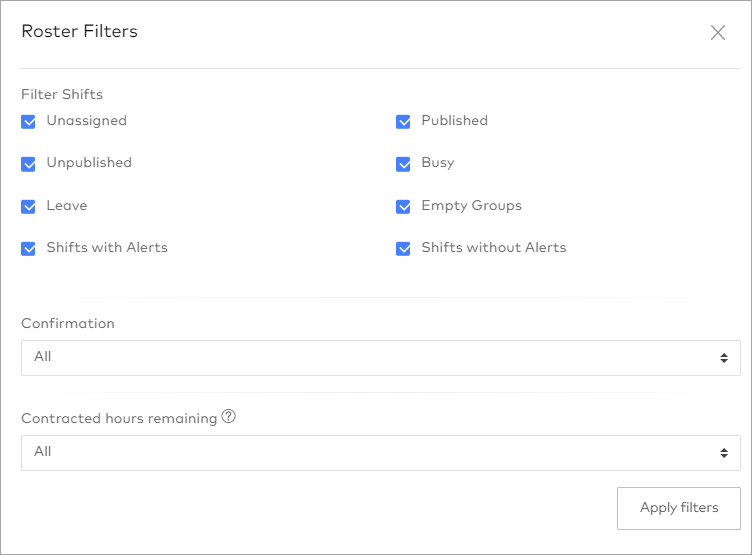
Roster filters let you view only the shifts you want to see.
You can filter shifts by various criteria including shift status, alerts, and whether the rostered employee has confirmed.
-
The Busy status shows when employees are busy at other stores.
-
The Empty Groups filter shows group rows (e.g. employees) even when there are no shifts currently assigned.
-
When the roster is grouped by employee, you can filter the list based on Contracted hours remaining for the period.
-
Filtering by Employee Requirements shows shifts staffed by employees with any of the selected requirements.
When building a roster, we recommend enabling all filters (as in the screenshot) to give maximum visibility.
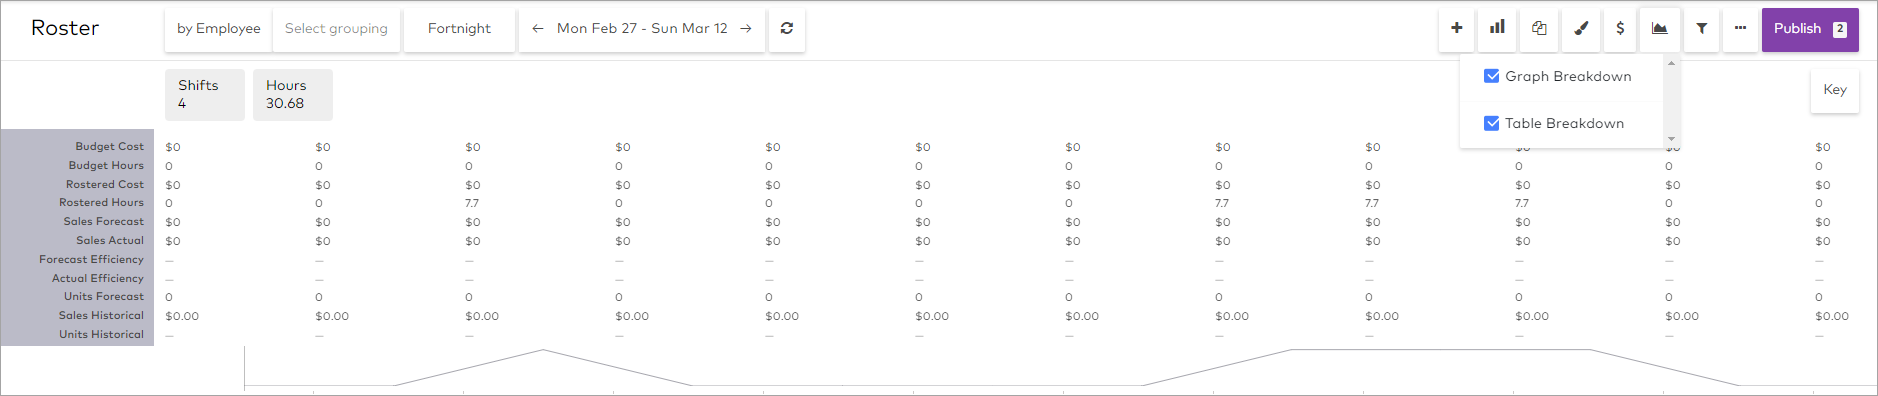
Breakdown display options
Breakdown display options lets you display information about costing, hours and efficiency in table or graph form.
Shift tiles
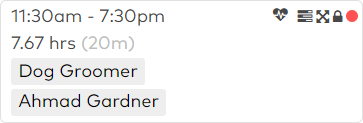
Shift tiles show basic information at a glance, including the employee, position, and times, along with icons for extra information.
You can click on a shift tile to get more information and perform actions such as editing or publishing the shift. Shifts with the gour-pointed arrow icon can be drag and dropped around the roster table to change the assigned day, employee, location, position or cost centre (depending on the grouping chosen).
Shift icon reference
Default icons
|
|
The shift has tasks assigned |
|
|
The shift is locked |
|
|
The shift can be drag-and-dropped on the roster table |
|
|
The shift is unpublished |
|
|
The shift is available for shift swaps |
|
|
The shift has outstanding confirmation or change requests |
|
|
The shift has conflicts or errors, which may prevent it from being published |
Requirement icons
A variety of icons, such the heart, show when a shift is staffed by an employee with the corresponding requirement. For more information, see Creating shift requirements.