On the Roster screen you can add and edit shifts and assign them to staff. You can then publish them make them to make them visible to your employees and send out notifications.
This page is about creating and assigning shifts. For more general information (including what all the buttons do), see Navigating the Roster screen.
Check your filters When building your roster, click Roster filters to make sure you can see everything you need. If in doubt, tick everything!
Creating and updating shifts
Shifts can be created and edited individually or as a series of repeat shifts, and copied one at time or in bulk. You can also generate hifts based on your employees' standard hours, espeically useful for those with the same shifts each week.
Creating a new shift or a series of repeat shifts
-
Go to the Roster screen.
-
Filter the roster view to the date you are creating a shift for.
-
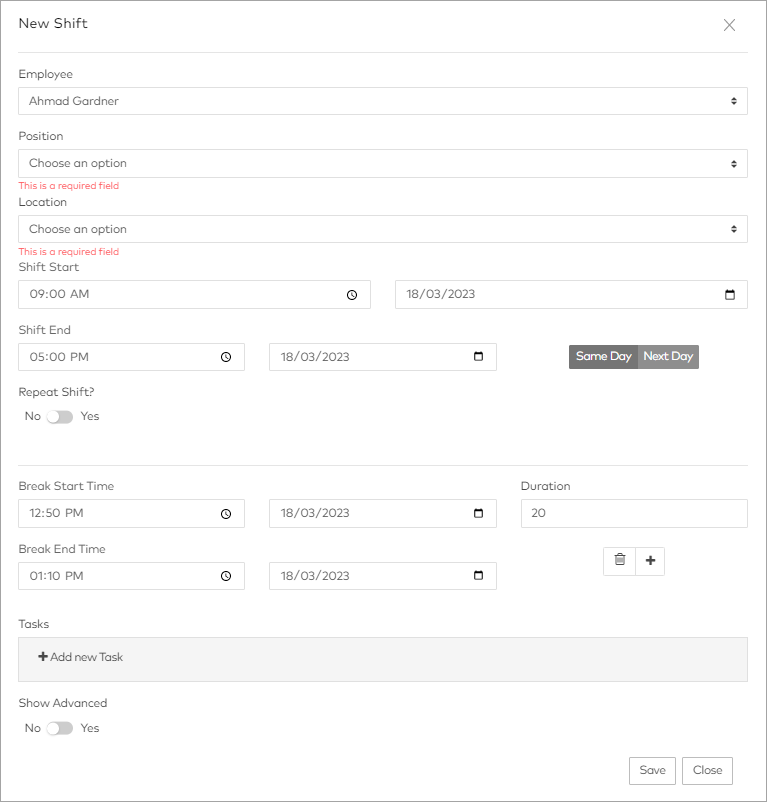
Click New Shift at the top right of the screen, or in an empty spot on the roster view. The New Shift window opens.
-
Enter the basic shift details, including the position, location and break times.
-
Position and Location are required fields.
-
If you use a standard break, and want to override it for this shift click Add custom break to open the detailed break view.
-
-
To create a series of repeated shift, select Yes for Repeat shift? then select the days to repeat the shift from the calendar view.
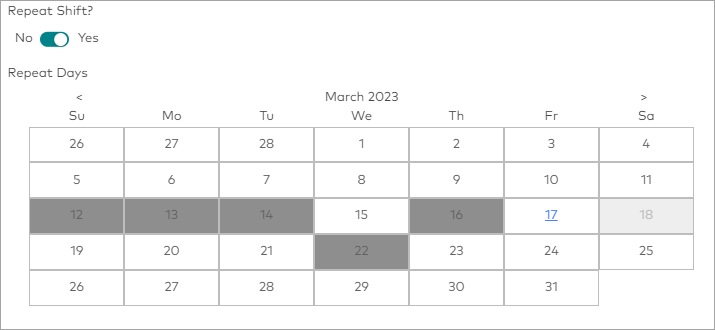
When you save this shift, an identical shift is created for each selected day.
-
To add tasks to the shift, click Add new tasks. For more information about tasks, see Adding and reviewing shift tasks.
-
To update the shift's Cost Centre, Work Type, and other more specific settings, select Show Advanced.
-
If the shift has to be staffed by an employee with specific qualifications or training, click Add requirements and select the appropriate option.
-
Select an End type to record whether the shift ended at the standard shift ending time (Actual), by request from the manager or employee (REQ) or because of an early closing time (CLS).

-
-
Once you have completed all the details, click Save. The shift will show on the roster view.
Newly-created shifts are unpublished. Publish them when you're ready to make them visible to your staff.
Editing a shift or a series of repeat shifts
-
Go to the Roster screen, and click on the shift you want to edit.
-
If the shift is published, click Unpublish to make it editable.
-
Click Edit, and make the changes you want.
-
Click Save to save your changes.
-
If the shift is one of a repeat series, select which shifts you'd like to edit at the prompt:
-
No – Just this shift
-
Apply to upcoming – This shift and all future shifts in the series
-
Apply to all – All shifts in the series, including those earlier then the shift you're editing
-
Copying a single shift
Copied shifts cannot be edited as a group, like repeat shifts, even if the copied shift was part of a repeat series.
-
Go to the Roster screen, and click the shift you want to copy.
-
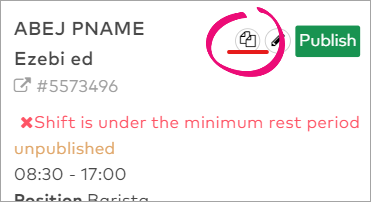
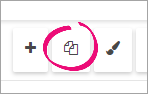
Click the Copy icon on the shift.
-
Click the paste button

Bulk copy a roster period
The Copy Shifts function lets you copy all the shifts for a period to a new period.
-
Go to the roster screen.
-
Click the Copy shifts icon at the top-right of the screen.
The Copy Shifts window will open.
-
Enter the From: dates and employee types of the shifts you want to duplicate.
-
Enter the To: dates that the shifts will be copied to, and whether the shifts should be Assigned or Unassigned.
-
Click Copy.
Adding shifts from standard hours
To add shifts from standard hours they need to be set up correctly and marked with the Add these standard hours to roster setting. For more information, see How do I add Standard Hours to an employee? (24.10 draft) and Setting up standard hours: default standard hours and alerts.
-
Go to the roster screen.
-
Make sure that the roster view is set to Day or Week view, so that the Add Standard Hours option is available.
-
Select a date range that includes the commencement dates of the standard hours cycles you want to add to the roster.
-
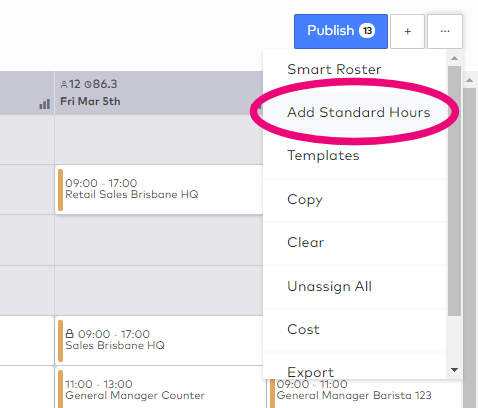
Select the Add Standard Hours option from the dropdown at the top right. The Add Standard Hours window opens.
-
Enter the employees you want to add standard hours for, or tick All Employee Standard Hours, then click Add.

Shifts for the selected employees will be added to the roster.
Deleting a single shift
-
Go to the Roster screen, and click on the shift you want to edit.
-
If the shift is published, click Unpublish to make it editable.
-
If the shift is for an employee with standard hours, click the more icon (...).
-
Click Edit, and make the changes you want.
-
Click Save to save your changes.
Bulk deleting shifts
Be careful The clear function deletes all shifts on the current view and is not reversible. If you're unsure, contact your Advanced Workforce Management consultant for help.
-
Go to the Roster screen.
-
Update your view so that only shifts you want to delete are visible.
-
Click the more icon (...) at the top-right of the screen.
-
Click Clear to delete all shifts on the current view.
Assigning shifts to staff and cost centres
Shifts can be assigned either by editing the shift settings, or by selecting the appropriate view and dragging the shift into the employee or cost centre row. Dragging and dropping the shifts is the quickest and easiest option, and lets you see the changes in context with the rest of the roster.
Warning: Shift is outside of standard hours
If a shift falls outside an employee’s standard hours you need to request a variation. For more info, see Shift variation requests: Assigning shifts outside employees' standard hours .
Assigning a shift by dragging and dropping
-
Go to the Roster screen.
-
Select the by Employee or by Cost Centre view at the top-left of the screen.
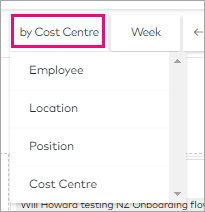
Your roster view will change to display a row for each cost centre or employee.
-
Click on the shift you want to assign, and drag it to the appropriate row to assign it.
Assigning a shift by editing the shift settings
-
Go to the Roster screen, and click on the shift you want to edit.
-
If the shift is published, click Unpublish to make it editable.
-
Click the Edit icon to open the Edit Shift panel.
-
Assign the shift:
-
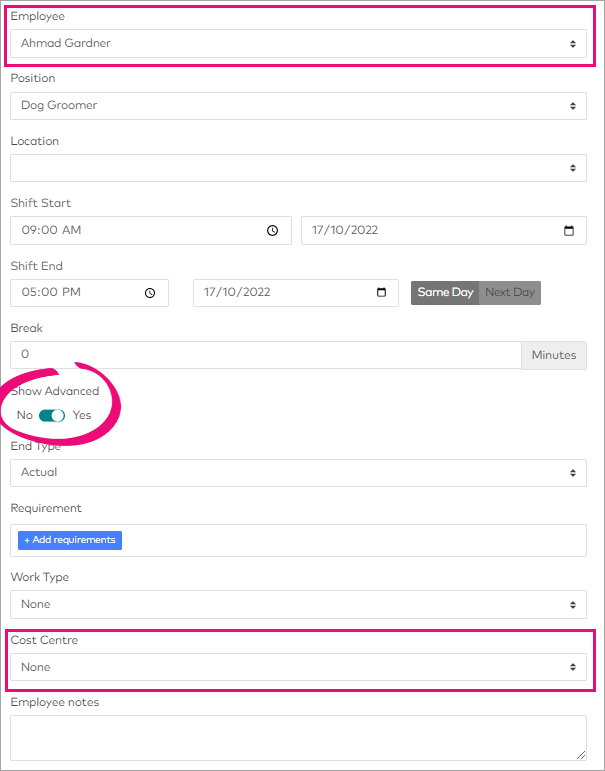
Employee: Select the employee from the drop-down menu.
-
Cost centre: Set Show Advanced to Yes, then select the cost centre from the drop-down menu.
-
-
Click Save to save your changes.
Assigning a shift using shift bidding
Shift bidding makes it easier to find employees to fill an open shift by making it available to all eligible employees. The employees receive a notification, then any number of them can express interest in the shift. The manager then chooses who to assign the shift to from those that have accepted it.
When a group of identical shifts are
-
Go to the Roster screen.
-
Click on an unassigned shift to view the shift details.
-
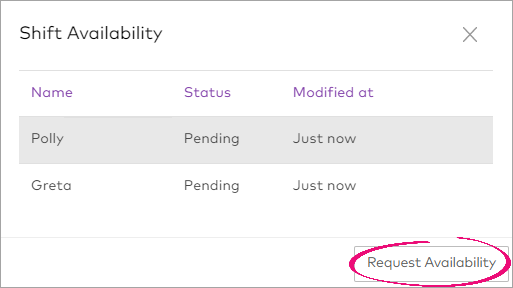
Click Shift availability to open the panel.
-
Click Request Availability button to send out a shift notification to all employees who meet all the following eligibility criteria:
-
They have the right location, role, and employment type for the shift.
-
They would not trigger any active Shift alerts (e.g. out of pattern or minimum break).
-
The shift falls within their standard hours, or their standard hours are not locked to the roster (i.e. employees whose standard hours are locked to the roster are ineligible to bid for shifts that fall outside those hours).
The panel updates to show a list of employees who have been notified.
-
-
Once your employees have had time to accept or decline the shift, open the Shift Availability panel again to check their responses in the Status column.
-
Click the Assign icon to assign the shift to an employee who has accepted it.
Publishing and unpublishing shifts
Publishing an individual shift in the web app
-
Go to the Roster screen to view the shifts.
Unpublished shifts are identifiable by a light brown flag. -
Click on an unpublished shift to display the shift details. All unpublished shifts will have the option to Publish unless there is a conflict restricting it.
-
Click Publish.
The Publish Shift panel opens. -
Select whether to request shift confirmation from the employee (this option is only available if turned on, see Setting up shift confirmation requests).
-
Click the Publish button at the bottom right.
-
-
Click the Publish button, to update the status of the shift.
A shift confirmation request will be sent to the assigned employee if it is set up for your company.
Publishing an individual shift in the mobile app
-
Go to the Manager tab and tap the Manage Roster tile.
-
Tap an unpublished shift.
The unpublished status is displayed beneath the shift date. -
Click Publish Shift.
Publishing multiple shifts
The Publish button publishes all unpublished shifts on the screen that don't have conflicts.
-
Go to the Roster screen to view the shifts.
-
Check the unpublished shifts are all ready to be published.
Unpublished shifts are identifiable by a light brown flag. -
Click the Publish button at the top-right of the screen to:
-
Publish all unpublished shifts in your view, except those with conflicts.
-
Send a notification to all employees assigned to those shifts.
A number in the circle of this button indicates the number of shifts that will be published by clicking this button.
-
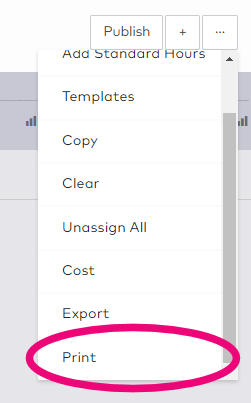
Printing a roster
-
Go to the Roster screen.
-
Click the ... icon at the top right, then click Print.