Select Step Three from the Remote Setup Cycle.
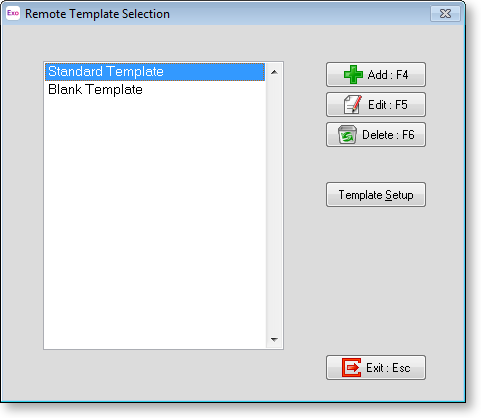
This is where you can maintain batch templates for this site – a batch template is the equivalent of a Payroll standard pay.
You can have any number of batch templates. You can combine any of these into the pay file that you send back to the head office.
For example, you may have wages, allowances and leave batches which are reconcilable against your paper-based records, which you can then combine into your pay file for the week.
The first time you enter this screen a Standard Template will be displayed. The list on the left hand side displays all the batch templates that currently exist in the system.
Template Setup
Clicking the Template Setup button opens the Template Setup window.
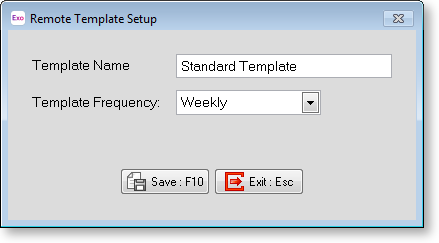
Template Name Here you can change the name of the existing template.
Template Frequency All batches created from this template will bear the same pay frequency. Only employees who have the same pay frequency are eligible for transactions. Here you can change the pay frequency of the existing template. Be sure to first remove all non-matching employees before changing the frequency of a batch template.
Adding Templates
Clicking the Add button or pressing F4 will allow you to add a new batch template to the system.
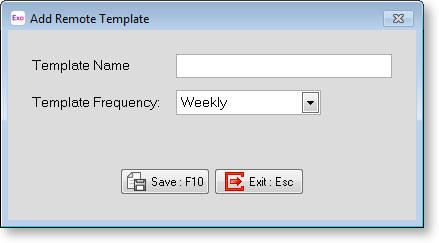
Template Name Enter a name here.
Template Frequency All batches created from this template will bear the same frequency. Only employees who have the same pay frequency are eligible for transactions.
Editing Templates
Clicking the Edit button or pressing F5 will allow you to edit an existing batch template. In other words, you will be taken into the Data Entry Grid.
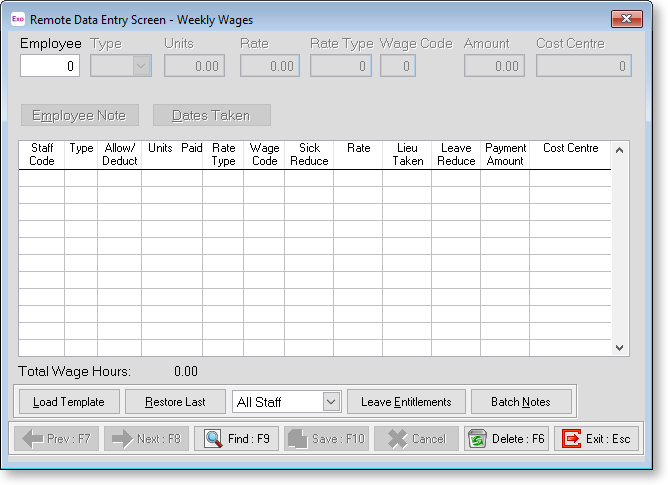
Enter an employee code or click Find to bring up a list of employees.
In the transaction type field, click on the list box or press the spacebar to see your choices. The following types are available (you may use shortcut keys to select them):
|
Letter |
Numeric
|
Transaction type |
|
W |
1 |
|
|
A |
2 |
|
|
S |
3 |
|
|
H |
4 |
|
|
D |
5 |
|
|
L |
6 |
|
|
O |
7 |
|
|
E |
0 |
|
|
U |
Wages
Wage transactions require the Hours to Pay, Rate Type (e.g. Ord / T1/2)
Allowances
Allowance transactions require the Allowance Code, and depending on the allowance setup, may require the Units, Rate, Rate Type, (Multiple hourly) Wage Code, or Amount.
Sick Pay
(Where sick leave is being measured in hours)
Sick pay transactions require the number of hours to pay (at the employee's relevant hourly rate) and the number of Hours of Sick Leave Entitlement to Reduce for those hours.
(Where sick leave is being measured in days)
Sick pay transactions require the number of hours to pay (at the employee's relevant hourly rate) and the number of Days of Sick Leave Entitlement to Reduce for those hours.
The Dates Taken button will be enabled for this transaction type, meaning that the calendar days on which the leave was taken can be recorded.
Holiday Pay
(Where holiday pay is being measured in hours)
Holiday pay transactions require the number of hours to pay.
(Where holiday pay is being measured in days)
Holiday pay transactions require the number of hours to pay.
(For employees on the Percentage Only holiday pay method)
Holiday pay transactions require a dollar Amount.
The Dates Taken button will be enabled for this transaction type, meaning that the calendar days on which the leave was taken can be recorded.
Days Paid
This is necessary for users who do not have Pay Period Valuation turned on in their company holiday pay setup. This field requires the number of days paid for holiday pay purposes. It is used in conjunction with the Normal/Days and Permanent Part-time holiday pay methods.
Lieu Time
Requires units worked or units taken and a cost centre.
Long Service Leave
Requires the Units to pay and a cost centre.
Deductions
Require the Deduction Code and depending on the deduction setup, may require the Amount or the Rate, or the Variance Code for Child support deductions.
Employee Note
Here you can modify the employee's Standard Note (if there is one) or enter a new note, for this employee. The end result being that the note will be posted to the Employee Notes screen in Payroll. Press F10 to save your Note and return to the data entry screen, or alternatively press Esc to discard changes to the Note.
Staff Filter
All staff
By default you will be viewing all transactions for all staff.
Specific Staff
Click on the list box to open it and select this value. This will let you see the transactions and wage total for one employee at a time. You can use the F7 and F8 keys to skip between employees.
Once you have finished entering your transactions Press F10 to save.
Leave Entitlements
This function enables you to quickly reference the leave entitlements for any given employee.
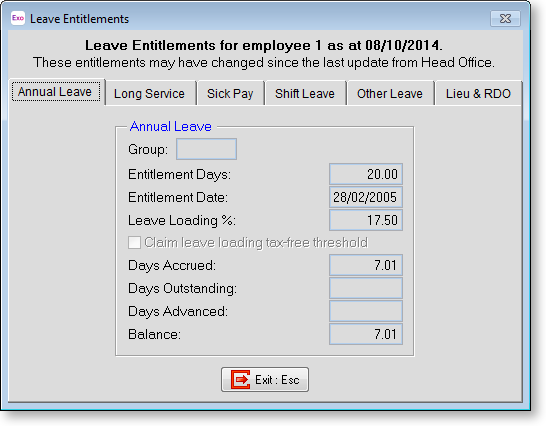
Balances for each leave type will be shown. These balances are as at the date of the last site file import.
Batch Notes
Selecting this button will take you into a memo field where you can add a descriptive note relating to the contents of the batch. Press F10 to save your Note and return to the data entry screen, or alternatively press Esc to discard changes to the Note. When you have finished editing the batch template, click on the Exit button to return to the Template Selection screen.
Deleting Templates
Clicking the Delete button or pressing F6 will delete the currently selected batch template. You will be given a warning before the deletion takes place.