Setting up MFA
If a site administrator has turned on multi-factor authentication (MFA) for you, you’re ready to set up MFA for your user account.
Setting up MFA is a two-step process: download an authenticator app to your phone or tablet, then add Greentree to the app.
This page uses screenshots from Greentree Desktop, but the steps are the same for eModules, WebView and WebStore.
Download an authenticator app
Before you can use MFA to log in, you need to download an authenticator app to your phone or tablet. Any authenticator app will work – e.g. Google Authenticator or Microsoft Authenticator, which are available for Android and Apple devices on the Google Play or App Store apps.
Authenticator apps are the most secure MFA method. Plus, you don't need internet to get a code from them.
Optionally, you can add Greentree to multiple authenticator apps. This is useful if you’ve lost your phone or tablet, or if you’ve gotten a new one. Or maybe you just want to try using a different authenticator app. See Adding Greentree to a new authenticator app.
Setting up MFA
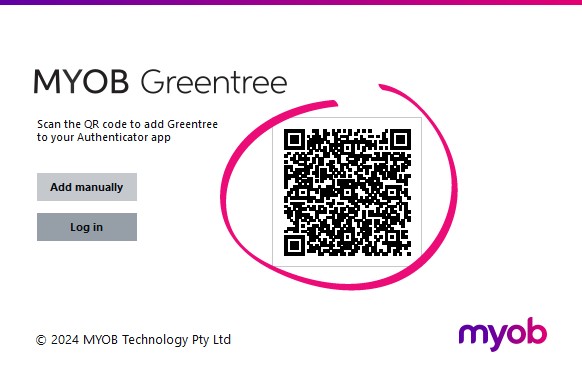
The first time you log in after MFA has been turned on for you, you’ll be prompted to add Greentree to your authenticator app.
The easiest way to do this is to scan the QR code with your authenticator app. If you try scanning the QR code with a regular camera app, it won’t work.

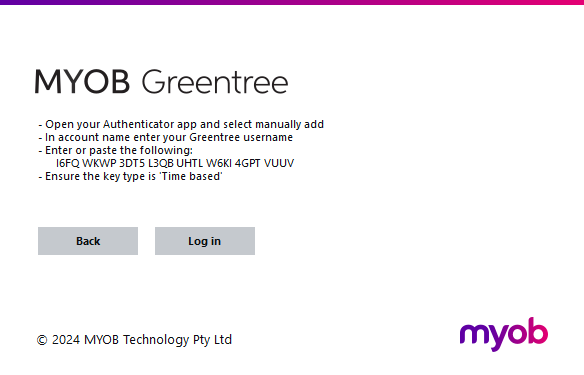
If scanning the QR code doesn’t work, click Add manually in the sign-in window. Then follow the on-screen instructions.

After adding Greentree to your authenticator app, you’re ready to log in with MFA.
