
The Timeclock Setup section of the Exo Time and Attendance System Setup screen allows you to set up the timeclocks used in the system. Exo Time and Attendance is a multi-clock system, and can have an unlimited number of Time Clocks within the one system where necessary. It can also process data from a variety of Time Clock brands. It can also use Time files created on other systems such as Job Costing systems, POS terminals etc.
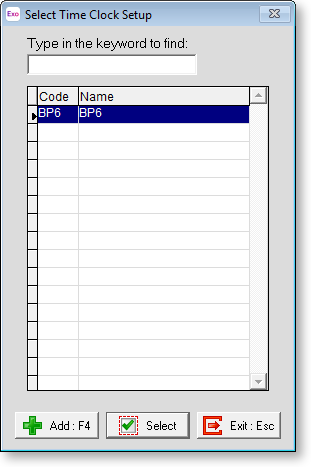
Click the Add button to create a new clock.
Code Enter an Alphanumeric code to identify this timeclock setup.
Description Enter a description for this clock, e.g. Factory Clock 1
Source Entering on this field will Pop-up a list of possible Time Clock options. Normally if you are using a Time Clock supplied by MYOB you would choose "MYOB BundyPlus G6 Series". If you have MyStaffInfo installed, you may choose the software-only "MyStaffInfo" option, which polls the times from the MyStaffInfo timesheet directly into the Pay Period times.
NOTE: Polling MyStaffInfo returns approved times and Cost Centres only. It does not return leave, allowances, wage types, etc. - these are retrieved by the Synchronise function in the MyStaffInfo Management Console.
Program to Execute
Click the 
Time File Name If the clock you have chosen has a default File Name, Exo Time and Attendance will complete this field for you. If you are polling times from MyStaffInfo, a default file name will be entered, which should be suitable in most cases, but it can be edited if necessary.
NOTE: If your Times file is coming from a source other than a Time Clock you should consult Support.
Polling Parameters
The Polling Parameters section contains different properties depending on the model of time clock selected.
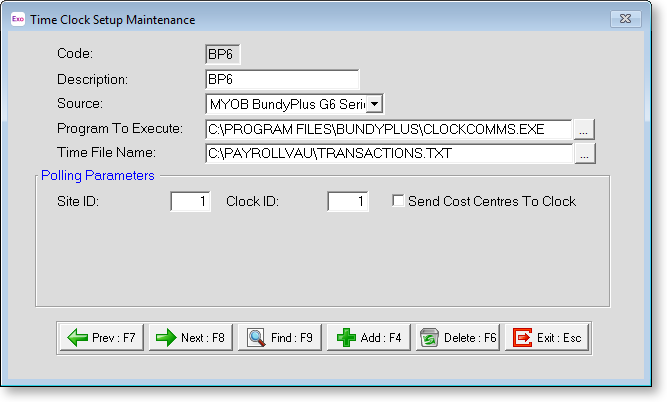
MYOB BundyPlus G6 Series
NOTE: The "MYOB BundyPlus G6 Series" option applies only to BundyPlus timeclocks purchased from MYOB.
Site ID Enter the site ID code specified when installing your Time Clock.
Clock ID Enter the ID code specified when installing your Time Clock.
Send Cost Centres to Clock Enable this option if you want to be able to send Cost Centres to the timeclock using the Send Cost Centres to Clocks Special Function.
TR-3 Timeclock
If you have chosen the TR-3 timeclock, the following options will need configuring.
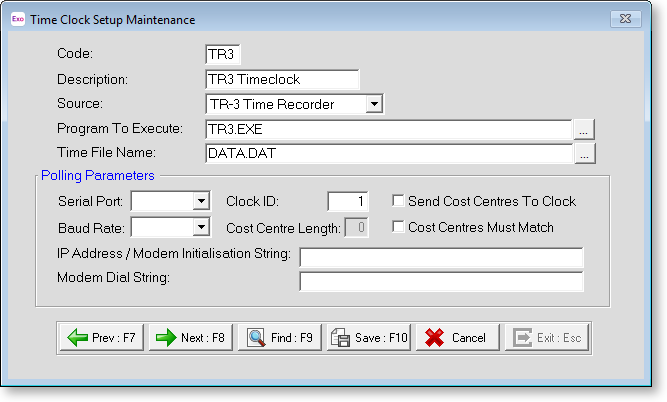
Serial Port The Serial Port is a 9 or 25-pin socket on the back of your computer into which the Time Clock data cable (serial cable) is plugged. Entering on this field will display a list of Serial Port options. Usually it would be Com1 or Com2 .
Baud Rate This would normally be left at the default of 9600.
Clock ID This would normally be left set at "1" unless you were running multiple Time Clock , in which case you would enter the ID code specified when installing your Time Clock. (Refer to your TimeClock Manual)
Cost Centre Length If you are using Time and Attendance for Job Costing you will need to specify here , the length of your Job Number in Digits. This way your Time Clock will know to ask each employee to enter their Job Number when clocking.
Send Cost Centres to Clock Turn this option off to prevent job costing from being done for this particular clock. In other words, when the Send Cost Centres to Clocks function is activated (Transactions menu, Poll TimeClocks, Special Clock Functions, Send Cost Centres to Clocks), this particular clock will not receive cost centres, and will not cost clockings to jobs.
Cost Centres Must Match Turn this option off to prevent Exo Time and Attendance from automatically creating new cost centres/jobs, for this individual clock. In other words, when the "Automatically Create cost centres that do not exist" option is enabled (Utilities menu, Setup Time and Attendance, Cost Centre Structure Setup), and the TimeClock is polled (Toolbar, Poll TimeClocks, Time and Attendance will create a new cost centre record for each code that has not already been sent to the TimeClock. This option prevents the automatic creation of cost centres for this particular clock. The assumption being made is that for this particular clock, cost centres will be provided by Time and Attendance's cost centre masterfile, and jobs will not be created on the fly.
IP Address/Modem Initialisation String For a TimeClock Source of TR-3, the modem initialisation string provides a set of commands by which Time and Attendance can communicate directly with your modem hardware, in order to poll your timeclock. If you intend to perform remote polling of a timeclock via two modems in two different geographical locations, take note of your modems' make and model number, and consult Support for a set of initialisation strings that will match your modem.
For a TimeClock Source of TR-3 IP Time Recorder, you will need to consult your network administrator and request for a static IP address to be assigned to your TimeClock, so that it can be recognised as a device on the network. Once this address is entered into the TimeClock menu (see your TR3 manual for details) you will be ready to enter the same address into TimeClock Setup.
The required format is the TCP/IP number prefixed with the letters "IP", for example:
IP193.102.168.007
The IP address has to be provided by your network administrator, who will need to grant access for the TimeClock to the network, before the timeclock can be polled.
EXO PC Clock
If your Source is set to "EXO PC Clock", there will be some extra configuration required.
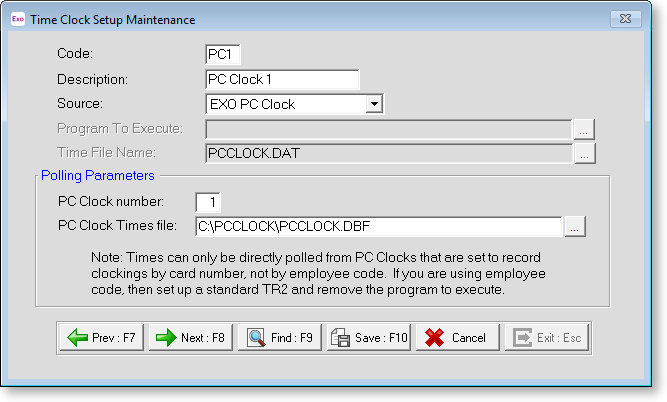
Polling Parameters The Time and Attendance system can be set up to poll data directly from the PC Clock times file, provided that the PC Clock has been configured (in the PC Clock's Setup screen) to accept clockings against card numbers.
PC Clock number Each installation of PC Clock requires its own clock number. This is to identify the physical location of the incoming times.
PC Clock Times file PC Clock will create a times file called PCCLOCK.DBF to the data directory. Click on the lookup [â¦] button to choose the correct folder.
B20 Finger Scanner
If your Source is set to the "B20 Finger Scanner", there will be an initial task of assigning finger scanner ID codes to time cards.
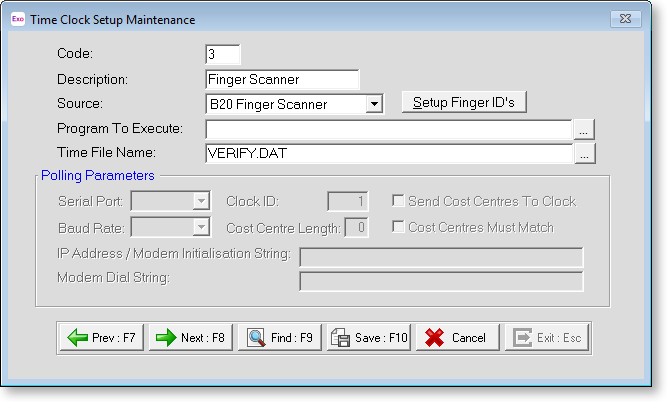
Click the Setup Finger ID's button to continue:
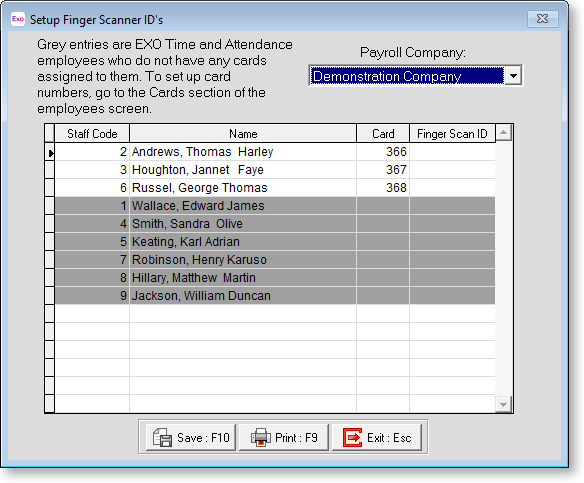
Payroll Company The Company setting will default to the Company that you are currently logged into. If you are using the Finger Scanner for more than one company, then remember to set the Finger Scan IDs for the employees of all applicable companies.
Staff Code This is the employee's staff code, as entered in the Add Employee screen.
Name This is the employee's full name, as entered in the Add Employee screen.
Card This is the employee's swipe card number, as entered in the Add Employee screen.
Finger Scan ID Greyed-out lines indicate that employees do not have cards assigned to them, which means that they are not able to be processed by the Time and Attendance system until they have cards set up. These do not need to be real card numbers, but can instead be arbitrary numbers used simply to identify them in the system.
Each time a new person is scanned into the B20 a unique code is generated. MYOB cannot tell you what the Finger Scan IDs are, as these are assigned to employees by the Finger Scanner system.
That code is linked to the employees swipe card, to form a clocking. Simply click onto the appropriate row for the employee and key in the finger scanner ID that the employee will be using. The Print button will give you a report of the current setup.
MyStaffInfo
If your Source is set to the "MyStaffInfo", the Polling Parameters section is disabled - you do not need to enter any additional information.