Install instructions are supplied with PC Clock, so this topic only covers the setup after the program has actually been installed on the computer. (This help file is not available until then).
The initial setup differs depending on if you have installed the Server-based or the Standalone version of PC Clock.
Server-based
When the system is run for the first time, it will prompt you to Register the program with MYOB. You will need to contact MYOB to get your registration code.
Next, there will be a message warning you that no datapath has been set up. Click OK to set the datapath for the clock
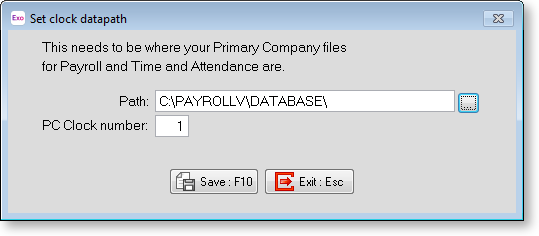
Path The datapath is how the clock knows where to find the Payroll and Time and Attendance information for automatic updates. You will need to enter the path, or use the ... button to select the path.
Note that when selecting the data path, you will need to select the company directory from within the program directory. This is so that PC Clock knows which payroll and therefore which set of employees it is working with.
This will usually be an abbreviation of your company name. If you are unsure of how to find this, please contact Support.
PC Clock Number This number is needed as soon as the Clock is used. Try to keep clock numbers unique between clocks so that there is no confusion with the data.
Once this information is correct, click Save and the main PC Clock screen appears.
As this is the first time it is being run, the setup information needs to be assigned. Do this by going to the Menu (top left corner), then choosing Supervisor Functions.
Standalone
The first thing it will ask when run is about registration. You will need to contact MYOB to get your registration code.
The next message will inform you that the "datafiles" will need to be imported. This is done from the "Head Office" - see the Standalone Head Office topic for more information.
The import screen will now appear:
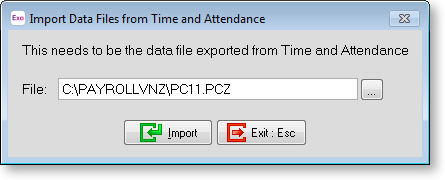
The first thing that you need to do (assuming that the file from the Head Office has been exported already) is to enter or find the file that contains your company data. This is usually called by the name and number assigned to this clock at the Head Office, then .PCZ (eg. CLOCK1.PCZ).
Find this file, then click Import and once the files are be updated it will appear with a message saying "Data files have been updated".
It will now bring you to the main PC Clock screen.
As this is the first time it is being run, the setup information needs to be assigned. Do this by going to the Menu (top left corner), then choosing Supervisor Functions.