The Manage Time screen is where you manage submitted timesheets. You can review outstanding timesheets, approve or reject them, progress them through to payroll, and manage incomplete shifts and clock errors.
Screen menu
The options in the top menu ribbon affect the whole screen.

Timesheet period

Use the first two buttons to choose the duration and dates shown on the Manage Time screen.
Group by

Click the by: button to categorise the timesheets into expandable groups by Day, Location, Employee, Position or Status.
Using the Status group can help identify which timesheets still need to be actioned.
Timesheet Filters
Click Filter ( 
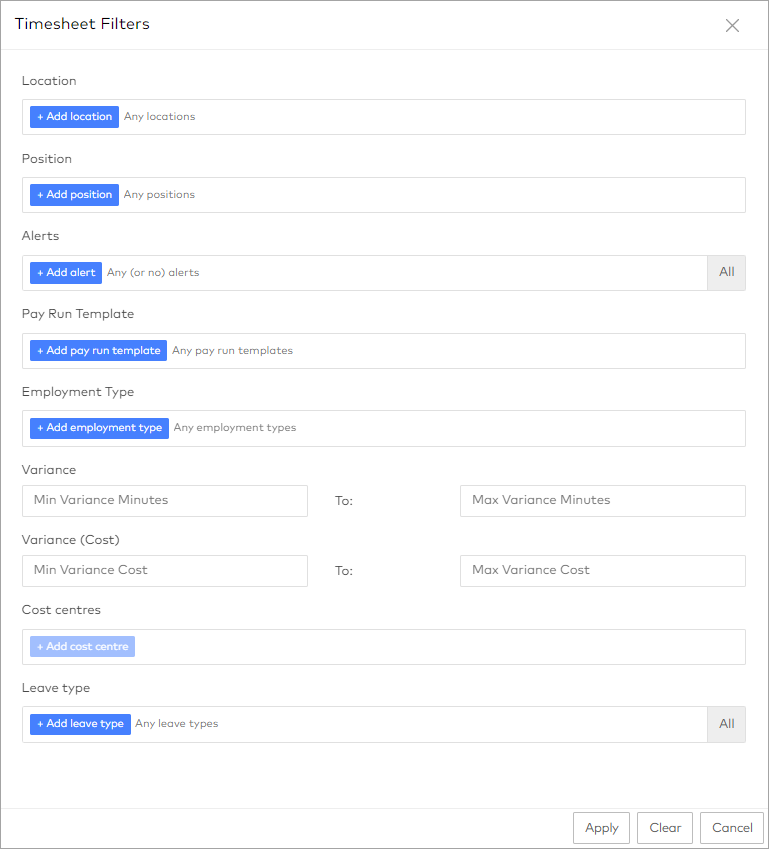
In addition to standard criteria such as location and position, there are a few filters that can help give you better insight into inefficiencies and schedule problems:
-
Alerts – Click + Add alert to show only timesheets that have triggered specific alerts, or Add all alerts to show timesheets that have triggered any alert. For more information, see Managing alerts.
-
Variance and Variance (Cost) – Use these filters to show timesheets that were longer or more expensive than they should have been.
Click Apply filters once you have made your selections.
Open/close all groups
To open or close all groups, click the menu button ( 
Add Timesheet
Click Add ( 
For more information, see How do I create a timesheet for an employee who was not scheduled?
Export All
Click Export All to open the Export Committed Timesheets screen.
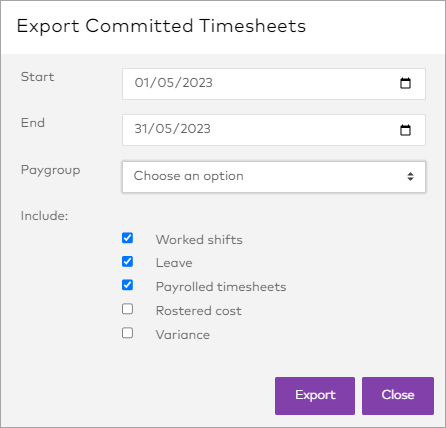
Select your filter options and data fields, then click Export to create a CSV of all committed timesheets in a period, regardless of group. For more information, see Exporting timesheets.
Group menu
A menu within each group lets you tweak the view further and make bulk changes to timesheets.

Add Timesheet
Click Add ( 
Timesheets created from the group menu have a field prepopulated based on the open group.
For more information, see How do I create a timesheet for an employee who was not scheduled?
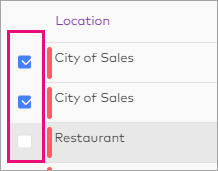
Bulk status changes
The menu button ( 
-
Hover over the column to the left of the timesheet list to reveal the Select row checkboxes.
They are otherwise hidden. -
Select the timesheets you want to update.
-
Click the menu button (
If some timesheets can't be updated due to alerts, a warning message will display.
Show/hide columns
The Show/hide columns button ( 
Search table
The Search table button ( 
Export CSV
The Export CSV button lets you download a CSV file with the group entries shown. Use the Show/hide columns button (
Unassociated Shifts and Clock Entries
This section displays shifts and clock entries which are not linked to any timesheet entry, to help you find clocking errors and other discrepancies.