Before completing these procedures, you should have configured all the settings on the Payroll Preferences screen (MPPP1100).
Set up an API user
-
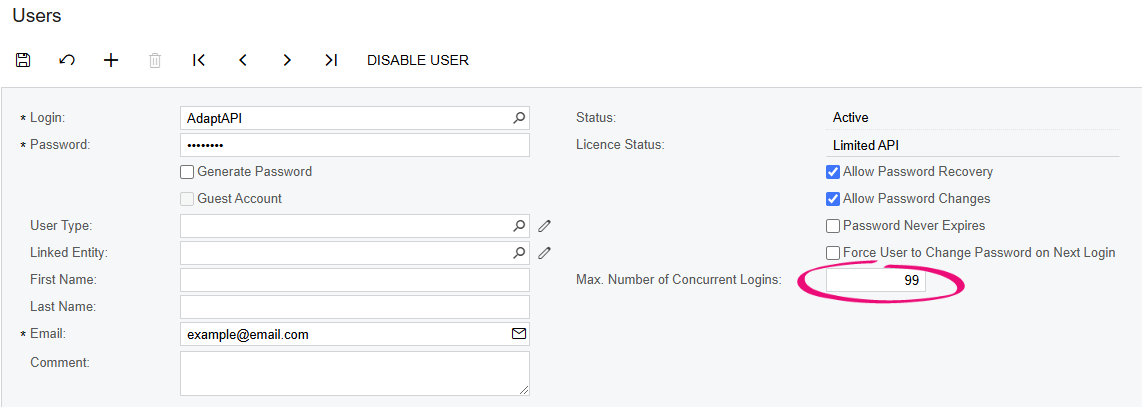
Go to the Users screen.
-
Change the automatically generated password:
-
Deselect the Generate Password checkbox.
-
Enter a new Password.
-
-
Deselect the Password Never Expires checkbox.
-
In the Email field, enter an email address. This is a mandatory MYOB Acumatica field, but doesn’t affect the migration. You’ll mainly use this email address for receiving password reset emails, etc.
-
In the Max. Number of Concurrent Logins field, enter 99.
-
On the Roles tab, select the following roles:
-
Administrator
-
People ESS
-
People MSS
-
People Payroll User.
-
-
Click the License Types tab.
-
Select the Limited API licence type checkbox.
-
On the main toolbar, click the Save icon.
Publish the MYOB Adapt customisation
For MYOB Adapt to be able to upload data to the site, you must publish the ADAPTPAYAU customisation.
-
Log in to the MYOB Adapt online portal.
Need a login for the online portal? Request one in Phoenix. Select MYOB Advanced as your product, ADAPT as the area and New User Login as the subarea.
-
Click Downloads on the left. The Files to Download page opens.
-
Click ADAPTPAYAU.zip to download the MYOB Adapt customisation for Payroll migrations.
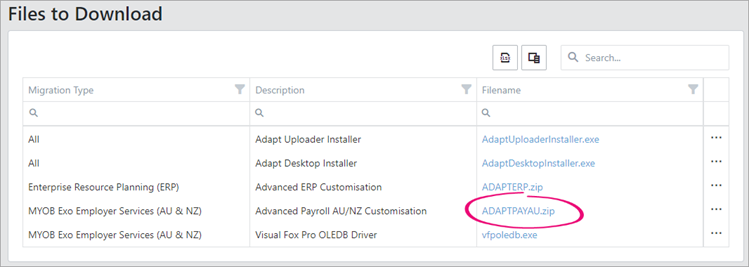
To prevent errors when using the files, make sure that the name of the file you downloaded matches the name on the MYOB Adapt online portal. For example, if you've previously downloaded the MYOB Adapt customisation file, it might be named ADAPTPAYAU (1).zip. In that case, you should rename it to ADAPTPAYAU.zip.
-
Log in to the MYOB Acumatica site for the customer you're migrating.
-
Go to the Publish Customisation screen.
-
Publish the ADAPTPAYAU.zip file you downloaded in step 3.
Enable the MYOB Advanced Payroll and terminations features
-
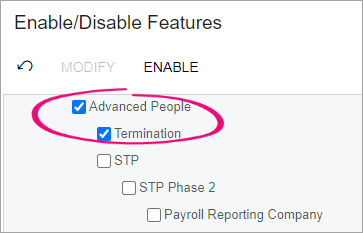
On the Enable/Disable Features screen (CS100000), click Modify on the form toolbar.
-
Select the Advanced People and Termination checkboxes.
-
On the form toolbar, click Enable.
Set up a cash account
You need to set up at least one cash account for each company and company branch.
Before you can set up a cash account you need to:
-
Set up an account as a cash asset on the Chart of Accounts screen (GL202500).
-
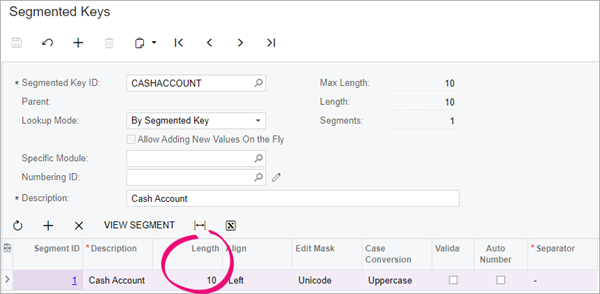
The segmented key ID for cash accounts should have a length of at least ten. You can check this by going to the Segmented Keys screen and entering CASHACCOUNT in the Segmented Key ID field.
AU migrations – Set up a work cover code
You need to set up at least one WorkCover code on the WorkCover Rates screen (MPPP3010).

Set up the general ledger purposes and posting class
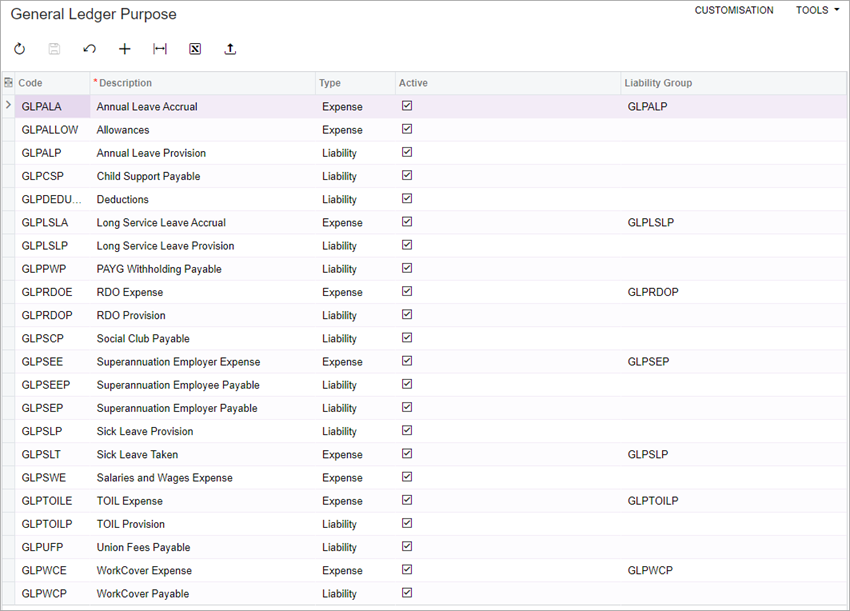
On the General Ledger Purpose screen (MPPP1020), most GL purposes already exist by default. However, you might need to manually create extra ones based on the customer's GL posting setup. A GL purpose determines how a pay item will behave when being posted to GL journals.
The screenshot below shows some example GL purpose codes.
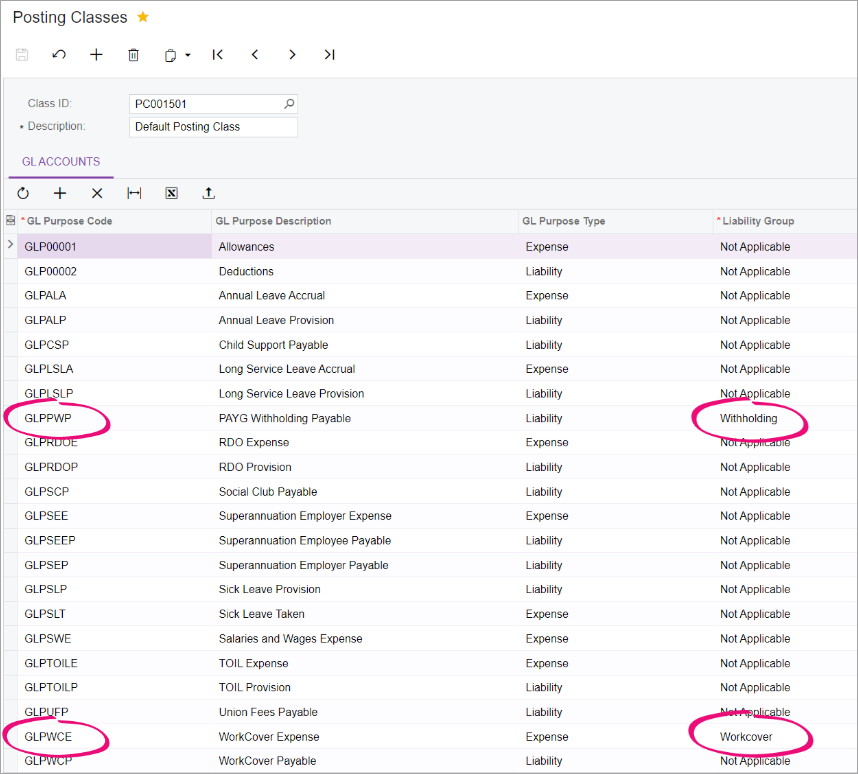
After creating any additional GL purposes that the customer requires, you can add GL accounts into a posting class on the Posting Classes screen (MPPP1030). A posting class defines which accounts should be used to post specific transactions to the general ledger.
For an Adapt migration, you need at least one posting class. All sites need to include the following in their default posting class:
-
The GLPPWP code with its Liability Group set to Withholding.
-
The GLPWCE code with its Liability Group set to Workcover.
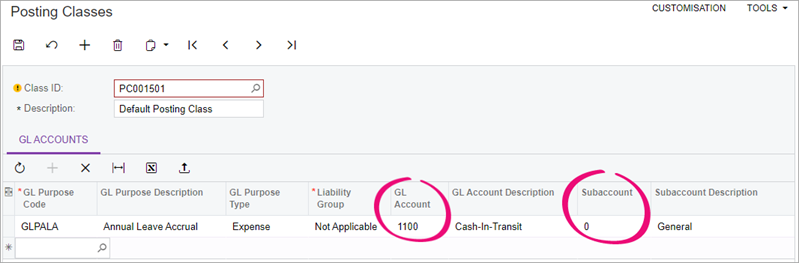
When adding a GL account to a posting, you must enter a GL Account and Subaccount.
Set up the default employee class
-
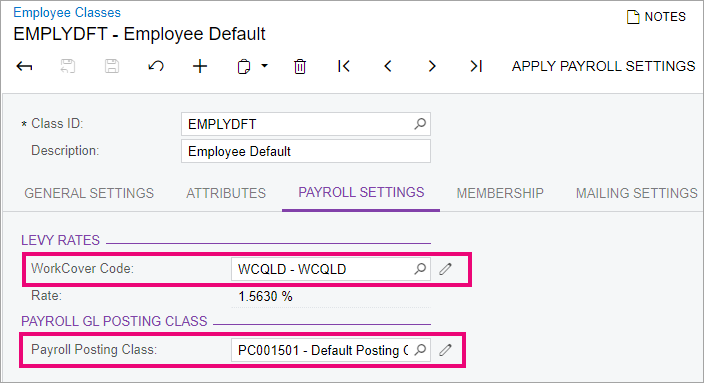
On the Employee Classes screen (EP2020PL), create a new employee class.
-
On the General Settings tab, select the Payment Method and Cash Account that you created.

-
On the Payroll Settings tab, select the WorkCover Code and Payroll Posting Class you created.
Back up your customer's site
After configuring your customer's sites, it's a good idea to back up both the test site and production site. That way, if something breaks during the migration, you can quickly restore the site to its original state, without having to reconfigure all of its settings.
Alternatively, you can take a snapshot of the site before beginning the migration.
What's next?
After you've finished setting up your customer's MYOB Acumatica Payroll site, you need to set up a migration in the MYOB Adapt online portal.