On the Mystaffinfo website, employees can enter their timesheet information electronically. On the Mystaffinfo website, managers can set up Templates for their employees. This saves employees from having to enter duplicate information on each timesheet.
In this article it shows the following:
Timesheets
In the Timesheet area, managers can set up a template timesheet for each employee with their standard work pattern.
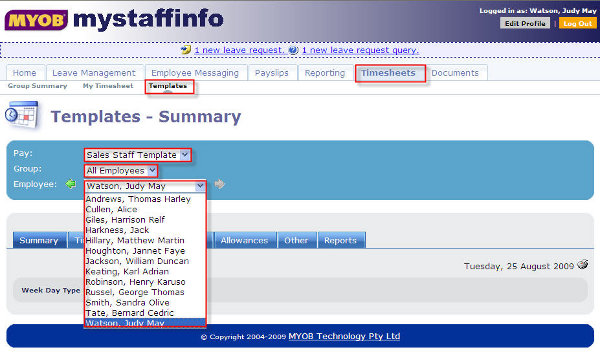
To access the Templates, click on Templates under the Timesheets tab.
To set up timesheet templates
-
From the Pay dropdown list, select the Template that you want to set up.
-
From the Group dropdown list, select the User Group you want to create a template for.
-
From the Employee dropdown list, select the Employee that you are creating this template for.
To add multiple days to the template
-
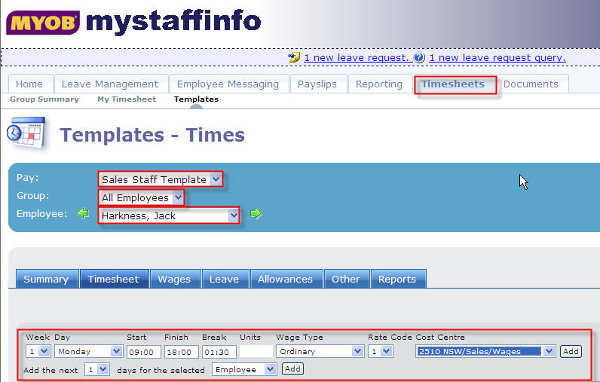
From the Week dropdown list, select the week of the template you want to add.
-
From the Day dropdown list, select the Day of the Week.
-
In the Start field, enter the time the employee normally starts .
-
In the Finish field, enter the time the employee normally finishes.
-
In the Break field, enter the total length of unpaid breaks the employee has.
-
From the Wage Type dropdown list, select the Wage Type these hours should be paid at, e.g. Ordinary Time.
-
If your MYOB Exo Payroll is set up to allow different hourly rates for each employee, an additional dropdown list will be available to select the Rate Code at which the hours should be paid.
-
If you are doing job costing, select the Cost Centre to which these hours should be allocated from the Cost Centre dropdown list.
-
From the Add the next "x" days dropdown list, select the number of days you want to duplicate this line.
-
From the for the selected dropdown list, specify whether the days should be added to the selected Employee, This Group or All Groups.
-
Click on the Add button.
Wages
In this area, managers can set up template wage hours for each employee with their standard work pattern.
To add multiple wage lines to the template
-
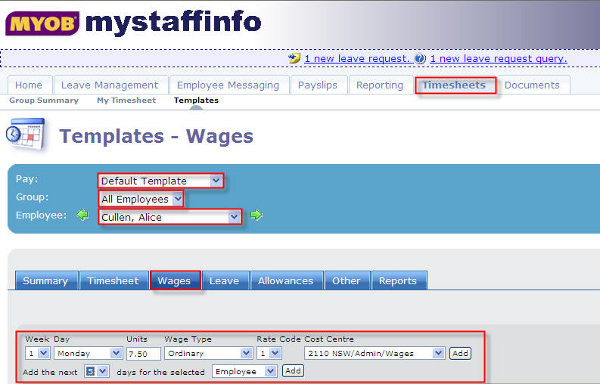
From the Week dropdown list, select the week of the template you want to add.
-
From the Day dropdown list, select the Day of the Week.
-
In the Units field, enter the standard hours Hours.
-
From the Wage Type dropdown list, select the Wage Type these hours should be paid at, e.g. Ordinary Time.
-
If your MYOB Exo Payroll is set up to allow different hourly rates for each employee, an additional dropdown list will be available to select the Rate Code at which the hours should be paid.
-
If you are doing job costing, select the Cost Centre to which these hours should be allocated from the Cost Centre dropdown list.
-
From the Add the next x days dropdown list, select the number of days you want to duplicate this line for.
-
From the selected dropdown list, select whether the days should be added to the selected Employee, This Group or All Groups.
-
Click on the Add button.
Need more help? You can open the online help by pressing F1 on your keyboard while in your software.
You can also find more help resources on the MYOB Exo Employer Services Education Centre for Australia or New Zealand.