Cost centres allows you to associate a cost with shifts, so you can get a view of projected vs. actual costs.
If you are using MYOB Advanced Workforce Management with MYOB Advanced Payroll, Advanced Workforce Management cost centers are mapped to subaccounts in Advanced Payroll.
Setting up cost centres
Creating a cost centre
-
Navigate to the Cost Centres screen by clicking on Management and selecting Settings. Once you are on the settings screen, click on the Cost Centres tile.

-
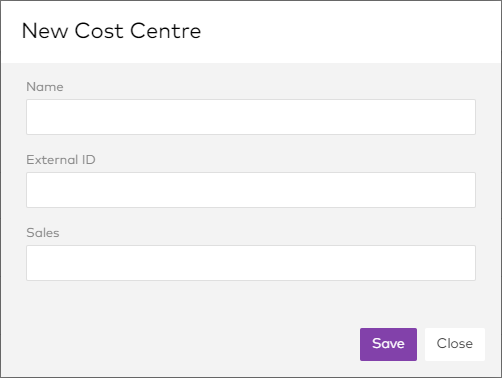
Click the Add ( + ) button.
-
Enter the name and sales figure to associate with the new cost centre.
If you are integrating MYOB Advanced Workforce Management with MYOB Advanced Payroll, you must enter the MYOB Advanced subaccount that this cost centre maps to in the External ID field.
-
Click Save.
Your cost centre appears in the list with the following fields:
-
Name: Name of the cost centre for your reference
-
Shifts: The number of shifts associated with this cost centre
-
Sales: The amount of sales associated with this cost centre
-
Hidden: Yes or No. This determines if the cost centre is hidden from use in the Roster.
You can also create a cost centre when applying a template to the Roster:
-
On the Roster screen, click the ... button and select Templates.
-
Drag a template onto the roster. The Apply Roster Template window appears.

-
Instead of selecting an existing cost centre from the Cost Centre dropdown, tick the Create a new cost centre check box and enter a name for the new cost centre.
-
Click Save.
Assigning cost centres
Assign a timesheet to a cost centre
-
Go to Manage Time.
-
Click Edit

-
Choose a Cost Centre from the drop-down menu.
-
Click Save.
Assign an employee to a cost centre
-
Go to Management > Employees.
-
Choose an employee, and open their Finance and Payroll tab.
-
Click Edit
-
Choose a Cost Centre from the drop-down menu.
-
Click Update Employee to save.
Assign a location to a cost centre
-
Go to Management > Settings > Locations.
-
Click Click Edit
-
Choose a Cost Centre from the drop-down menu.
-
Click Save.
Viewing cost centre data
Viewing shifts associated with a cost centre
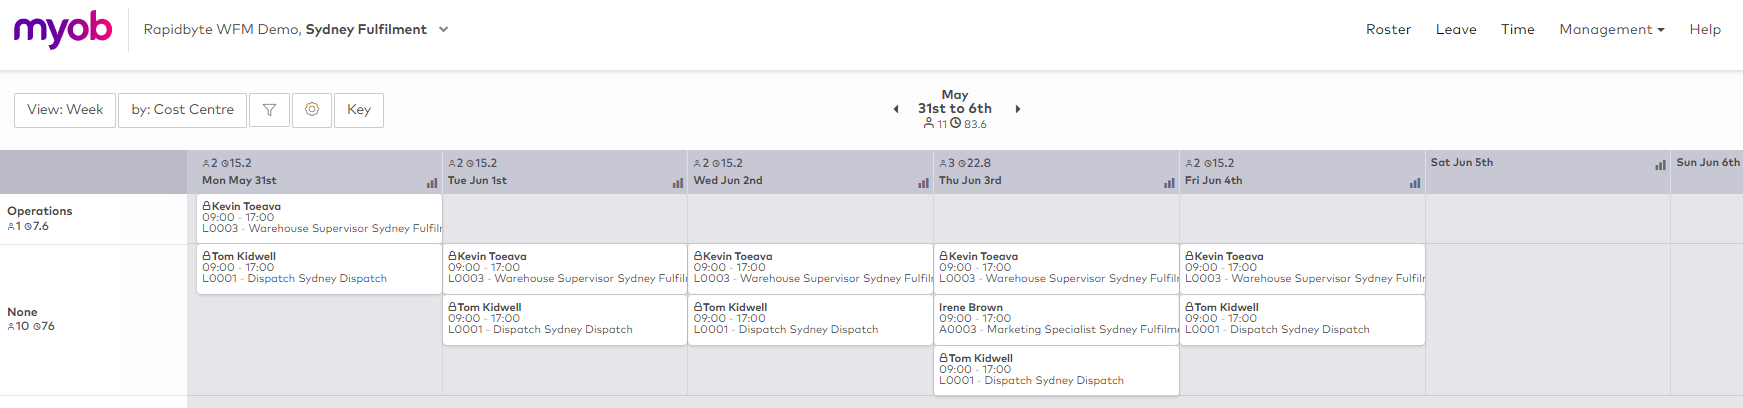
In the schedule view, select "Cost Centre" from the the View by dropdown.
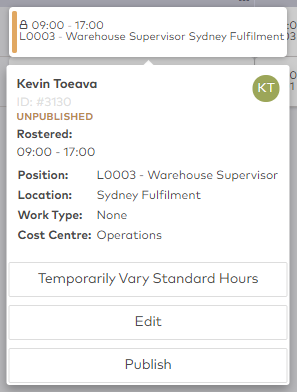
You can also see the associated cost centre for each shift by clicking on it:.
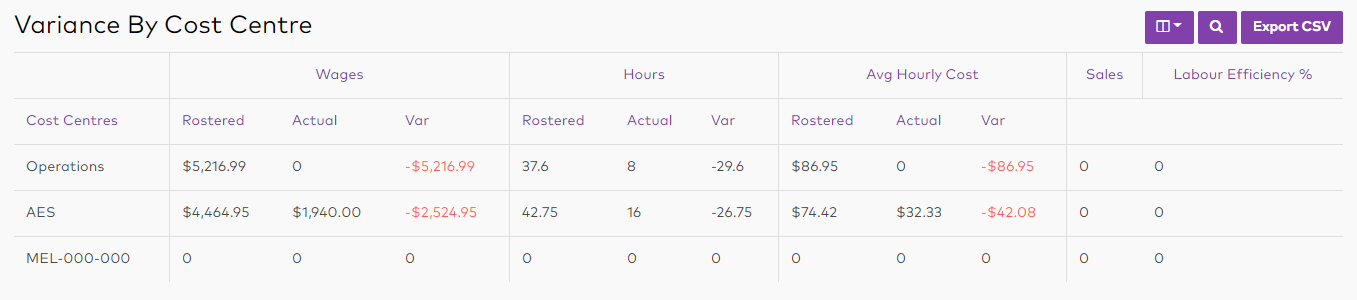
Reporting on cost centres
When your shifts are published, the system will start tracking your rostered sales so they can be compared to actual sales and used to calculate your labour efficiency.
You can view this information on the Variance By Cost Centre report, located at Management > Reporting > Analysis.
This report displays the following information:
-
Cost Centre: The name you gave the cost centre
-
Wages: Rostered vs Actual wage costs of the associated cost centre
-
Hours: Rostered vs Actual hours of the associated cost centre
-
Average Hourly Cost: Rostered vs Actual average hourly cost of the associated cost centre
-
Sales: The inputted sales amount
-
Labour Efficiency: This calculates the actual wages vs the actual sales and displays in a percentage format.