This page is about MYOB Advanced Workforce Management's legacy onboarding features, which have been superceded by an improved onboarding process released in June 2022. To turn on the new onboarding features, see Onboarding - Initial setup.
On this page
Configuration Options
On the Management > Company Settings screen, a system administrator can set options that affect what will appear during the onboarding process.
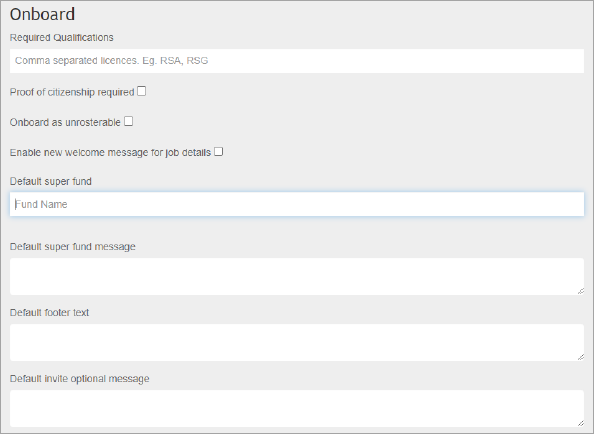
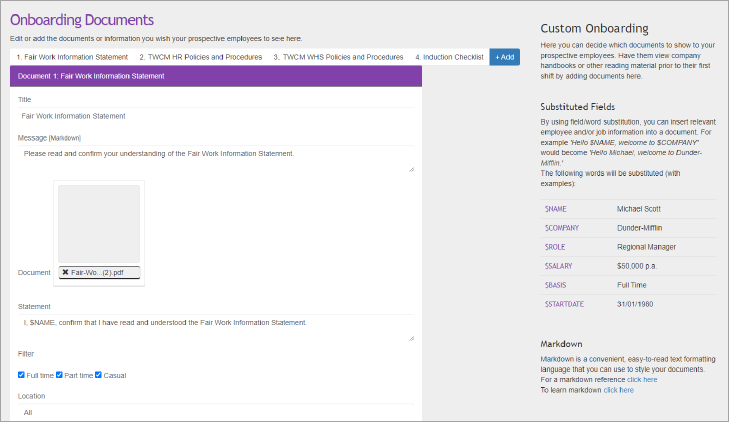
On the Management > Onboard Settings screen, a system administrator can add documents to be displayed to the employee during the onboarding process, e.g. company policy documents.
Documents can be company-wide, or associated with a specific position or employment type (Full time, Part time or casual).
Sending the Onboarding Invitation
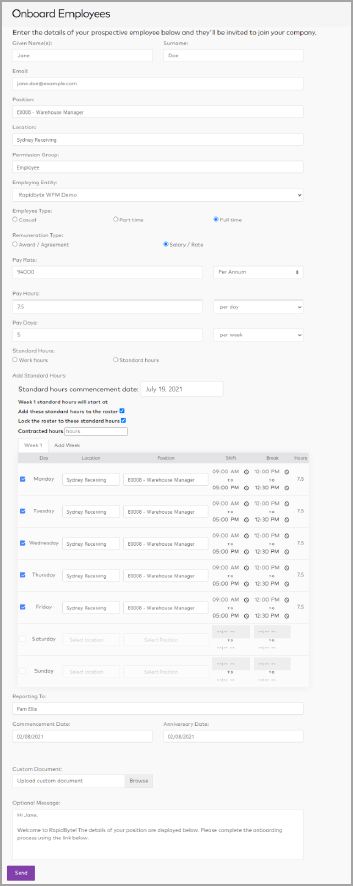
To send an onboarding invitation to a new employee, a manager goes to the Management > Hire > Invite screen. The manager enters details of the employee and their position, then clicks Send.
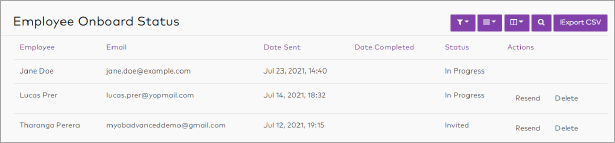
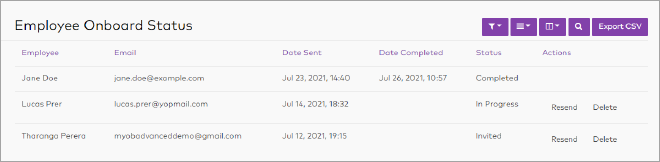
The manager can check the status of the onboarding from the Management > Hire > Status screen:
Employee Experience
The employee receives an onboarding email, with a link to take them to the online onboarding process.
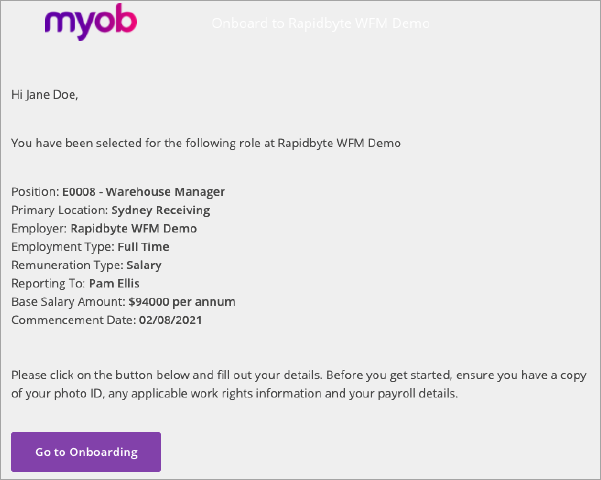
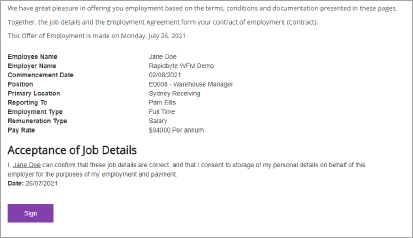
The first screen of the onboarding process shows details of the employee's position. The employee clicks Sign to confirm that the details are correct, then Continue.
If the employer entered Standard Hours as part of the onboarding invitation, they will also be displayed for the emplyee's information.
The employee must then enter their personal information.
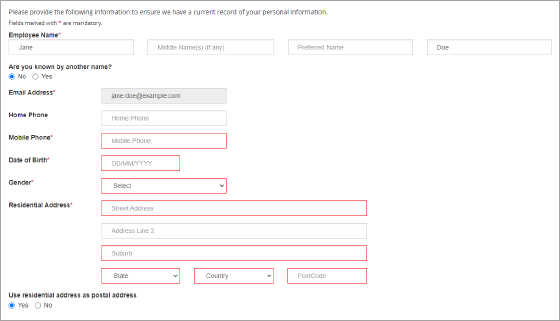
On this and all other onboarding screens, mandatory fields are highlighted in red.
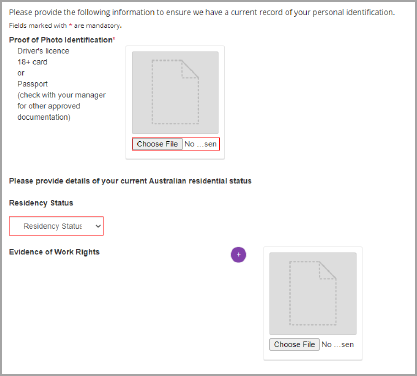
The employee must then select their residency status and upload proof of identification and evidence of work rights
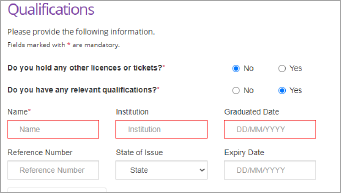
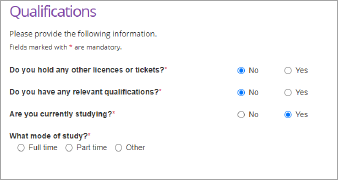
On the next screen, the employee can answer questions about their qualifications.
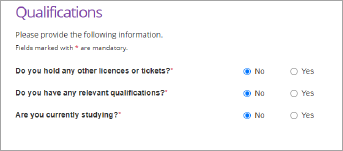
If the employee selects Yes to Do you hold any other licences or tickets? or Do you have any relevant qualifications?, more fields become available so they can enter the details of the licenses, tickets or qualifications, and upload supporting documents.
If they select Yes to Are you currently studying?, they will need to select the kind of study they are doing.
On the next screen the employee completes their Tax File Number Declaration. Once they've provided all information, they must click Sign to confirm the declaration, then click Continue to proceed.
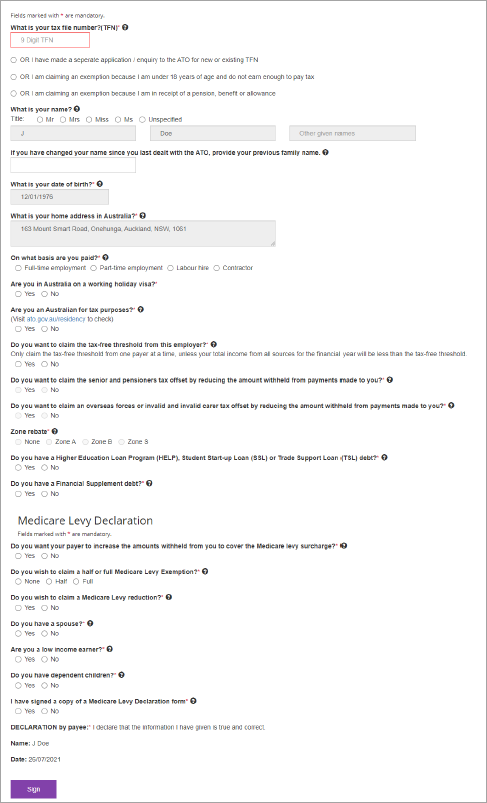
The employee then enters their bank account details.
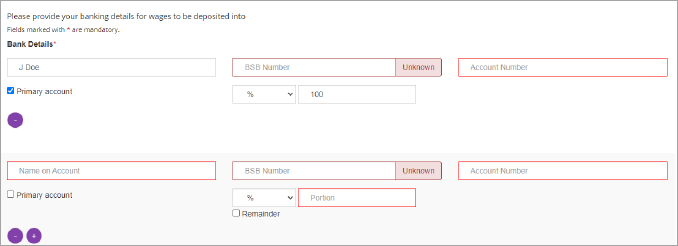
If the employee wants their pay to go to more than one account, they can click the + icon to enter details of additional accounts. They can enter the amount or portion of their pay that should go into each account.
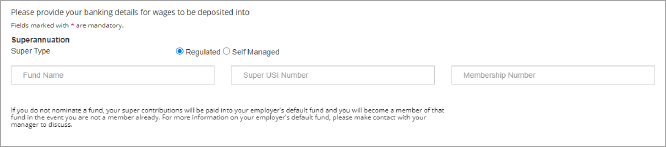
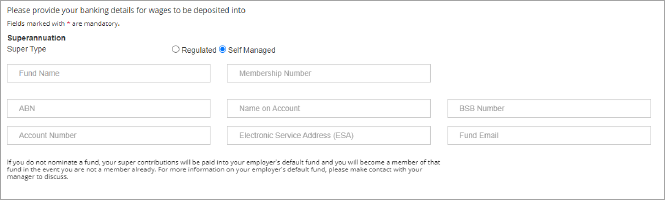
The employee can enter the details of a superannuation scheme (Regulated or Self Managed), or leave these fields empty, which will result in them being enrolled in the per scheme (specified on the Company Settings screensee page 3).
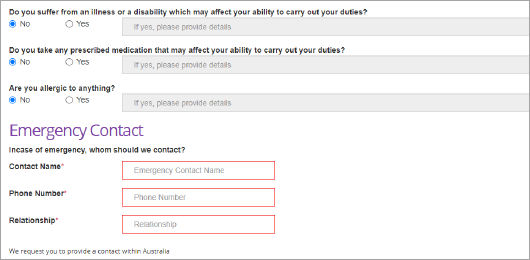
The employee must then enter emergency contact details and answer questions about medical conditions.
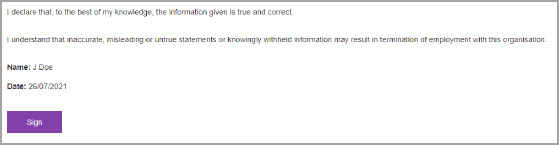
Finally, the employee must click Sign to declare that the information they have entered is correct. Then click Submit to submit their details to MYOB Advanced Workforce Management.
A confirmation message appears onscreen, and a confirmation email is sent to the employee.
If any onboarding documents were set up for the company, they will appear on separate screens during the onboarding process.
After Onboarding
Once the employee has completed the onboarding process, the status of the onboarding changes to "Completed".
A manager can now view the employee's details (and edit them if necesssary) from the Management > Employees screen.