If you've moved to a new building or added a department, you may need to create a new location.
-
Go to Management > Settings > Edit Location.
-
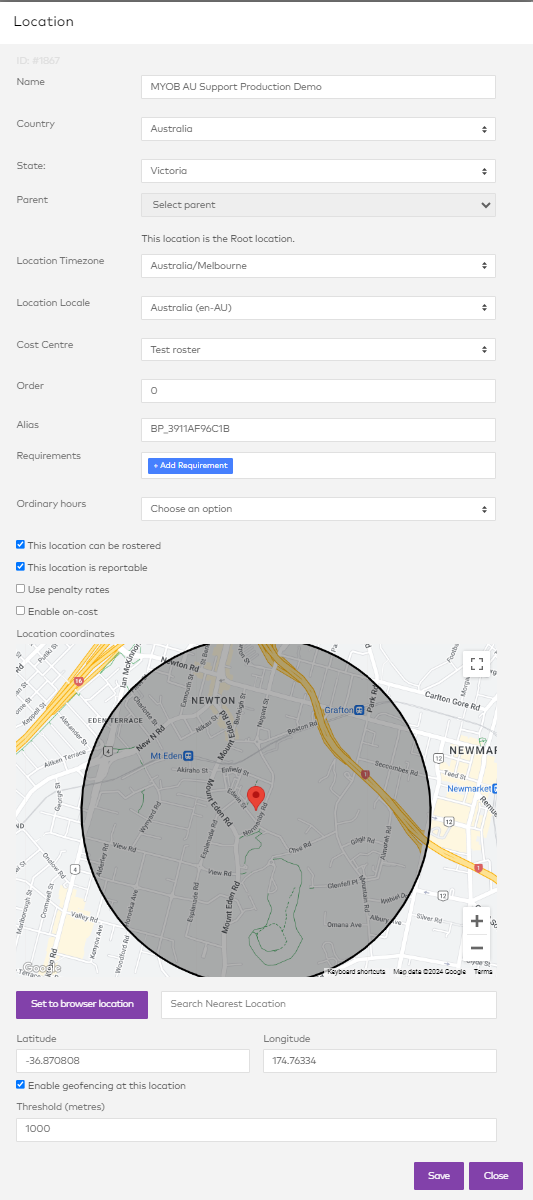
Click Add (:AWFM_Add_Purple_Thin:) to create a new location, or Edit (:AWFM_edit_grey:) to update the settings for an existing one. The Location window opens.
-
Enter the location's basic details, including the name, country, and timezone.
-
Parent allows the location to inherit some settings, and is used to control who can see which employees & rosters. Locations must have a parent unless they are the Root location.
-
Choose a Cost Centre if you want to set a default cost centre for any shifts/timesheets made in this location.
-
Enter an Order number to determine where the location displays in reports and selection menus. Location zero comes first.
-
Requirements allows you to set requirements employees must have to work shifts in this location.
-
Ordinary Hours allows you to define a span of hours for any shifts worked in this location.
-
If you want to be able to assign shifts to this location, select This location can be rostered.
-
To make this location selectable in reports, and enable some extra location-specific settings, select This location is reportable.
-
To customise penalty rates for the location, select Use penalty rates and enter the times and multipliers.
-
To customise costings for this location, tick Enable on-cost and enter your costing percentages.
The Use penalty rates and Enable on-cost features will be enabled fully in a future release.
-
-
To give the location customised geofencing settings, deselect Inherit geofencing settings from parent. For more information, see Setting up a location for geofencing.
-
Click Save when you're done.