Once Single Touch Payroll is enabled, payroll data is reported to the ATO automatically each time a pay is run.
Because STP data includes year-to-date totals for employees, you do not need to go back and send STP data for historical pays—once you have run a pay and generated STP data for all employees, your reporting will be up to date.
When a pay run is processed, the STP validation checks are run on all records included in that pay run (see Checking your data). Any errors must be corrected before the pay can be completed.
When a pay run is completed, a Single Touch Payroll batch is created and automatically submitted to the ATO. Before the batch is submitted, you must accept a declaration that the data is correct and that you are authorised to submit it (this is an ATO requirement).

Tick I agree and click OK to submit the STP data.
Managing STP submissions
Once a Single Touch Payroll submission has been made, you can view and manage it on the Manage Submission screen (MPPP5019). You can access this form in several ways:
-
The STP batch’s ID code is displayed on the header of the Pay Run Details screen (MPPP3120). Click the ID code to open the Manage Submissions form and display the STP batch for the pay run.
-
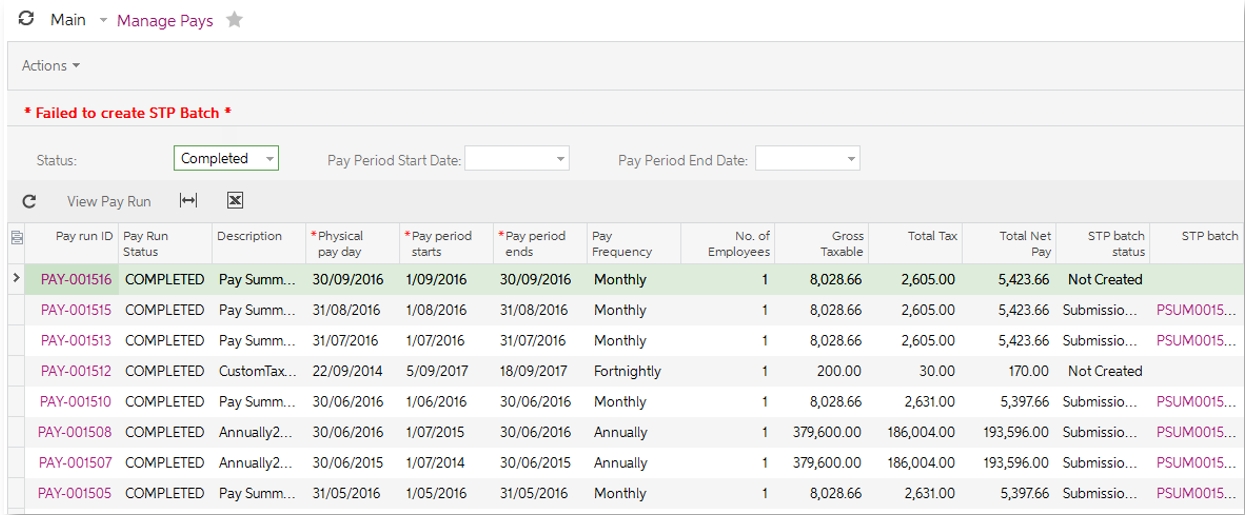
The STP Batch column on the Manage Pays screen (MPPP4110) displays the ID code of the STP batch for each pay. Click one of the ID codes to open the Manage Submission form and display the STP batch for the relevant pay run.
-
Open the Manage Submissions form directly from the navigation pane, then select the batch to show from the Batch number field.
The Manage Pays form will display an alert if any pays include a failed STP submission, or if any historical, future-dated pays are missing an STP batch (see "What do I do if a submission fails?" in Troubleshooting).
Submission status
The status of the batch’s lodgement with the ATO is on the header of the Pay Run Details form and in the STP Batch Status column of the Manage Pays form. The Manage Submissions form gives more detailed information about the batch’s status.
Possible statuses are:
|
No status |
The batch hasn’t been sent yet. |
|
Not created |
The system was unable to create an STP batch for the pay run, or the pay run was created before STP was enabled, but is future-dated to a date after STP was enabled. |
|
Not required |
There was no need to create an STP batch for the pay run, e.g. if the pay run was cancelled. |
|
Submission pending |
The batch has been sent, but no reply has been received yet. |
|
Submission received |
The batch has been sent and successfully received by MYOB’s online services. |
|
Submission failed |
The batch could not be sent to MYOB’s online services. |
|
Submission successful |
The batch has been successfully lodged with the ATO. |
|
Submission not successful |
The batch has been lodged with the ATO, but one or more errors were returned. Details of the errors are displayed on the Errors tab. |
To update the status once the batch has been sent, click Check Submission Status on the Manage Submissions form.
Response times from the ATO can vary according to the size of the payroll and the status of the ATO’s services. It can take between a few minutes and a few hours to receive a response, depending on these factors.
A Check submission status automation schedule is available to automatically update the status of all STP batches, which is set to run each night. You can check that this schedule is active on the Automation Schedules screen (SM205020).
After any database change (e.g. upgrade or database restore), restart the schedule from the Automation Schedules Statuses screen (SM205030)—select the Check submission status schedule and click Initialize Scheduler.
On the Manage Submissions form, a batch’s status is broken down into three levels:
-
The status of the batch as a whole is displayed in the form header.
-
The status of each company included in the batch is displayed on the Payer Details tab.
-
The status of each employee included in the batch is displayed on the Payment Details tab.
Any Submission not successful errors in one level will affect the level above, i.e. if one employee in the batch has the status Submission not successful on the Payment Details tab, then that employee’s company will also have the status Submission not successful on the Payer Details tab, which will result in the batch having the Submission not successful status on the header.
If the batch includes any errors, an extra Errors tab is available on the Manage Submissions form. This tab contains full details of each error, allowing you to identify and correct the problems. See “What do I do if a submission fails?” in Troubleshooting for more details on dealing with rejected submissions.
STP batch details
The Manage Submissions form displays all information included in the STP submission. This information is split into several sections.
The details on the Payer Details tab are the totals for the originating pay run only. The details on the other tabs are year-to-date totals for the entire financial year.
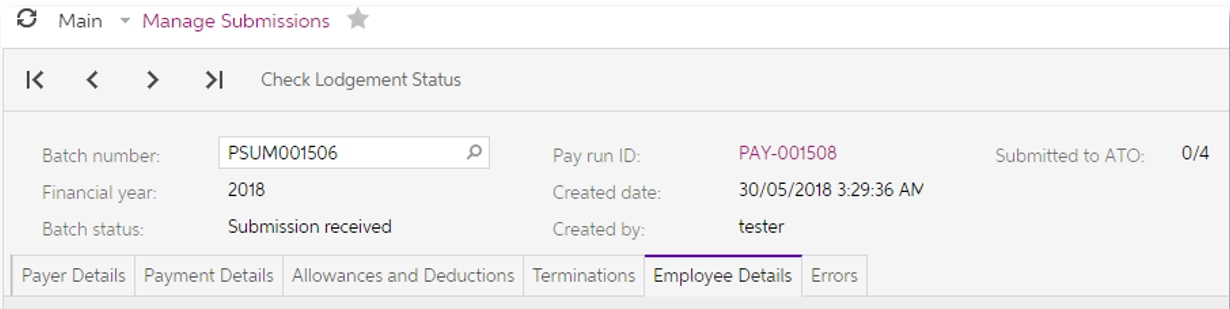
Form header
The header area of the form displays information about the submission.
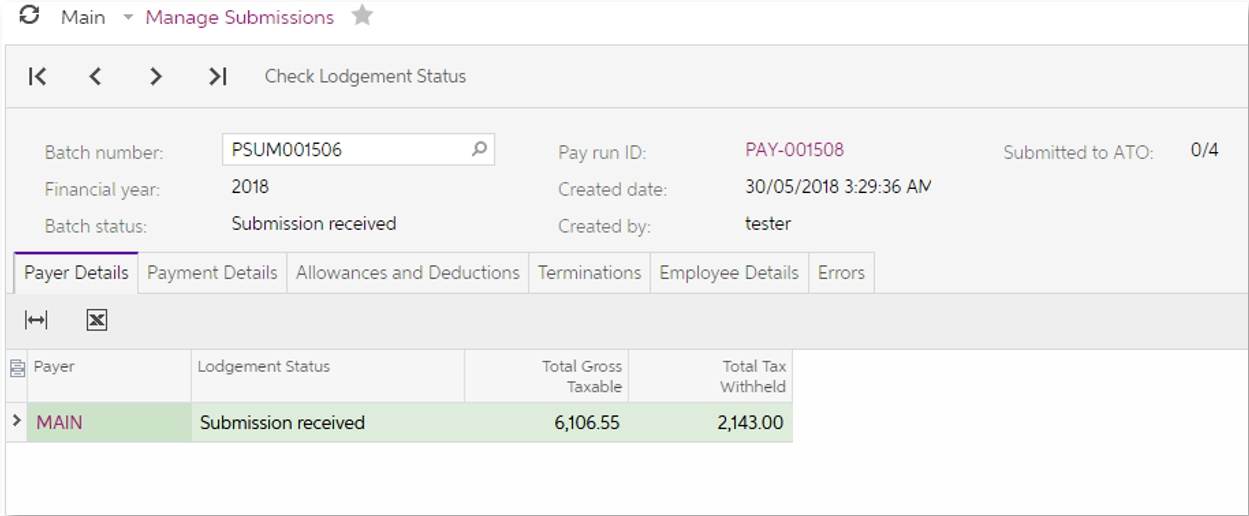
Payer details tab
The Payer Details tab displays lodgement statuses and totals for each company included in the originating pay run.
If an employee has been paid from another company in the past, the amounts for that branch will not be included in their totals for this STP batch. This is not a problem—once STP data is finalised at the end of the financial year (see Finalising STP data), all amounts will be included.
If the batch could not be sent to the ATO, a Re-send to ATO button is available on the toolbar for this tab.
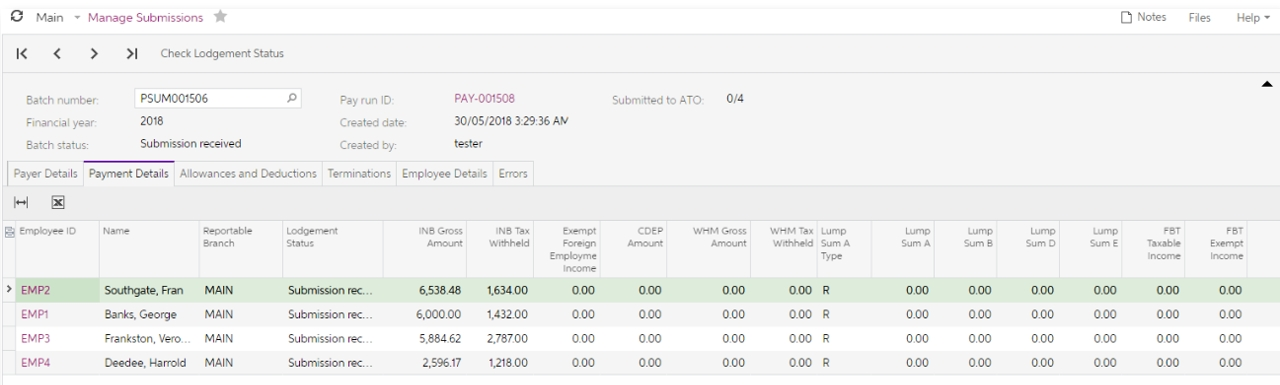
Payment details tab
The Payment Details tab displays statuses and year-to-date income information for each employee included in the batch.
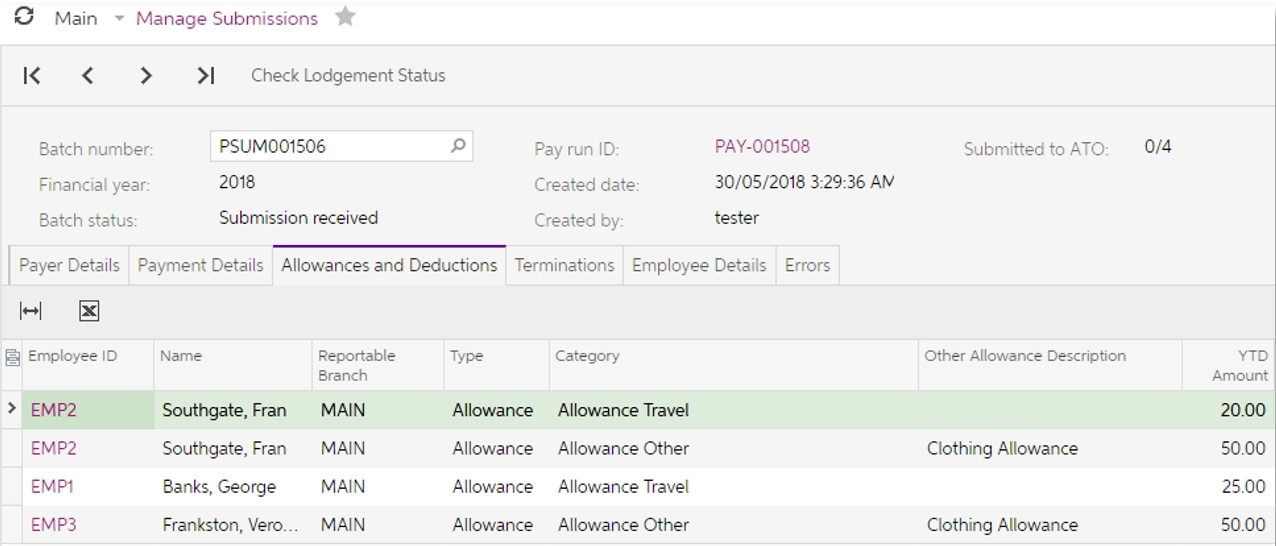
Allowances and deductions tab
This tab displays year-to-date totals for the deductions and/or allowances for each employee in the batch.
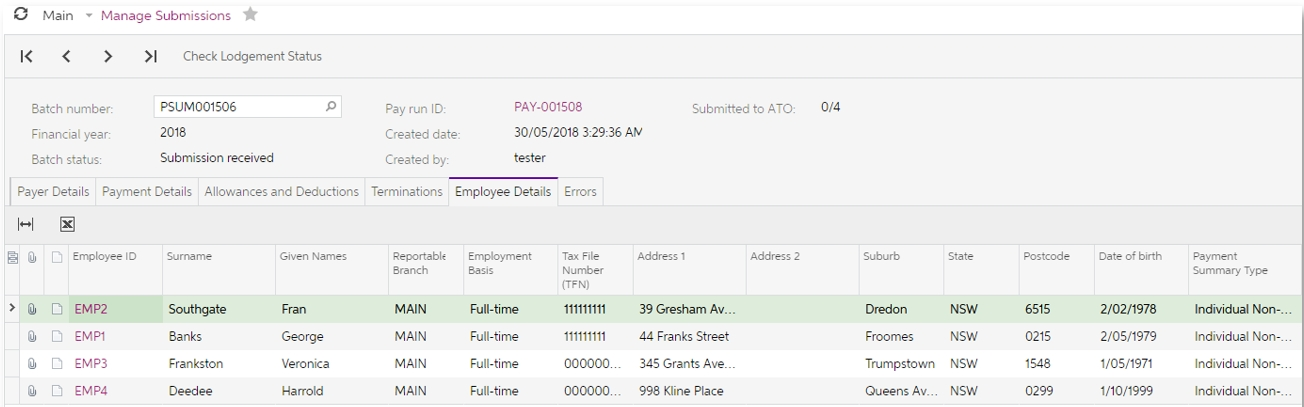
Employee details tab
This tab displays taxation and contact details for each employee included in the STP batch.
Employee terminations and STP
The Single Touch Payroll submission for the pay that included an employee’s termination will report a finalisation declaration for the employee. The ETP pay items will be included in the Termination tab of the Single Touch Payroll batch for the pay run; all other pay items will be included in the tab corresponding to the employee’s recorded Payment Summary type. ETPs are listed individually in the batch tab, and consolidated by date of payment and ETP code in the submission.
Recent enhancements to the termination process include the automatic use of system-provided pay items for most ETP payments. See to the “Terminations in Payroll” white paper for guidance, including the use of custom ETP pay items where necessary.
Historical terminations
As the ETP pay item types were not available before the introduction of STP features, if an employee was terminated before STP was enabled, their ETP may have been processed by adding custom pay items with a custom tax rate/amount.
In these cases, you will need to use the Update Historic Terminations screen (MPPP5021) to enter ETP information for the custom pay items, which will add their termination payment amounts to the STP data.

To add termination payment amounts to the STP data:
-
Use the Employee ID and Pay Run ID fields to select the terminated employee and the pay run that contained their final pay.
-
If a termination date was entered on the Termination form, it will be displayed in the Current Pay Termination Date field; otherwise you must enter the termination date manually.
-
All income and allowance pay items for the employee are displayed in the main table. For each pay item:
-
Select the ETP code that applies to the item.
-
Select the ETP tax treatment (taxable or non-taxable) that applies to the item.
-
For taxable items, enter the amount of tax withheld.
-
-
Click Save.
See the ATO website for detail on ETP codes.
Termination payment amounts for the employees will be submitted when a finalisation declaration is sent (see page 21), or when a manual update of STP data is sent (see page 22).
Fringe benefits and STP
When reporting via STP, reportable fringe benefits are set up as normal, i.e. pay items for reportable fringe benefits must configured on the Pay Items screen (MPPP2210) as follows:
-
The pay item’s Type should be set to “FRINGE BENEFIT REPORTING”.
-
The pay item’s Taxation field must be set to “Tax-free (Paid after tax)”.
-
Set the Apply grossed-up multiplier and Fringe Benefits are exempt from Fringe Benefits Tax options on the Additional Info tab as appropriate. (You may need to set up multiple pay items for each fringe benefit to cater for the different combinations of these two options, e.g. you may need to set up exempt and non-exempt items for one fringe benefit, or grossed-up vs not grossed-up items for another.)
-
The item’s ATO Category on the Pay Item Liabilities screen (MP.PP.10.25) must be set to “Reportable fringe benefits amount”.
Once they are set up, add fringe benefit pay items to employees Standard and Current Pays in the same way as any other pay item.
See Managing Employee Pays > Pay Items > Fringe Benefits in the Payroll section of the MYOB Acumatica User Guide for more information on setting up and processing reportable fringe benefits.
Finalising STP data
At the end of each financial year, you must send a finalisation declaration for each employee. This updates STP data for all active and inactive employees (including terminated employees), and indicates that you have provided all of their information for the financial year through STP reporting. From this data, the ATO will pre-fill each employees taxation information in their myGov account.
When an employee is terminated, a finalisation declaration is automatically included in the STP batch for the pay run that they were terminated in.
Send finalisation declarations on the Finalise screen (MPPP5023):
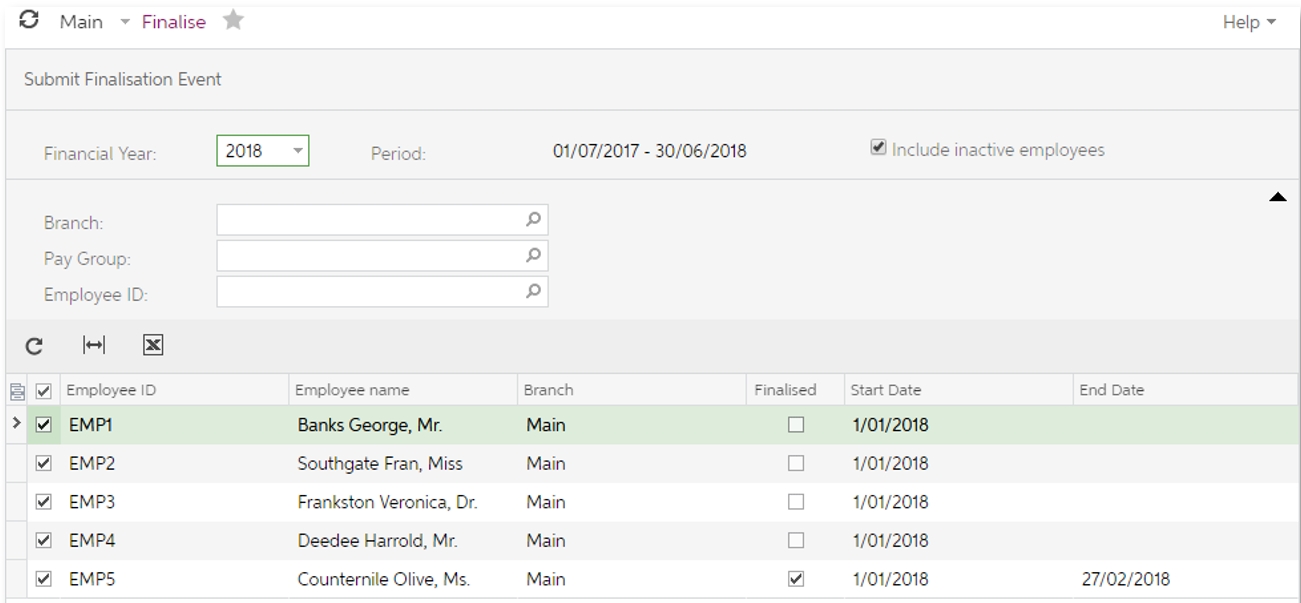
Use the controls at the top of the form to filter the list of employees, tick the boxes for all employees you want to send a finalisation declaration for, then click Submit Finalisation Event to send declarations for the selected employee(s).
Any employees whose STP data has been finalised will have a tick in the Finalised column on this form.
Updating employee STP data
Normally, employees’ Single Touch Payroll data is updated during the pay run, when STP data for a pay is sent to the ATO. In certain rare cases, it may be necessary to update employees’ STP data outside of a pay run.
Send STP updates on the Update screen (MPPP5022):
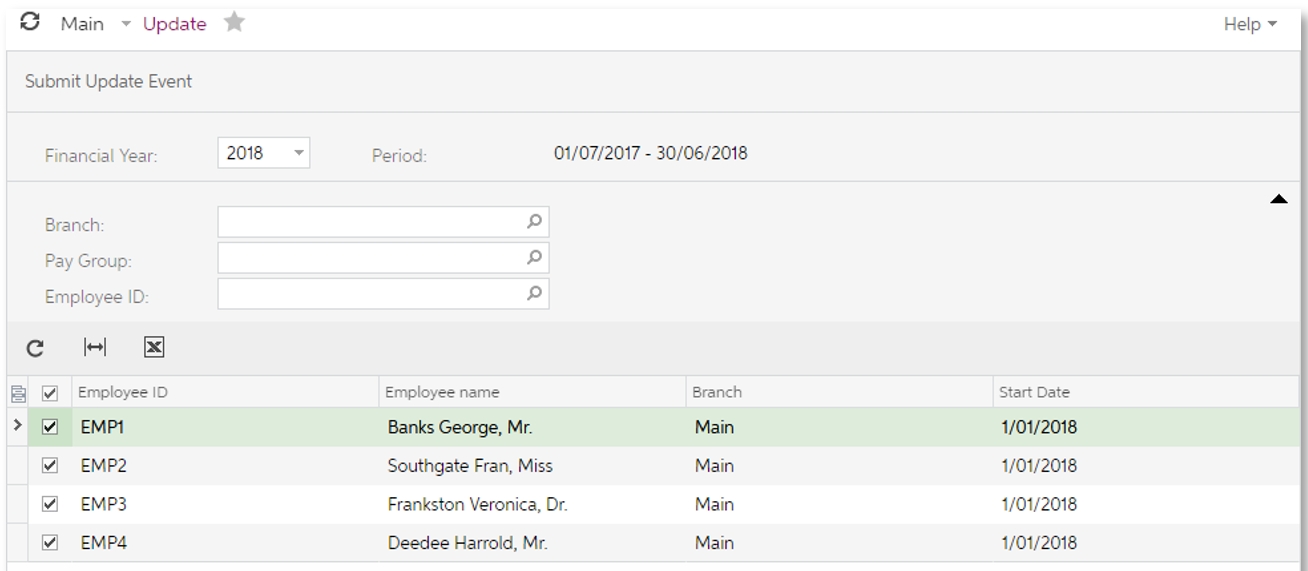
Use the controls at the top of the form to filter the list of employees, tick the boxes for all employees you want to send an update for, then click Submit Update Event to send updates for the selected employee(s).
This updates the STP data for all active employees; no payer information is sent.