Before getting started with trust accounting in MYOB Acumatica Construction, you need to do some one-off setup tasks.
To be able to set up trust account features, you need to get the ConstructionCompliance customisation from MYOB or your MYOB Partner.
Create a trust company in MYOB Acumatica
First, you need to create a new company with its own ledger for each trust account type you'll be using. The Queensland Building and Construction Commission (QBCC) mandates that each trust account must have its own ledger. This helps keep your company's accounts neat and tidy for auditing purposes.
So, you'll at least need a project trust account (PTA) company.
If your company withholds retention from contractors and requires a retention trust account (RTA), you also need to create an RTA company. For more details on RTA criteria, see the QBCC guide to retention trusts.
You'll still use your main company to create trust projects, as you would for any other project. But having dedicated trust companies helps you comply with the QBCC's requirement for each trust account to have its own ledger.
Create a trust company
-
Go to the Companies form (CS1015PL).
-
On the form toolbar, click the New Record icon (

).
-
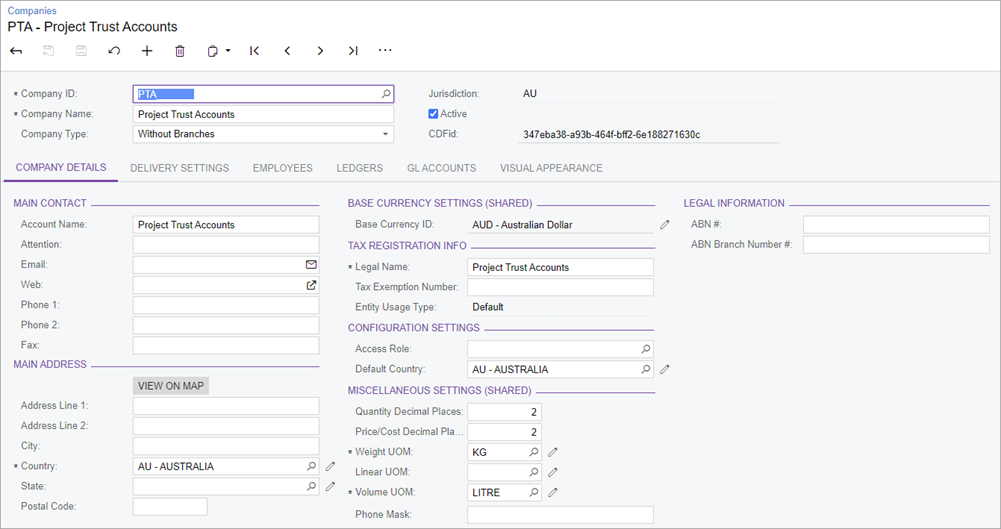
On Company Details tab of the the new record form, complete the fields:
-
Company ID– Enter an ID that makes it clear what kind of trust account company this is. For example, PTA.
-
Company Name – Enter a name that makes it clear what kind of trust account company this is. For example, Project Trust Accounts.
-
Company Type – Select Without Branches from the dropdown.
-
Account Name – Enter the same thing you entered for the Company Name.
-
Country – Set this to Australia.
-
Legal Name – Enter the same thing you entered for the Company Name.
-
-
On the form toolbar, click the Save icon (

).
Create a trust company ledger
-
Go to the Ledgers form (GL2015PL).
-
On the form toolbar, click the New Record icon (
).
-
In the Ledger ID field, enter a name for the ledger.
-
Set the Type field to Actual.
-
On the Companies tab, click the Add Row icon (
).
-
In the new row, select your PTA company.
-
On the form toolbar, click the Save icon (
).
-
If you have an RTA company, repeat steps 1–6 for it.
Map intercompany transactions
When you make trust payments in MYOB Acumatica, you'll be transacting across multiple ledgers. To make sure your accounts balance out, you need to map your main branch and your trust branches to each other.
For a refresher, see Interbranch Account Mapping.
-
Go to the Inter-Branch Account Mapping form (GL101010).
-
In the Originating Branch field, select your main branch.
-
On the Transaction In Originating Branch tab, add a row each for your PTA branch and RTA branch (if you have one).
-
On the Transaction In Destination Branch tab, add a row each for your PTA branch and RTA branch (if you have one).
-
On the form toolbar, click the Save icon (
-
-
In the Originating Branch field, select your PTA branch.
-
On the Transaction In Originating Branch tab, add a row each for your main branch and RTA branch (if you have one).
-
On the Transaction In Destination Branch tab, add a row each for your main branch and RTA branch (if you have one).
-
On the form toolbar, click the Save icon (
-
-
If you have an RTA branch, select it in the Originating Branch field.
-
On the Transaction In Originating Branch tab, add a row each for your main branch and RTA branch (if you have one).
-
On the Transaction In Destination Branch tab, add a row each for your main branch and RTA branch (if you have one).
-
On the form toolbar, click the Save icon (
-
Set accounts payable preferences
-
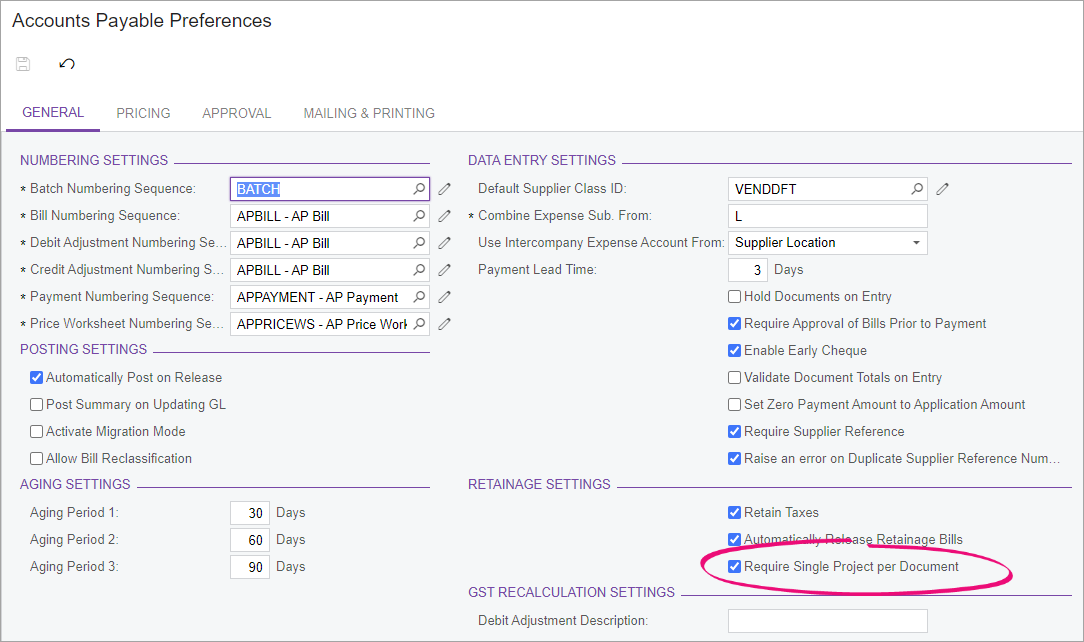
Go to the Accounts Payable Preferences form (AP101000).
-
On the General tab, select the Require Single Project per Document checkbox.
Enable trust accounting features
Publishing the ConstructionCompliance customisation lets you enable trust accounting features, like new forms, reports and the ability to mark a project as a trust project.
2. Enable trust accounting features
-
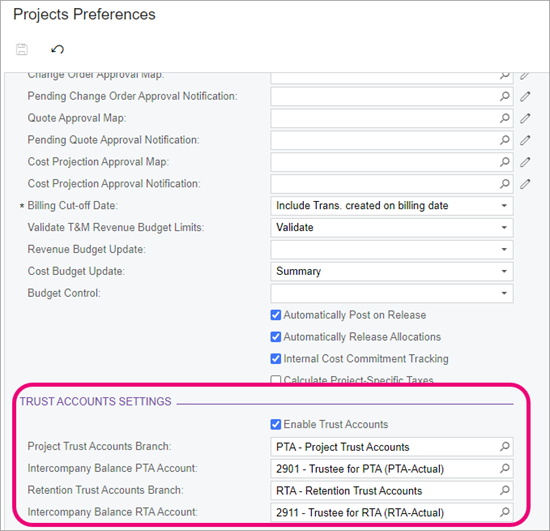
Go to the Projects Preferences form (PM101000).
-
In the Trust Accounts Settings section at the bottom of the form, select Enable Trust Accounts.
This section is only available after you publish the trust accounts customisation.
-
Complete the fields:
-
Project Trust Accounts Branch – The PTA company you created.
-
Intercompany Balance PTA Account – The PTA intercompany transactions account you added to the chart of accounts.
-
Retention Trust Accounts Branch – If you need one, the RTA company you created.
-
Intercompany Balance RTA Account – If you need an RTA, the intercompany transactions account you added to the chart of accounts.
-
-
On the form toolbar, click the Save icon (
).
What's next?
If your company holds retention, you need to add your RTA to MYOB Acumatica.
Otherwise, you're ready to start a new trust project.