Setting up single touch payroll
To set up and activate payroll reporting via Single Touch Payroll:
-
Enable the STP feature on the Enable/Disable Features screen (CS100000).
-
Register for Standard Business Reporting (SBR), if you have not done so already.
-
Ensure that any users who will be sending STP data to the ATO have my.MYOB login accounts associated with the MYOB Acumatica logins. (This is already the case for users who have signed up for Secure Authentication.)
-
Check your data to ensure that there is no missing information that would cause STP data to be rejected by the ATO.
-
Activate STP reporting on the Single Touch Payroll tab of the Payroll Preferences screen (MPPP1100).
-
Re-check your data to ensure that all pay items have the correct ATO reporting categories for STP.
Enabling the STP feature
To enable Single Touch Payroll functions, tick the STP feature under Advanced People on the Enable/Disable Features screen (CS100000). This enables the various forms and fields used to set up and manage the STP functionality.
Registering for SBR
MYOB Acumatica uses the Standard Business Reporting (SBR) mechanism for sending data to the ATO.
If your company is branched for PAYG purposes, you must set this up with the ATO and receive a branch number for each branch. To ensure correct STP reporting, you must create a separate company record for each unique ABN+ABN Branch Number combination.
If you have already registered for SBR on the SBR Registration tab of the Payroll Preferences screen (MPPP1100), you can skip this step; otherwise perform the configuration steps below.
To register for SBR, you must generate a software ID for each company in the system, then register the IDs with the ATO, which authorises MYOB to send information to the ATO on your behalf.
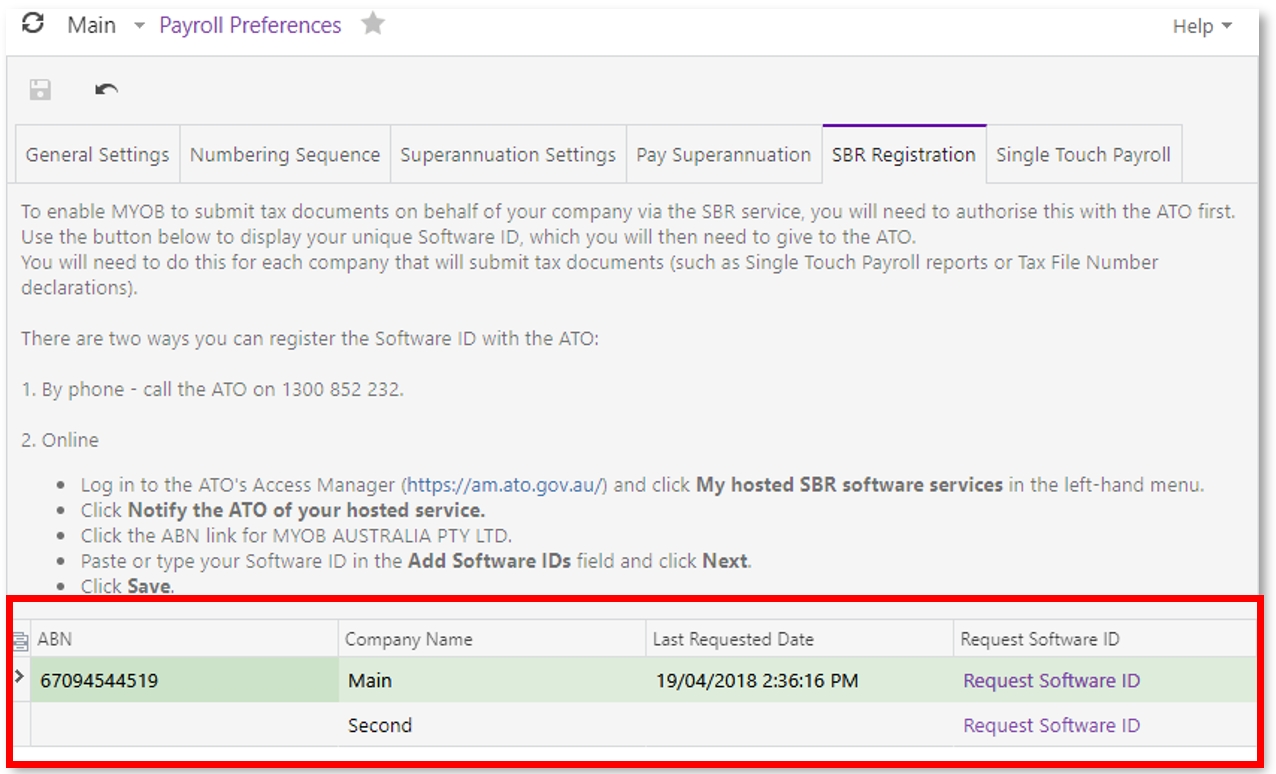
Companies that are already registered for SBR will have a value in the Last Requested Date column in the table at the bottom of this form.
Generate IDs by clicking each of the Request Software ID links in the table at the bottom of the SBR Registration tab—note each ID down as it is generated.
When you click Request Software ID, you may be asked to log in with your my.MYOB credentials—when you have done that, a popup for the software ID will appear. (After you have logged in once, you won’t have to do it again for subsequent software ID requests.)
Once you have IDs, you can register them in one of two ways:
-
Call the ATO on 1300 85 22 32 and work through the process with the ATO representative.
-
Use the ATO's Access Manager website (https://am.ato.gov.au/ ) to update and assign the information to your business. This requires an AUSkey login, and the person registering the software ID must have administrative rights for the business’s AUSkey account.
Registering the software ID online
-
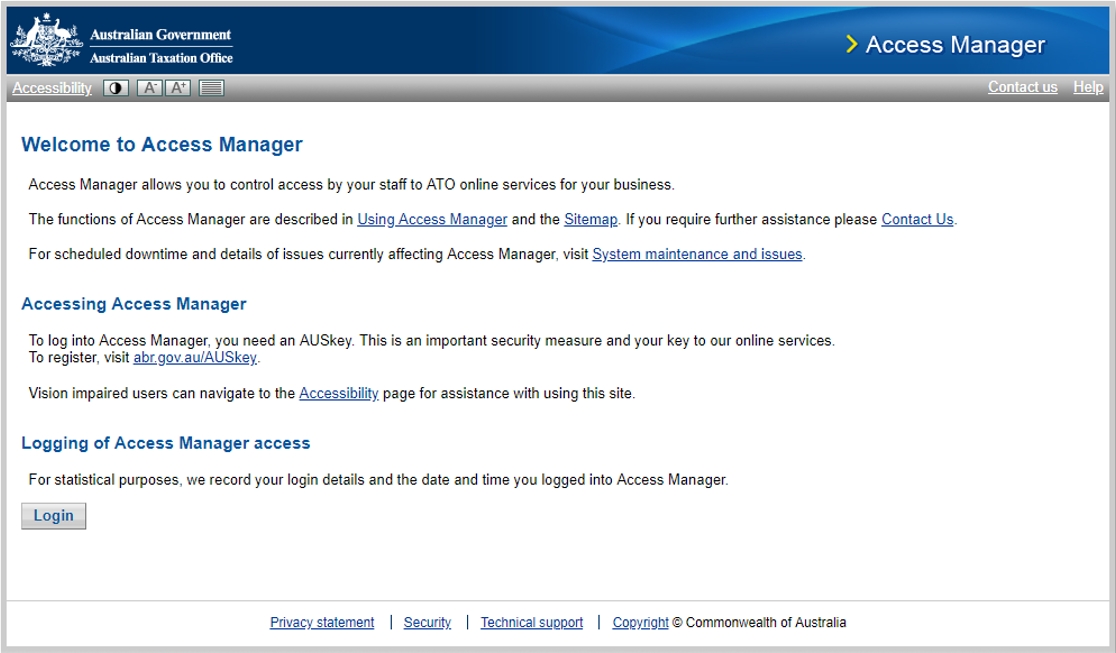
Log in to the ATO's Access Manager (https://am.ato.gov.au/ ), upon login, the system will try and identify the site using their AUSKey
-
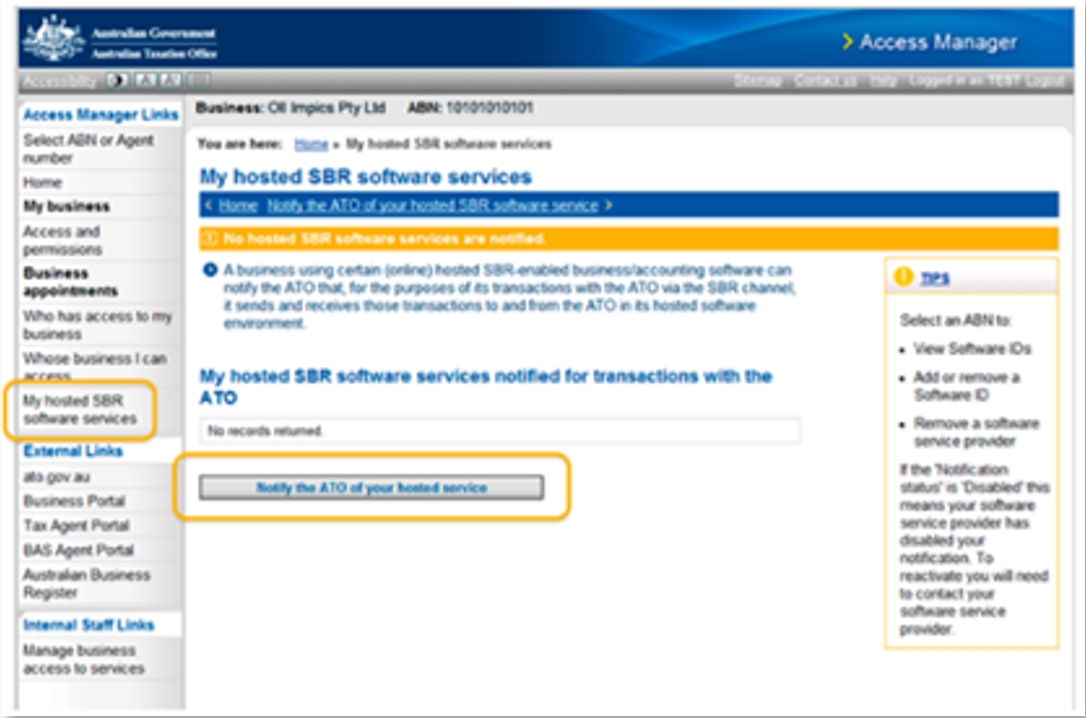
Once access has been authorised, select My hosted SBR software services from the menu on the left.
-
Click Notify the ATO of your hosted service.
-
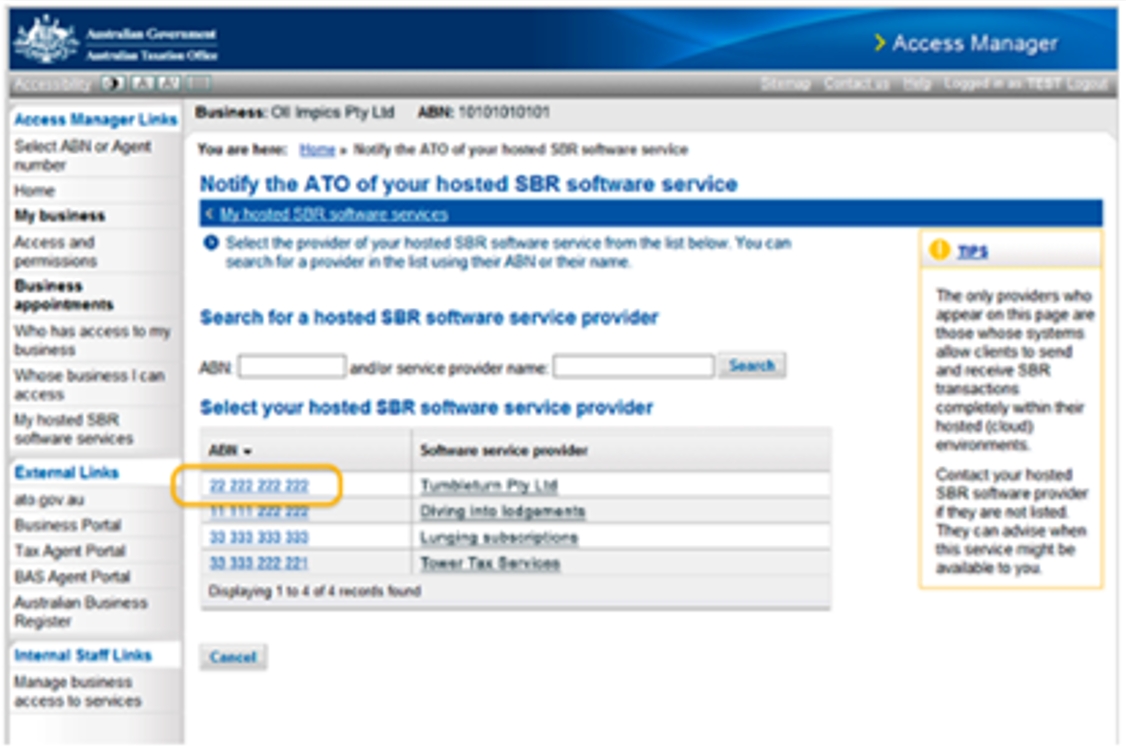
Search the service provider name for MYOB AUSTRALIA PTY LTD as a hosted SBR software service provider:
-
Click the ABN link for MYOB AUSTRALIA PTY LTD.
-
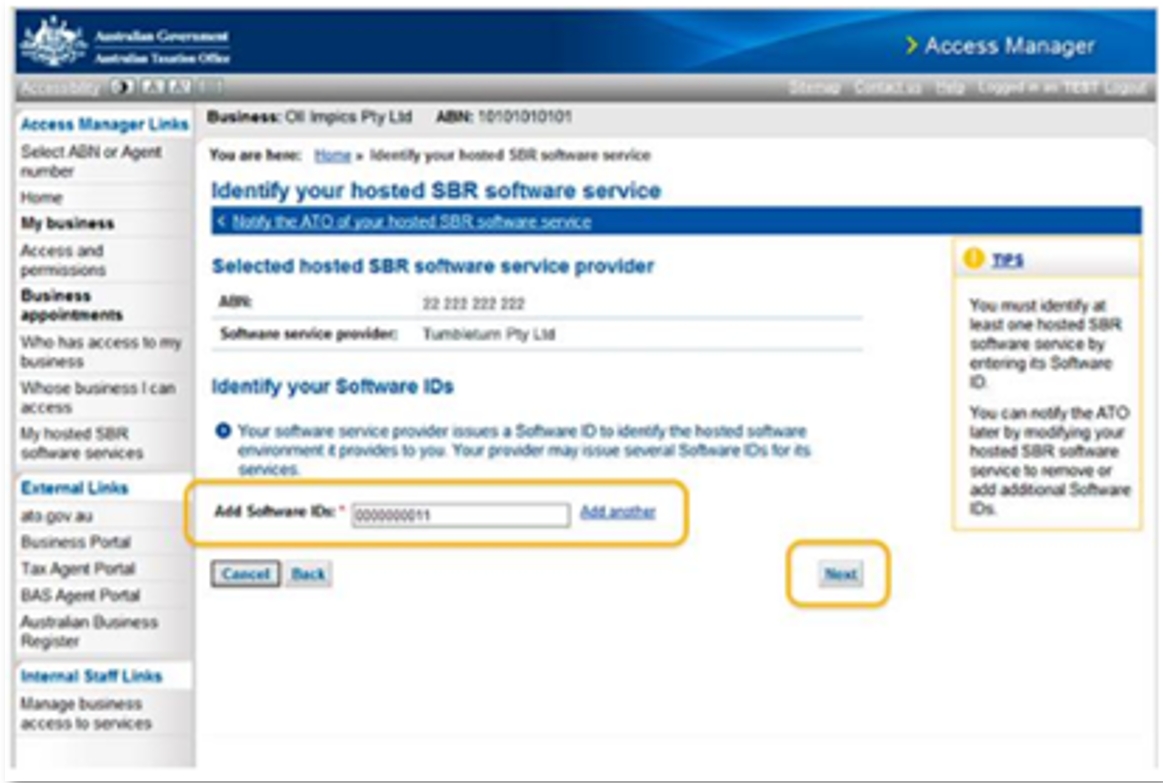
Enter your software ID and click Next.
The entered Software ID must match the ID was provided by MYOB Advanced, or transmissions using MYOB’s service will not be successful.
-
Read the notification statement then click Save.
-
A green success message will appear on the next screen to confirm your notification.
Setting up my.MYOB logins
Ensure that any users who will be sending STP data to the ATO can log in to MYOB Acumatica using a my.MYOB login. A my.MYOB login is created and associated with an MYOB Acumatica login when a user signs up for Secure Authentication. Secure Authentication was introduced in the 2018.1.2 release, and is required for all logins after 1 December 2018.
Activating the MYOB external identity provider
As of the 2018.1.2 release, my.MYOB logins are enabled by default. In previous releases, the MYOB provider had to be made active on the Security Preferences screen (SM201060). This provider is now active by default and the table of Allowed External Identity Providers is now read-only.

Associating advanced users with my.MYOB logins
As of the 2018.1.2 release, users are able to sign up for Secure Authentication, which associates a my.MYOB account with their MYOB Acumatica login as part of the signup process. In previous releases, my.MYOB logins had to be set up manually—the introduction of Secure Authentication means that all users (not just users who will be submitting STP data) can set up logins automatically.
To check that a user has a my.MYOB login associated with their MYOB Acumatica login, check the External Identities tab of the User Profile form—if there is a value in the User Key column for the MYOB provider, they are associated with a my.MYOB login.

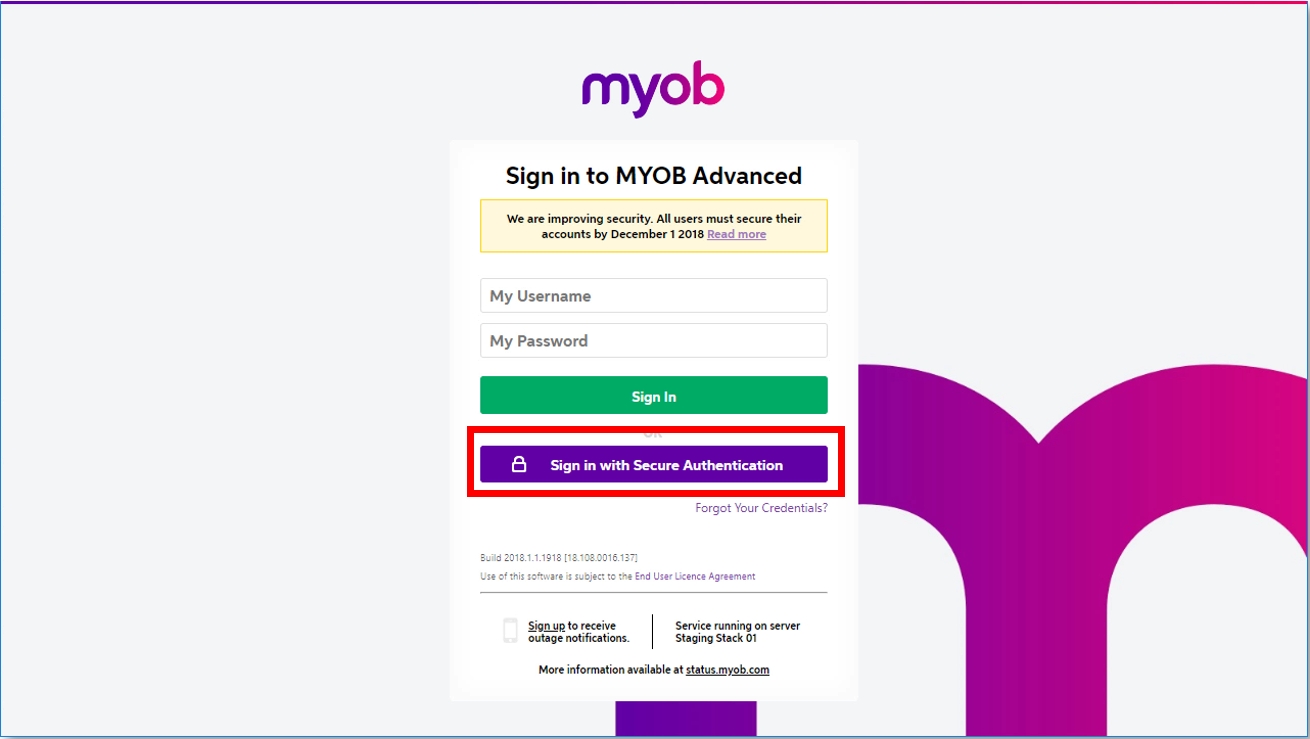
Once a user has signed up for Secure Authentication, they can login by clicking the Sign in with Secure Authentication button on the MYOB Acumatica login screen:
Checking your data
Before starting to use STP, check your data to ensure that there is no missing information that would cause STP data to be rejected by the ATO.
We recommend that you run the validation checks before activating STP reporting, in case there are a large number of records that need to be corrected. However, you should run the checks again after activating STP, to ensure that the ATO reporting categories assigned to your pays items are correct.
You can run validation checks on your data from the Check Data screen (MPPP5020)—doing so will highlight any errors that would prevent an STP batch from being sent to the ATO. (These validation checks are also run automatically when a pay is processed, but in that case only the records involved in the pay are checked.)
Click the Run validation toolbar button, and details of all data validation errors appear in the main table. If there are no errors, the table will remain empty.
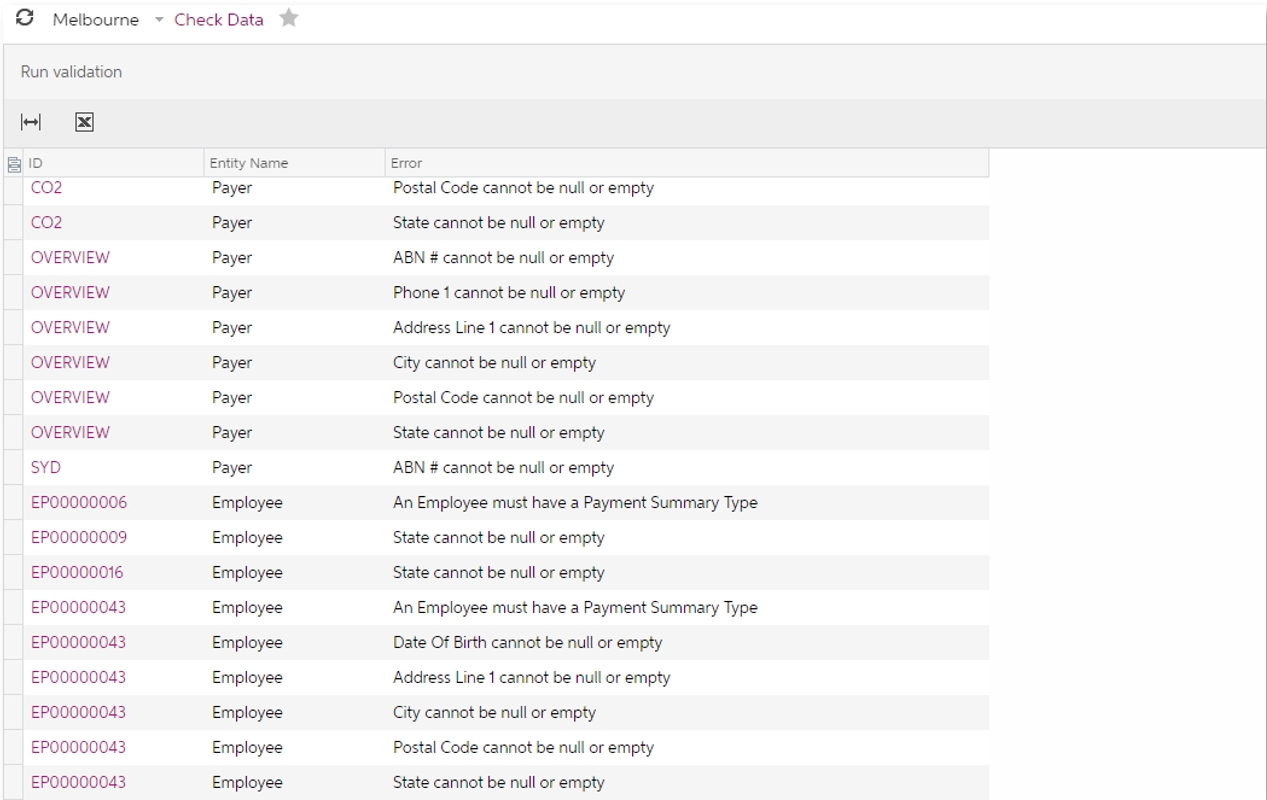
The system checks employee records, payer records (i.e. branches) and pay items. Click on the ID column to open the record in the appropriate editing window, so you can make the necessary corrections.
Activiating single touch payroll
Enabling the STP feature (see Enabling the STP feature) adds a Single Touch Payroll tab to the Payroll Preferences screen (MPPP1100):
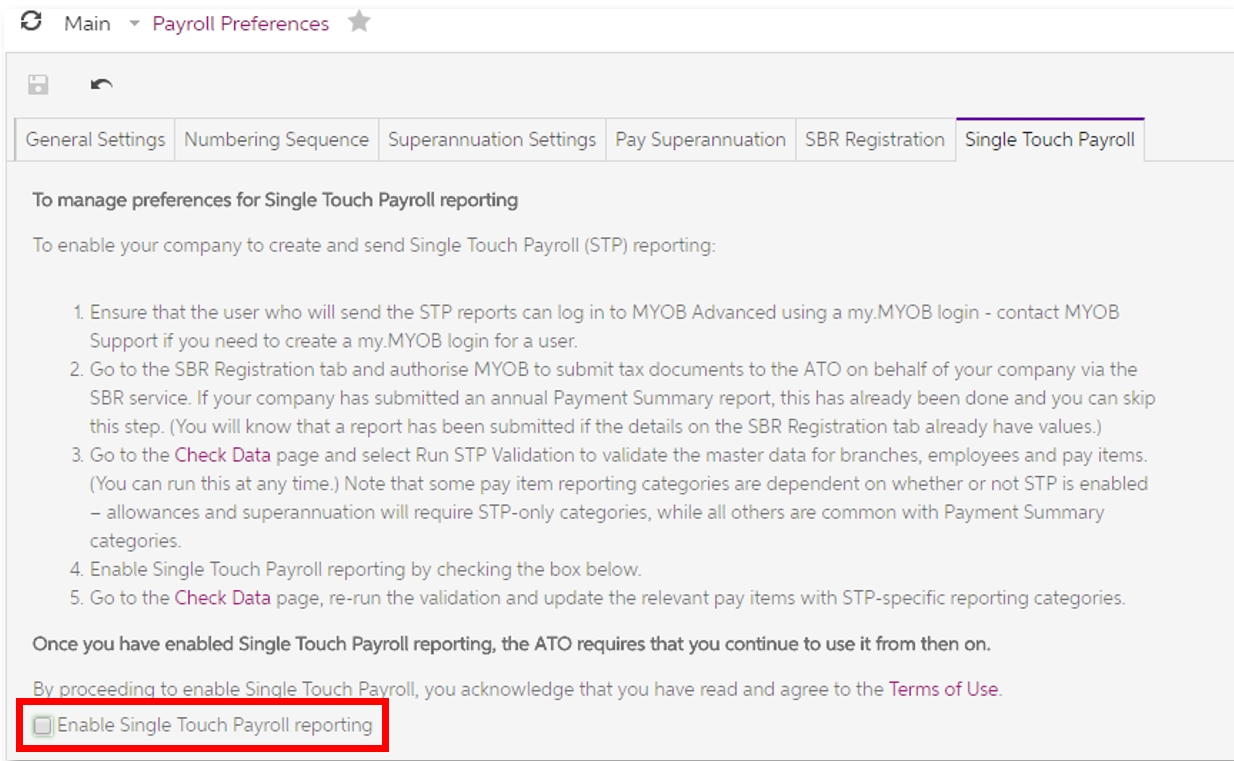
Read the Terms of Use linked to on this tab, then tick the Enable Single Touch Payroll reporting check box:
Once STP reporting has been enabled, an STP Enabled Date field appears on this tab, displaying the date and time STP was enabled.
Once you have enabled STP reporting, the ATO requires that you continue using it from then on. The Enable Single Touch Payroll reporting check box cannot be unticked once you have submitted your first STP batch.
You are now ready to report pay data to the ATO via Single Touch Payroll.