Employee onboarding implementation guide
This guide is about the initial setup of MYOB Acumatica — Employee Onboarding. It is aimed at consultants from MYOB and MYOB Acumatica partners.
MYOB Acumatica — Employee Onboarding is available to MYOB Acumatica — Payroll customers at no additional subscription cost. Customers don't need to sign up for it separately, as the revised MYOB Acumatica — Payroll terms and conditions also cover MYOB Acumatica — Employee Onboarding.
Criteria To use MYOB Acumatica Employee Onboarding, companies must fit the following criteria:
Using MYOB Acumatica — Payroll version 2022.1.2 or greater
Not already using MYOB Acumatica — Workforce Management
Requesting an employee onboarding company
Consultants must create a support ticket to request a dedicated employee onboarding company for a customer.
MYOB Acumatica — Payroll setup
These instructions are for MYOB Acumatica — Payroll versions 2022.2.1 onward.
Go to the Payroll Preferences (MPPP1100) screen.
Click the Workforce Management tab.
In the Create Connection section, click Create.
This creates a new user with a login name and email of <tenant>-wfm-api-user@myob.com. This user is automatically assigned to the dedicated WFM API user licence. You don't need to assign them any other API licence.You can click Test to check the connection.If branch restrictions are set up:
Assign a default branch to the <tenant>-wfm-api-user@myob.com user
Give the WFM API user access to create employee records in all branches.
MYOB Acumatica — Employee Onboarding setup
After setting MYOB Acumatica — Payroll, you need to set up your customer's MYOB Acumatica — Employee Onboarding company.
Log in to MYOB Acumatica — Workforce Management.
In the top-right corner, click the dropdown and choose Change Business. This shows you a list of accounts you have access to.
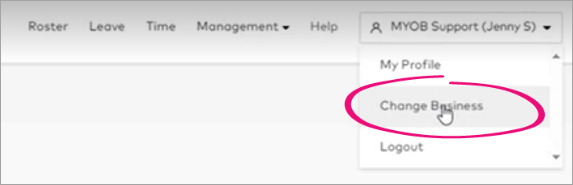
Don't see Change Business? In a new web browser tab, log in to the appropriate environment, then try step 2 again.
From the list, click the name of your customer's MYOB Acumatica — Employee Onboarding company.
Navigate to Management > Settings > Manage System Users.
Click Create new system user.
Enable notifications only if the administrator wants to receive all the notifications
The administrator is the highest-level permission in the organization and can create positions and hiring managers.
The Admin Role in an Onboarding-only company has a view of the full WFM product. The user guides will point out the relevant areas needed for Onboarding, keep an eye out in release notes for when the Admin view will be focused down to an Onboarding only view.
A hiring manager is someone who sends onboarding invitations and receives notifications when employees have completed their onboarding.
Check with your customer who they'd like to be set up as hiring managers. Many customers start by setting up their payroll administrator as the only hiring manager to keep things simple.
There are two ways to add a hiring manager:
To prevent the employee from being synced with MYOB Acumatica — Payroll, use the Employee Importer.
To sync the employee with MYOB Acumatica — Payroll, add them directly to MYOB Acumatica — Employee Onboarding.
Assign the 'Hiring manager' Permission Group.
Using the employee importer
In MYOB Acumatica — Payroll, use the export scenario to generate the Excel file with employee information.
Download the file.
In MYOB Acumatica — Employee Onboarding, go to Management and choose Settings.
On the Settings screen, click IMPORTERS.
On the Importers screen, click EMPLOYEES. The Employee Importer screen opens.
At the bottom right of the screen, click Next.
Upload your Excel file.
Review the employee information.
Some fields only exist in MYOB Acumatica — Employee Onboarding, which means information for those fields can’t be exported from MYOB Acumatica — Payroll. For details on mapping these fields, see Employee importer mapping for workforce management and payroll, where the comments column mentions if a field is only for employee onboarding.For the 'Reports To' option you can use the Admin user that was setup.
Save your changes.
The export file contains visible personal information for the exported employees. It’s important that you’re aware of your obligations for handling sensitive employee information in Australia and New Zealand, and that you have a process for the data transfer that ensures you meet these obligations.
The exporter includes an externalId field. When employees are exported from payroll and imported into employee onboarding, this field is used to stop the employee from being synchronised back to MYOB Advanced Payroll.
In order for Managers to invite employees to their own team - selecting themselves as 'Reports To' - the manager needs to be added as an employee first, this is because system users cannot be selected in an invitation.
What's next?
Take your customer through how they can get started with employee onboarding. To make the handover easier, you can ask customers to complete the free MYOB Academy course, MYOB Acumatica — Payroll: Employee onboarding.