When a test environment is required to mirror what is currently in the production (Live) database, a backup of the live database should be restored over the test database.
Before refreshing the test database
To follow the instructions on this page, you need to:
-
Be familiar with the PayGlobal environment.
-
Be able to backup and restore a database using SQL Server Management Studio.
-
Host your PayGlobal solution in-house.
For our Online customers, PayGlobal Support will action the refresh for you. Requests for Online test database refreshes should be sent to payglobalsupport@myob.com - Online test database refreshes are typically completed overnight, ready for the next morning.
Step 1. Backup Live database and restore over Test
-
Make a backup of your test and live databases.
-
Restore the backup of live database over your test database.
For information on backing up and restoring your databases, see Microsoft SQL Server 2022 Documentation – Restore a Database Backup Using SSMS.
Step 2. Secure the test database
To secure the Test database you will run HR.exe with the /initsql switch. It is important to use the HR.exe from the latest version of the PayGlobal application that you have installed.
-
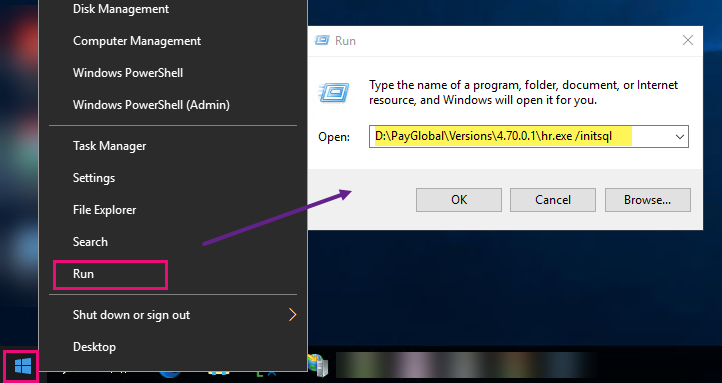
Click the Windows Start button to see the menu.
-
Click Run.
-
Locate the application directory of the latest version of PayGlobal installed and click Hr.exe. If the Hr.exe path contains spaces, you must enclose the path and filename in double quotes.
-
After Hr.exe, type a space, and then type /initsql and click OK. For example:
-
Enter the following details:
-
Path– Type the path of your existing company Data folder – this folder will hold the data for the company. You can check the company Data folder location that is specified in the Hr.ini file (CompanyPath). The Hr.ini file is located in the same folder that you launch StartPayGlobal.exe from.
-
Server name– The SQL Server where the database will be created and stored. This is also known as the SQL server instance name.
-
Database name– Type a name for the database that will be created on the SQL Server, for example, TreeTopsESS.
-
Country– Select the relevant country.
-
PayGlobal user– By default this is PGUser_[Database Name]. The PayGlobal user must be unique to each database. If the SQL Server uses Windows Authentication, you can leave the PayGlobal user field blank.
-
Restore login – By default this is PGRestorer_[Database Name]. Each database on your SQL Server needs a unique Restorer login.
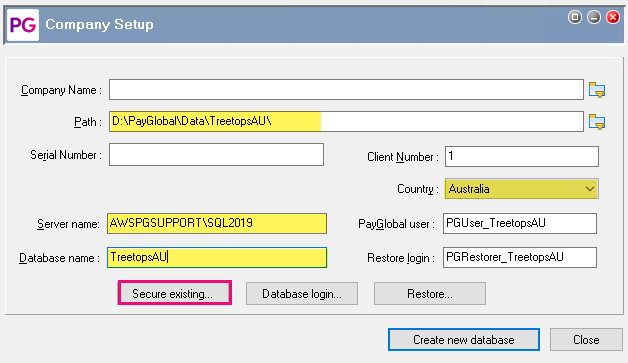
Not all fields need to be completed, just the fields highlighted below. It will look similar to the following screenshot.
-
-
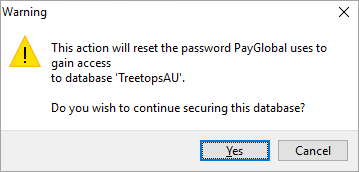
Once you have completed the settings on the Company Setup form. Click on Secure existing. You'll see a warning message:
-
Click Yes to continue securing the database.
-
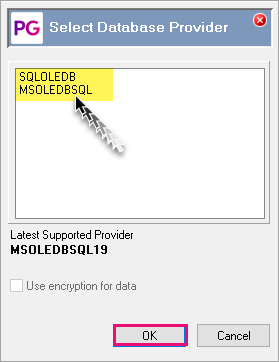
At the Select Database Provider prompt, select the SQL OLD DB provider you have installed and click Ok.
-
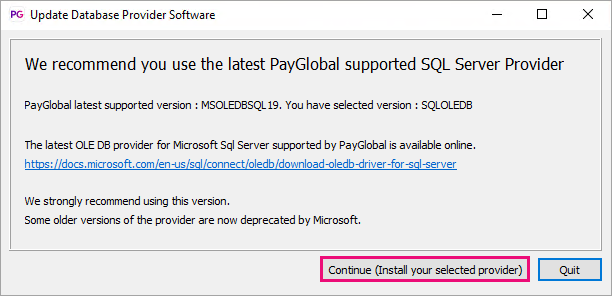
If you don't select the latest SQL OLE DB provider available, a prompt will appear advising you of the latest available. Click Continue. Note: If you prefer to install the latest SQL OLE DB Provider, click Quit to do so before starting secure process again from step 1.
-
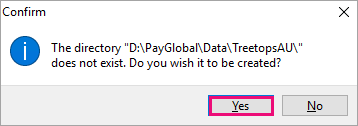
If you haven't entered the existing Data directory, you will be prompted to create it. Check for an existing directory in HR.ini file or click 'Yes' to continue if the directory doesn't exist yet.
-
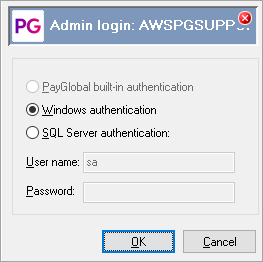
Select the authentication to connect to the SQL Server and secure. If you choose Windows Authentication, the logged in user (you) must have access to the SQL server and database to create required logins. If you choose to this was SQL Server authentication, type in the password.
-
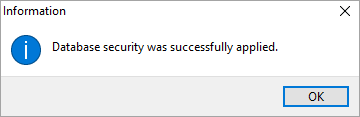
A message appears to advise the process was successful or has failed.
-
Click OK to return to the Company Setup form.
-
Click Close.
-
A Confirm message appears to Exit initialisation form? Click Yes.
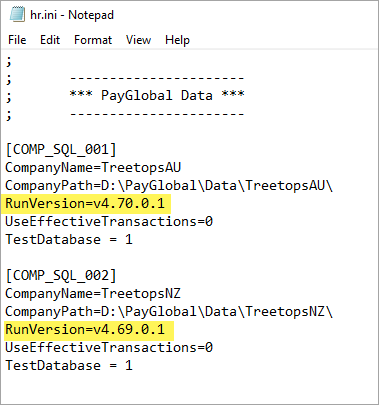
Step 3. Confirm Hr.ini details
After you restore and secure the database, you will need to confirm the database version and check the Test company is set to the correct version in the Hr.ini file.
-
Make a backup copy of the Hr.ini
-
Open the HR.ini
-
Checked the Live company RunVersion used and update the Test company RunVersion so that it is using the same version.
-
Close and save the Hr.ini file.
-
Once you have confirmed the Test database has been successfully refreshed you can delete the copy of the Hr.ini file you backed up in step 1.
Step 4. Import reports
When you installed the new version of PayGlobal, the Installation Wizard copied a Report catalogue (tmrr.zip) to the PayGlobal executable folder. You now need to import the new report catalogue into your new database.
-
Login to Payglobal.
-
In the PayGlobal Tree, navigate to the Reports | Import Reports run command.
-
Double-click Import Reports. The Import Reports box is displayed.
-
Click Import.
The Open box displays the contents of the PayGlobal application folder. If the PayGlobal application folder is not displayed, then navigate to it.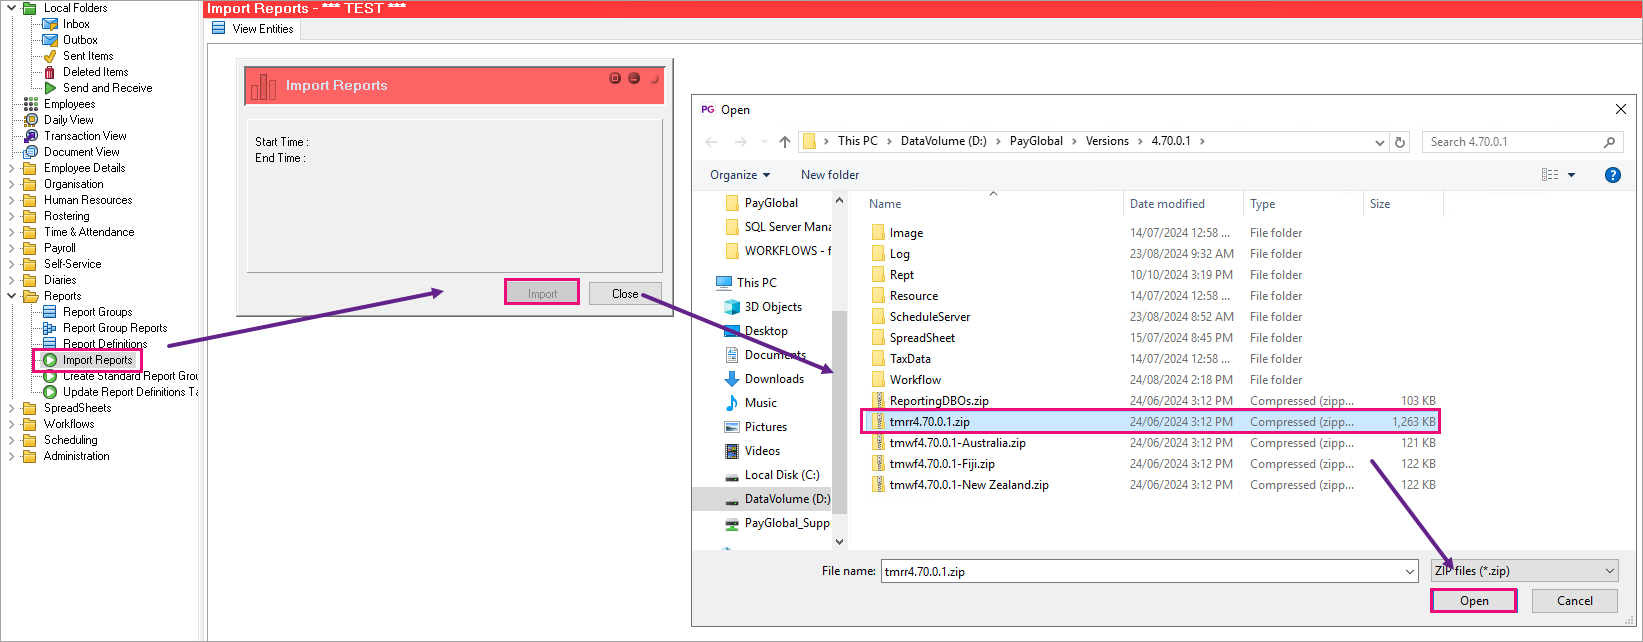
-
Double-click the report ZIP file, tmrr<version number>.zip. For example, Tmrr4.8.0.0.zip
The Import Reports box is displayed. PayGlobal extracts the reports from the ZIP file to the Rept folder in the executable folder. The following Information message is displayed: Importing completed.
-
Click OK to return to the Reports folder.
-
Double-click Update Report Definitions Table. The following Information message is displayed: Report Definitions Table updated.
-
Press Enter or click OK to return to the main PayGlobal window.
Step 5. Update file paths
When you refresh test or move a database to a different server, you need to update the following data paths and file names.
This step is important so that the payroll users do not accidentally import or overwrite data that relates to the Live database.
If you use any of the following functions, navigate to the applicable fields and update them:
-
Direct Credit file - Administration | Modify Company Settings | Payroll | Banking | Banking Details | Direct credit file name field.
-
General Ledger file - Administration | Modify Company Settings | Payroll | Processing | General Ledger | GL file name field.
-
Exporting Rostering data from PayGlobal - Administration | Modify Company Settings| Rostering/T&A | Rostering| Export to Payroll | Data path field.
-
Exporting Rostering Job costing data from PayGlobal - Administration | Modify Company Settings | Rostering/T&A | Rostering| Export to Job Costing | Job data path field.
-
Exporting T&A data from PayGlobal - Administration | Modify Company Settings | Rostering/T&A | T&A |Export to Payroll | Data path field.
-
Exporting T&A Job costing data from PayGlobal - Administration | Modify Company Settings | Rostering/T&A | T&A |Export to Job Costing | Job data path field.
-
Importing Clock data - Time & Attendance | Clocks | Add or Edit | Import Details | Local import path field.
-
Importing Rostering Timebands into PayGlobal - Administration | Modify Company Settings | Rostering/T&A | Rostering| Import Timebands | Timeband data path field.
-
Importing T&A data into Payroll - Payroll | Payroll Import Types | Add or Edit | Details | TA data path field. Also in Administration | Modify Company Settings | Payroll | Import from T&A | Import TA| TA data path field.
-
Importing T&A Timebands into PayGlobal - Administration | Modify Company Settings | Rostering/T&A | T&A |Import Timebands | Timeband data path field.
-
Message Diversion Rules - Administration | Messaging | WorkGroups | Add or Edit | MessageDiversion Rules | Add or Edit | Message Diversion Actions | To path field.
Step 6. Check Windows security
PayGlobal users must have Windows Security permissions that allow them to access the PayGlobal Data folder and database files.
Using Windows Explorer, check that users have the following minimum folder permissions:
-
Read access to the Test Company Data folder and all its sub-folders, except for the following sub- folders that need Read and Write access:
-
Log
-
Perm
-
Temp
-
-
Read and Execute access to the folder that contains the PayGlobal executables.
The Test Company data and PayGlobal application installation folders can be found in the Hr.ini file (see step 3).