To set up the ExonetDCE for connection via SOCKETS you need to set up the DCE server following:
Prepare Executables
-
Decide on a location for your executables.
While you can set up the executables anywhere you want, most Exo sites are configured in a C:\Exonet folder and this is where consultants are likely to look for it. -
Copy ExonetDCE.exe to the MYOB Exo Business folder This can be founded in EXECUTABLES.ZIP. The current version at time of this article being published is: 2020.3 version of Executables.zip
-
Download COMPONENTS.ZIP for your version of Exo. The current version at time of publishing is: 2020.3 version of COMPONENTS.ZIP
-
Copy the newest version of scktsrvr*.exe into your EXO folder
-
Rename the file to scktsrvr.exe (remove the version information)
-
Copy the newest version of midas*.dll into your EXO Folder.
-
Rename the file to midas.dll (remove the version information)
-
Open a command prompt with administrator privileges, and navigate to your Exo folder (Eg: C:\Program Files (x86)\MYOB Exo Business or C:\Exonet)
-
Type scktsvr.exe /install
This registers the required Sockets driver. -
Type ExonetDCE /regserver
This registers the DCE Service in the registry. -
Type ExonetDCE /install
This adds ExonetDCE to the Services list for Windows. -
Type Regsvr32 midas.dll
This registers MIdas.DLL as available for applications to use (Datasnap). -
Install the MS OLEDB driver for SQL Server. You can find this direct from Microsoft.
Configure Windows Services.
-
Open the Windows Services Manager in Window's Administrative Tools
-
Locate the “Borland Socket Server”. Ensure the Startup Type is set to Automatic. (We also recommend changing the Restart options to always restart the service.)
-
Right click the service, and click Start.
-
Locate the “EXO Business DCE”. Ensure the Startup Type is set to Automatic. (We also recommend changing the Restart options to always restart the service.)
-
Right click the service, and click Start.
Configure Distributed COM Server Permissions
-
Open the Component Services Manager in Windows Administrative Tools (DCOMCNFG.EXE)
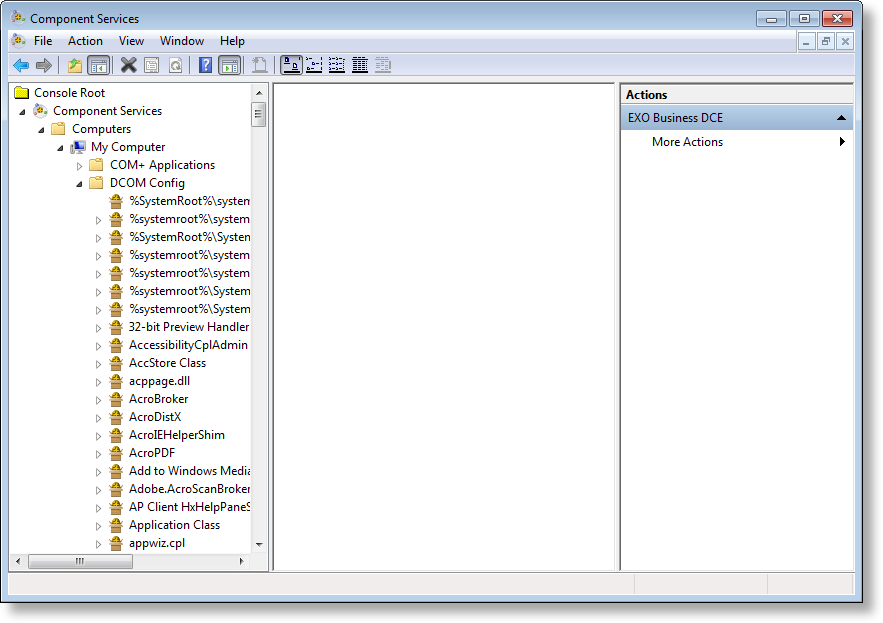
The actual applications visible in the DCOMCnfg properties will depend on the applications installed on your server. Note the Exo Business DCE application in the list.
-
Open Component Services > My Computer > DCOM Config, right-click on the Exo Business DCE application and select Properties.
You may see Exo Business DCE in the list multiple times. In that case repeat Steps 3-8 for each instance.
-
Select the Security tab.
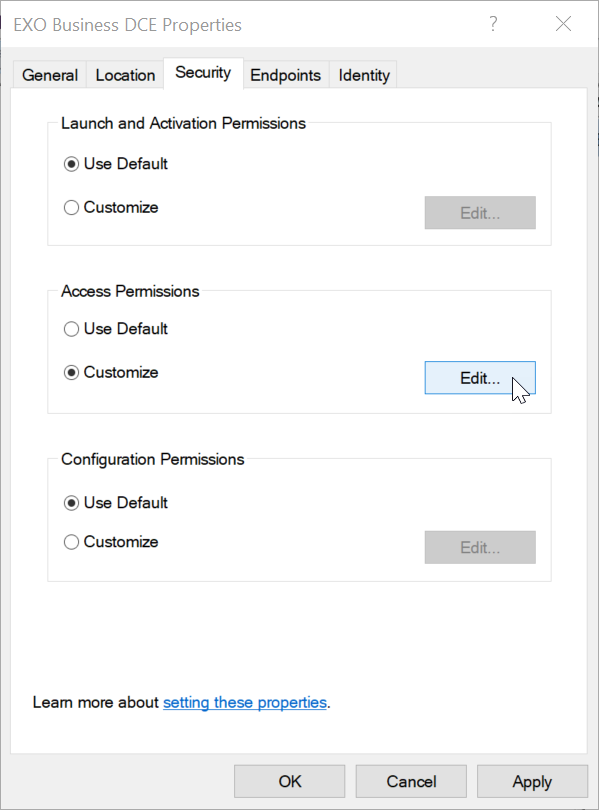
Access permissions must be for the server DCOM objects so the client computers can access the middleware server. Launch and Configuration permissions should be left as default as they are not used when the Exo Business DCE is run as a service. -
In the Access Permissions group, select Customize and click the Edit.. button.

-
When the Access Permission window appears, click Add..
For purposes of testing if the service can work, it can be useful to try the EVERYONE special user group. This is not recommended for live environments as it opens up the security too far, but is useful for testing connections.
-
Add the SYSTEM account.
-
Ensure that the Allow is ticked for the access permissions for the user(s).
-
Click OK and close all Windows.
Configuring ExonetDCE
-
Open a Command Prompt in Administrator mode.
-
Run ExonetDCE in -Executable mode
Type ExonetDCE.exe -Executable -
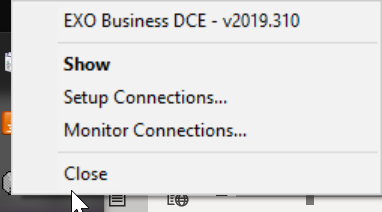
You'll now see this icon in your system tray:

-
Right click and choose: Setup Connections
-
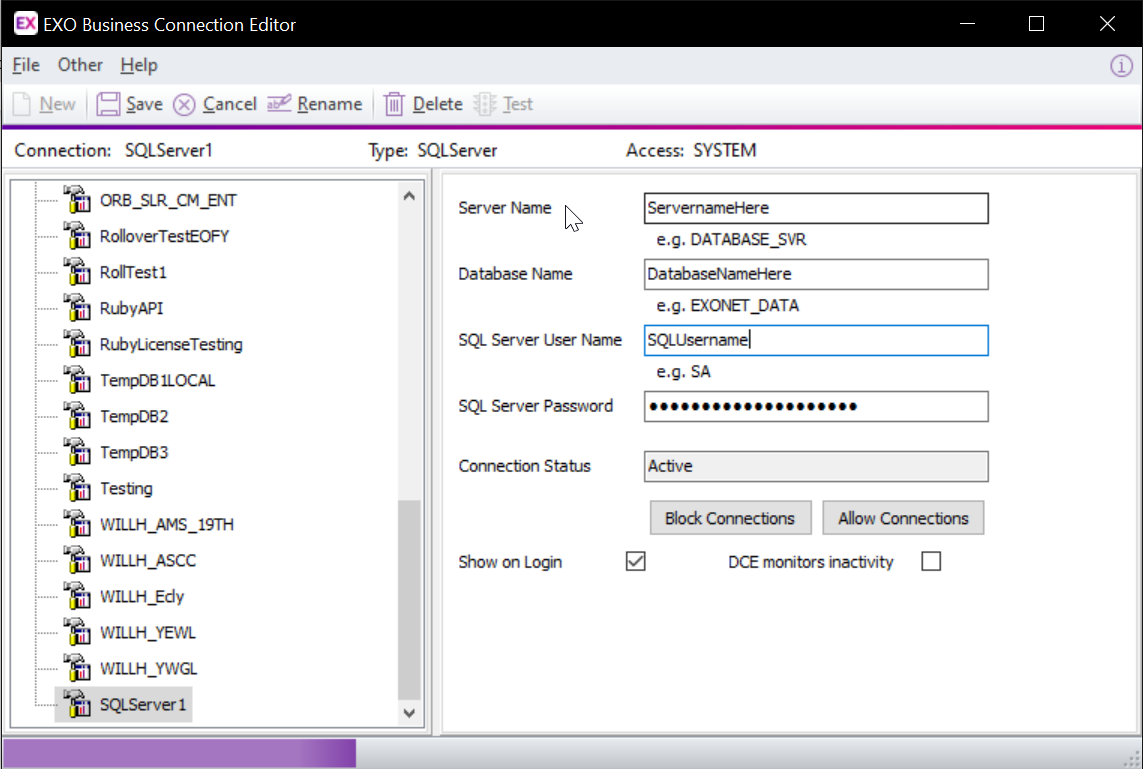
The usual Exo Business Connection Editor will appear. Add a connection configured to your server:
-
After configuring the connection, Save and then Test it.
-
If you see the message
"Unable to connection to DB_NAME
The Error message is:
Missing data provider or data packet.
The above message is a false error and indicates a successful connection in version 2020.3 of the ExonetDCE.
Everything to do with DCE Configuration should be referred to either your IT Administrators or your Exo Business Implementation Partners. These pages are highly technical and intended for your Partner to work through.
You can also find more resources on the MYOB Exo Business Education Centre.