Exo Employer Services allows for multiple logon accounts. To set up an account and password, select User Security option from the Utilities menu. This opens the following window:

User Details
User Code This is a short code, usually the person's initials or an abbreviation of their job title.
User Name Enter the person's name.
The default Admin user is a special case The user name "Admin" cannot be changed.
Password Enter the password that the user will use to log in to the system. Passwords are mandatory; if no password is entered, it will default to "myobabc".
The password for the Admin user should be changed from the default to increase security. The user controlling the Admin password determines the security levels for all the other users.
Default Application This setting controls which MYOB module appears immediately after the user logs into the MYOB system. A user can only be in one module at any given point in time. Users can switch to another module via the module changer on the right hand side of the toolbar. Being a multi-user system, the number of users who may simultaneously access an MYOB module over a network is governed by number of seats purchased in your MYOB Annual Licence.
E-mail Address Users of the Exo Employer Services system can optionally be set up to access payroll information on the Internet. In this case, the e-mail address serves as a point of contact, in that the person reviewing the website data can receive messages via the MYOB EXO MyStaffInfo website.
These e-mails will be directed to the inbox of the user's default E-mail program (e.g. Microsoft Outlook).
Show Reminders when entering company The Reminder Notes window will appear with your outstanding reminders whenever you log into the system. Removing the tick from this option suppresses those notes from appearing on start-up.
Inactive
If a user is marked as inactive, they will no longer be able to log in to Exo Employer Services. The user account stays in the system for auditing purposes.
Only the Admin account can change this setting. The Admin account cannot be made inactive.
User Access Rights
The Access Rights tab controls what the user is and is not allowed to access.
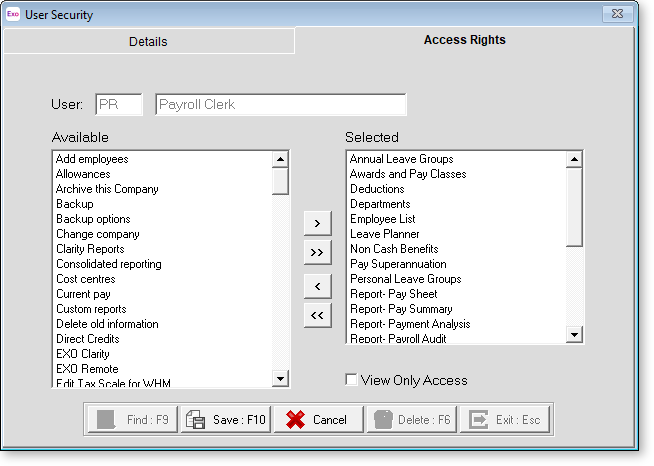
To grant a user access to a particular type of data, select a data type from the Available list and click the > button, or drag the type from the Available list to the Selected list. You can also click the >> button to grant access to all types. (The "Admin" user always has access to all types.)
To remove a user's access to a particular type of data, select a data type from the Selected list and click the < button, or drag the type from the Select list back to the Available list. You can also click the << button to remove access to all types.
View Only Access Selecting this option will let the user open and view the chosen windows, but they will not be able to add or edit any values.