A report run is a way of grouping reports together to process several at a time. This saves the repetitive task of having to navigate to, set up, preview, and print the same reports from the Select Report screen every time you need them. When a report is in a run, it can be customised permanently for that run.
Report runs are set up and run from the Report Runs tab of the Select Report window. Selecting Report Runs from the Reports menu opens the Select Report window with the Report Runs tab automatically selected:
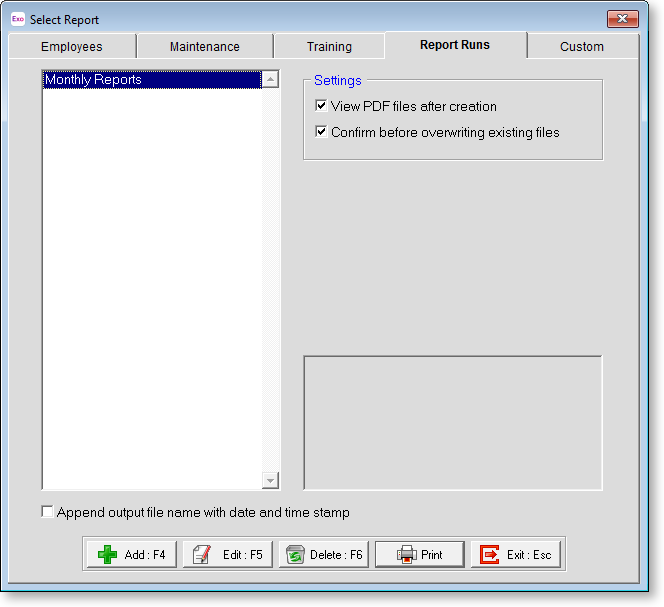
The following options are available on the Report Runs tab, which affect all reports generated from report runs:
-
View PDF files after creation - if this option is ticked, PDF reports will be opened in your default PDF viewer application when they are created.
-
Confirm before overwriting existing files - if this option is ticked, you will be asked for confirmation if any of the report files you are generating will overwrite an existing file. If it is not ticked, files will be overwritten automatically. This option is disabled if Append output file name with date and time stamp is ticked, as files will always be unique in this case.
Adding Report Runs
To add a report
To add a Report Run:
-
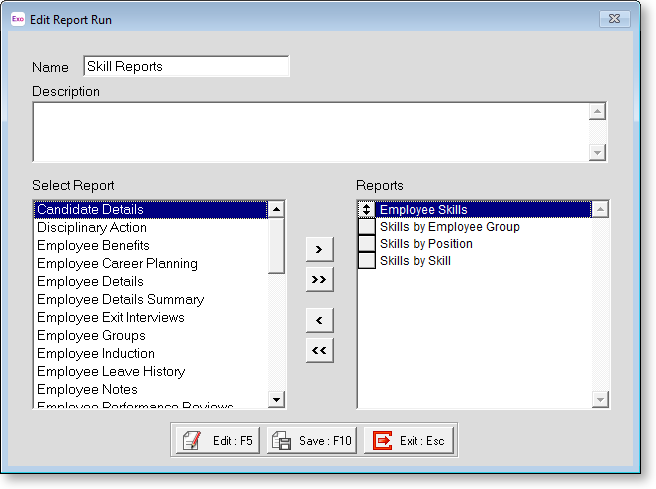
Click Add or press F4. The Edit Report Run screen appears:
-
Enter a Name and Description for this report run.
-
From the Select Report window on the left, select any report for inclusion into the report run. Double-click on a report, or select the report and click the > button to move the selected report to the Reports window. Reports in the Reports window can be re-ordered by dragging them up and down.
-
Customise each report. You do not need to customise a report if the default settings suit you; however, it is a good idea to check how the current defaults.
To customise a report, double-click on a report in the reports window, or select the report, then click Edit or press F5. The Print Report screen for that report appears.
Enter values into the selection ranges to print for specific departments/cost centres as necessary.
Set the report destination for each report.
TIP: This lets you send certain reports to go to certain printers. You can set all reports' destinations to "Screen" to preview each report before it goes to the printer.
You can set any number of options to do with what to show or what to hide on the report, choose between summary and detail view, or choose the page orientation.
-
Once you have finished customising the report, click Save or press F10 to permanently save your settings, then click on Exit or press esc to return to the Edit Report Run screen.
Click Save or press F10 to save the report run (and the reports in it) and return to the report run selection screen, from which you can proceed to print the run.
Editing Report Runs
You can select an existing report run on the Report Runs tab and click Edit or press F5 to add, remove or edit the reports in that report run.
Clicking Delete or pressing F6 removes the currently selected run from the report run list.
Printing Report Runs
Click Print on the Select Report screen to print the currently selected report run. All of the reports in the run are printed in one sequence.