When printing any of the following reports, an extra "Distribute" option is available in the Destination dropdown on the Print Report window:
-
Payslip Custom
Video Help is available for this topic on the Exo Employer Services Education Centre.
Selecting the "Distribute" option and clicking the Distribute button opens the Distribution window:
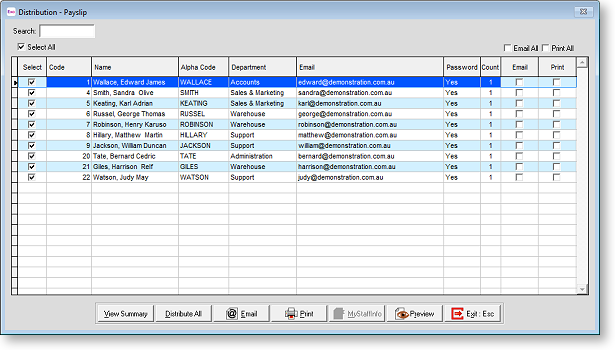
From this window, you can print reports, send them by email, upload them to MyStaffInfo, or any combination of the three.
You can preview report information before distribution by clicking the Preview button, which displays the report for the selected employee. For the custom payslip, a View Summary button is also available - clicking this displays the Payslip Summary report.
To distribute reports
-
Select the employees who you want to distribute the reports to by ticking the appropriate boxes in the Select column or by ticking Select All.
-
Select the destination(s) for the employees' reports:
-
To email the report to an employee, tick the appropriate box in the Email column, or tick Email All to select all employees.
-
To print the report for an employee, tick the appropriate box in the Print column, or tick Print All to select all employees.
-
To upload an employee's report to MyStaffInfo, tick the appropriate box in the MSI column, or tick MSI All to select all employees.
-
-
Distribute the reports by one or more methods:
-
To print reports for all selected employees who have the Print option ticked, click Print.
-
To email reports to all selected employees who have the Email option ticked, click Email.
-
To upload reports to MyStaffInfo for all selected employees who have the MSI option ticked, click MSI.
-
To send reports to all selected employees by all of the selected destinations in one operation, click Distribute All.
-
-
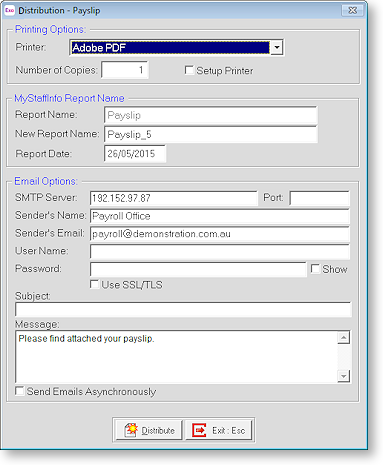
Enter the settings for the selected distribution method(s):
-
Click Print, Email, MyStaffInfo or Distribute (depending on the setup window).
-
A progress window appears. Click Distribute to begin the distribution. Progress is displayed as the reports are processed.
-
Once the operation is complete, you are given the option of printing a distribution report that displays the results of the distribution operation, including any errors that were encountered.