This is where you create a Site File for your Exo Remote Timesheet based on payroll records. This is so that Exo Remote Timesheet can recognise who you are paying and who should have security rights. Click on Step One of the Exo Remote Cycle.
Site Details
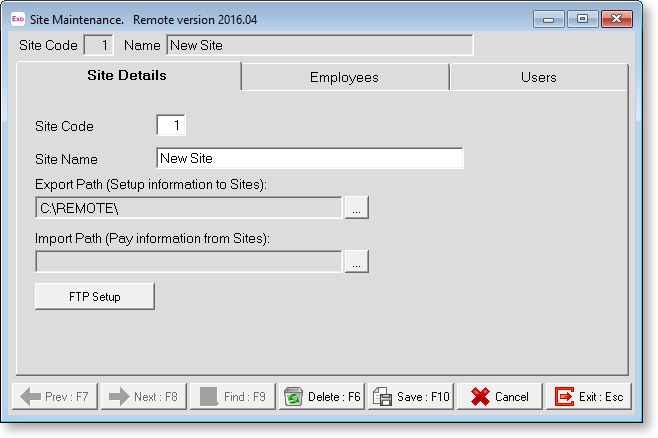
Site Code This is the unique number for the site, this number is generated by the system.
Site Name This is the name of the site. It is useful to make the name as descriptive as possible.
Export Path This option allows you to specify a path to place the site files when you have created them. This option is useful if your company runs on a large network. You can create the files to a specific location and Exo Remote Timesheet can pick up the files from the same location. If you have not yet installed the Exo Remote Timesheet component, set this path to your current payroll folder, e.g. C:\Payrollv.
Import Path This is the location from which the finished pay file (containing the time transactions) will be picked up from.
FTP Setup The computers containing your Exo Remote Timesheet installation(s) may not necessarily be located on the same network as the computer containing your Remote Head Office Installation. If this is the case, you will need to find a way to transfer the Site file(s) from one location to another.
A popular option is to request your Network Administrator to set up an Internet FTP (File Transfer Protocol) server. In basic terms, this consists of computer that has a permanent Internet Connection and is set up to perform as an FTP file server. With appropriate login codes, another computer, such as the computer containing Exo Remote, can upload files to a reserved space on the file server. In addition, other computers, such as the computers containing Exo Remote Timesheet, can download the same files to the Exo Remote Timesheet program folder (usually C:\Remote).
The Exo Remote Timesheet sites need up-to-date Site files in order to be operational. In other words, the users of Exo Remote Timesheet must be able to share up to date payroll data, with the users of the Exo Payroll system. In this way, the Exo Remote Timesheet users are informed of who it is that they are paying, and what those employees' leave balances are. This data comes in the form of Exo Remote Timesheet files.
This electronic method of moving data is often faster and more reliable than physical methods of moving data, such removable storage media – floppy disk, CD-R, Flash drives, etc.
If you elect to use the FTP transfer method, all of the following FTP settings are to be supplied by your Network Administrator.

FTP Server The URL address of the FTP Server.
FTP Folder The name of the folder on the FTP Server into which the uploaded files will be placed.
User Name The user name that will be used to access the FTP connection.
Password The password that will be used to access the FTP connection.
During the setup process, it is advisable to test that your FTP connection is enabled. Click the Test FTP Settings button to continue. A window showing the results of the FTP test appears. Click on the Exit button to return to the FTP Setup window, and then click on the Save button to confirm your changes and return to the Site Maintenance screen.
Employees
This tab allows you to assign employees to the site. You can only select employees who have the same pay frequency as the site. The list on the left hand side shows all available employees, the list on the right hand side shows all employees who have been selected.
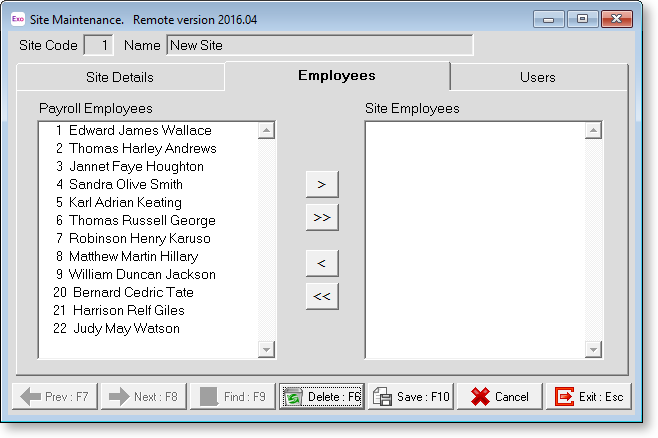
To move an employee between the Payroll Employees and Site Employees sections, click on an employee and then click one of the following functions:
> Select employee
>> Select all employees
< Deselect employee
<< Deselect all employees
Users
This section allows you to maintain who has access to the Exo Remote Timesheet application(s).
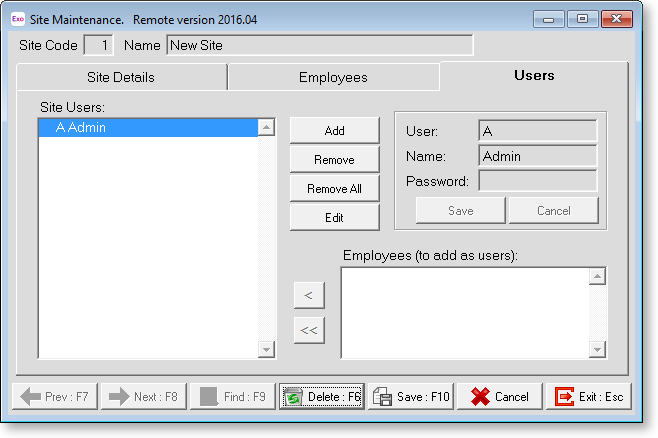
User This is the unique user code for the current user.
Name This is the name of the user.
Password This is the password for the user. This allows you to define an initial password for a user. The user can change their password at the Remote Timesheet.
Add Selecting this option or pressing the F4 function key adds a blank user file for you to fill in.
Remove This option will remove the currently selected user from the list.
Remove All This option will remove all the users (except the administrator) from the list.
Edit This option allows you to edit an existing user.
Employees (to add as users) This lists the employees for the site and allows you to add them as users so that they can log in to the Site and enter their timesheets. Double-clicking in the list or clicking the < button will add a single employee. Clicking the << button will add all the employees in the list.