
PRODUCT VERSION:
Example created using the following systems:
Advanced Payroll: Build 2021.117.403.7802 [21.117.0037]
Advanced Workforce Management: Version 8.4 February 2022
SCENARIO:
Demonstration of Cost Centre to Sub Account mapping functionality between Workforce Management and Advanced Payroll.
REQUIREMENTS:
Integrated Workforce Management and Advanced Payroll system.
SOLUTION:
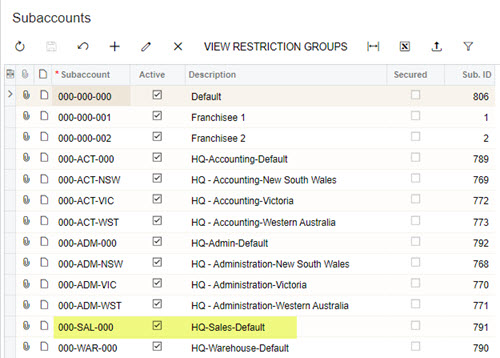
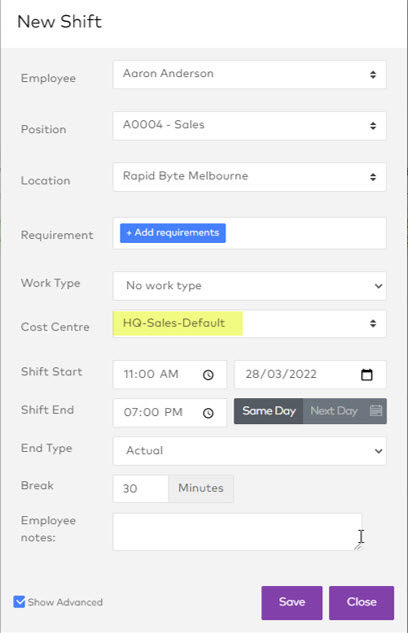
This example follows a roster assigned to Cost Centre ‘HQ Sales Default’ which is mapped to Subaccount 000-SAL-000 in Advanced Payroll.
As always, please perform these configurations in a Test environment, verify that all the screens, reports and areas that might be affected by the change are working correctly before implementing in the production environment.
Advanced Payroll Settings
Subaccounts Screen (GL203000)
This example assumes that sub accounts have already been created in the Advanced Payroll tenant.
Data Maps Screen (MPPP7020)
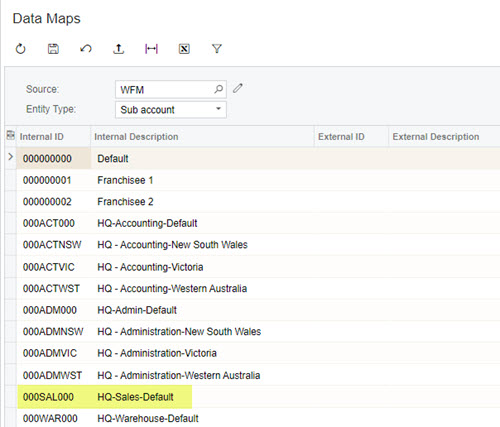
Any sub accounts entered on the Subaccounts screen (GL203000) are automatically populated to the Internal ID and Internal Descriptions fields on the Data Maps screen (MPPP7020). These form the WFM Sub account. Hyphens contained in the sub account codes are stripped out.
The Data Maps External ID and External Description fields are left blank as not required for this example.
Workforce Management Settings
Add a Cost Centre:
-
Navigate to Management > Settings > Cost Centres
-
Click the Add ( + ) button
-
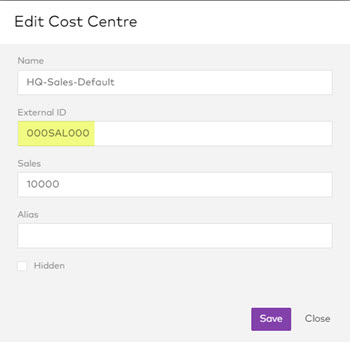
Enter the Cost Centre details as follows:
-
Name: The sub account description ie HR-Sales-Default
-
External ID: The WFM Sub account Internal ID (MPPP7020) ie 000SAL000
-
Sales: The amount of sales associated with the cost centre (optional)
-
Alias: An alternate name for the cost centre (optional)
-
Hidden: Determines if the cost centre is hidden from use in the Roster. Leave as false.
-
-
Save.
Note: You can also Create a new cost centre via the Apply Roster Template
Adding the Cost Centre to a Roster
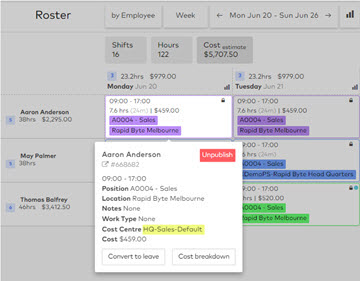
Process the timesheet through to Advanced Payroll in the normal manner.
Advanced Payroll
Go to Timesheet Batches MPPP7060.
Click to Import External Timesheets.

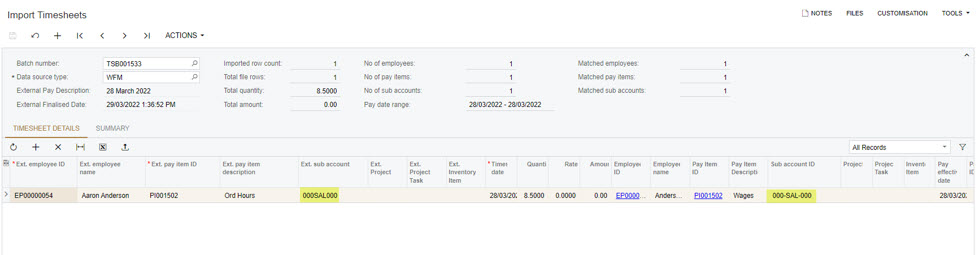
Open the batch, and you can see the Pay line.
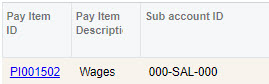
The ‘Ext. sub account’ field shows the Workforce Management Cost Centre External ID. To the far right, the Sub account ID field is automatically mapped for you.
DISCLAIMER
In no event shall MYOB ANZ be liable for any special, indirect, or consequential damages arising out of or in connection with the use of documentation or information available on this web site.
All examples (including the application of specific processing standards or legislation) are representative examples only and may not directly apply to the user’s own circumstances. These may include technical inaccuracies or typographical errors.
As the information presented on this web site is changed periodically, MYOB ANZ may make improvements and/or changes in the product(s), program(s), and/or documentation described at any time, without notice.