As a manager you are able to add and identify blackout periods to prevent employees from applying for leave or unavailability requests during your business's busiest times.
-
Manager with Finance and higher access levels can view, add, edit and delete existing blackout periods.
-
Managers can view existing blackout periods but not add or edit blackouts.
Employees are blocked from applying for leave on days that are added as blackout period by a manager. When an employee applies for unavailability/leave it is blocked if any of the unavailability/leave period overlaps any of the blackout periods. Managers can by pass the blackout period - a pop-up alert is displayed informing managers about the blackout should they apply leave on a blackout period.
How do I add a blackout period?
Manager with Finance or higher access is required.
-
On the dashboard, click Management > Settings > Blackout Periods. You should be redirected to the Blackout period page.

-
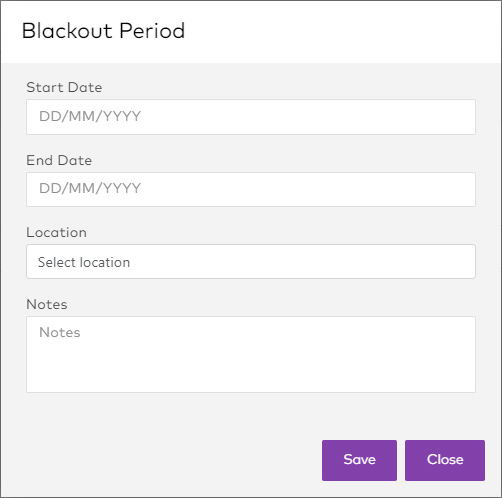
To add a new blackout, click the Add New button. A window will appear. Enter the following details:
-
Start Date and End Date: should be today's or future dates. Entering past date is not allowed.
-
Location: you can specify the location that the blackout period is attached to (if this is at the top level then all sub-levels should automatically apply that blackout period.)
-
Notes: notes entered here will be shown to the employees as an error message, when they try to apply leave on a blackout period. We recommend that you enter the reason why it is a blackout, to avoid confusion with employees applying for leave in a blackout period.
-
-
Click the Save button.
Users can’t add blackout periods to locations where they don’t have access. When adding a blackout to a parent location, that blackout period will also be applied to all of its sub-locations. If the blackout period is not applicable to any of its sub-locations, do not add the blackout period to the parent location; instead, add the blackout period to the locations where the blackout is applicable.
To edit a blackout, click the pencil icon beside the delete icon. The same window appears. Make necessary changes then click the Save button.
To delete a blackout, click the delete icon. A pop-up alert will be displayed asking for confirmation. Click Yes to delete.
What does a blackout period look like to employees?
When an employee applies for unavailability/leave, it is blocked if any of that unavailability/leave period overlaps any of the blackout periods.
An error message is displayed informing the employees about the blackout period.
The error message displays the Notes entered for the blackout period, so employees know the reason for the blackout.
How can a manager bypass the blackout period?
Managers can bypass the blackout period - a pop-up alert is displayed informing the manager about the blackout should they apply leave in a blackout period.
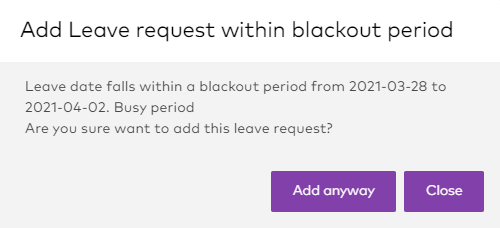
Clicking the Add anyway button on the pop-up box adds the leave request, bypassing the blackout period.