Introduction
Acrobat E-sign is the world's most trusted cloud-based e-signature solution that allows the user to send, sign, track, and manage signature processes using a browser or mobile device and MYOB's preferred e-signature partner. E-sign is now integrated with MYOB Acumatica. You can access Acrobat PDF documents and sign documents from anywhere, on mobile or desktop or your recipients can sign in a snap — no downloads or sign-ups required. For pricing please visit: E-signature Pricing and Plans | Acrobat Sign (adobe.com)
With the e-Sign integration for MYOB Acumatica, users can:
-
Create envelopes and prepare documents for signing
-
Send documents for signing and manage documents
-
Check status of document sent for signing
-
Send documents from CRM, Financials, Distribution, and other modules using Document Management
Getting started
The purpose of this document is to guide the user on how they can set up Adobe e-sign account, further connect it with MYOB Acumatica. To show the applicability we have included a detailed use case to help you understand the document signing process.
Configure Adobe e-sign account
To start with, you have to sign up for a developer account at: https://www.adobe.io/apis/documentcloud/sign/docs.html#!adobedocs/adobe-sign/master/gstarted/sign_up_dev.md
Once done, follow the below steps to set up
-
Open Adobe Sign
-
Login to your Adobe Sign account
-
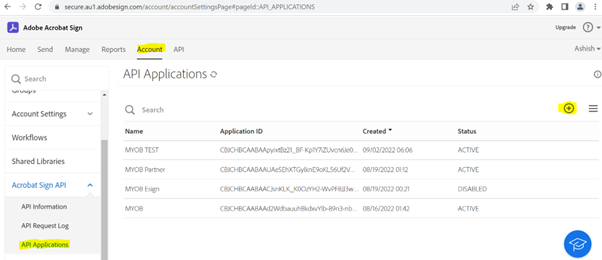
Now select “Account” from the menu and navigate to Adobe API > API Applications from the left navigation as show below
-
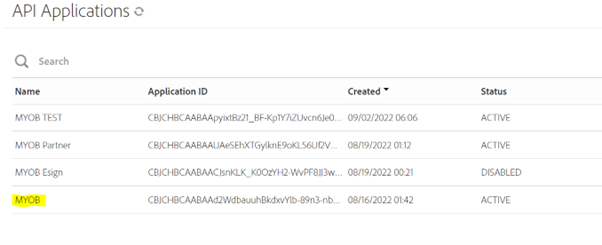
In the API Application screen, click on plus sign and provide the following information about the app:
-
Name: Type a name for your MYOB instance e.g., MYOB
-
Display Name: Provide a descriptive name for your MYOB Acumatica instance.
-
Domain: Select Customer
Save this information and you will see a new application created in the API Application list as shown below
-
-
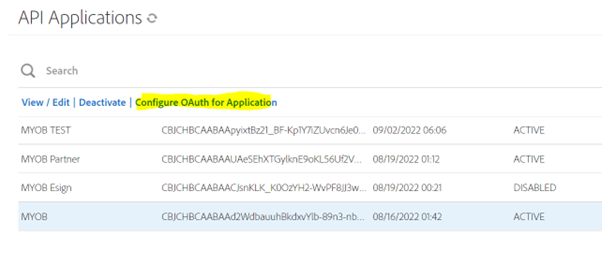
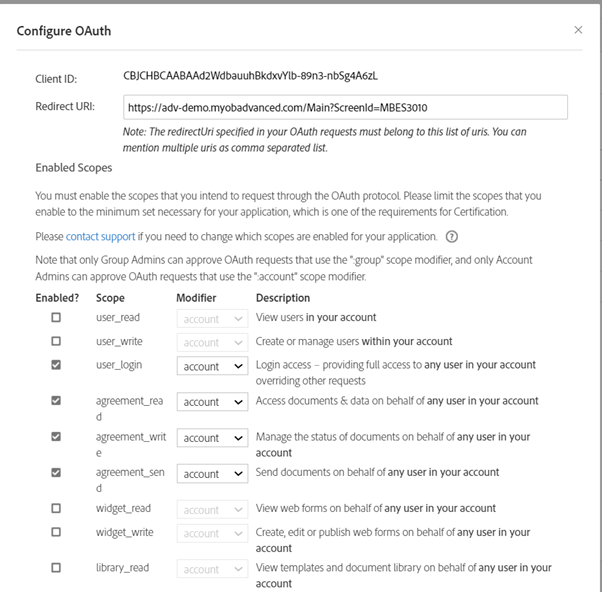
Select the newly created application and choose Configure OAuth for Application from the menu. In the Configure OAuth, specify the following information:
-
Redirect URL: Enter the link to your MYOB Acumatica site in the following format: https://(Site name)/Main?ScreenId=MBES3010 (for example, https://adv-demo.myobacumatica.com/Main?ScreenId=MBES3010)
-
Enable the following scopes:
-
user_login
-
agreement_read
-
agreement_write
-
agreement_sent
-
workflow_read
-
workflow_write
-
Set all modifiers to Account
-
E-sign set up at MYOB
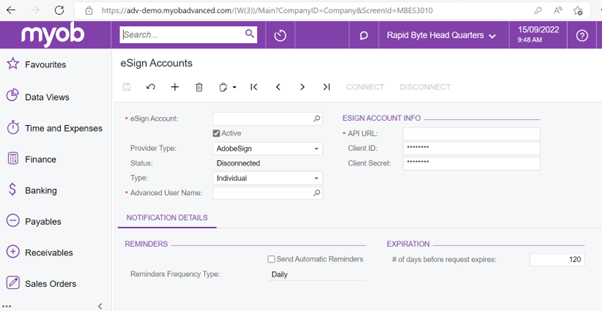
Now return to MYOB Acumatica to configure the Adobe Sign user account using eSign Account screen
-
Navigate to eSign Account screen
-
Provide a name for this Adobe Sign Account (e.g., MYOB)
-
Select AdobeSign as Provider Type
-
Select either Individual or Shared (Team/Enterprise) account type
-
Assign the account to MYOB Acumatica user (This user can send documents for signing using the Adobe Sign account) - this must be an Employee
-
If you clicked Type: Individual, only one user/employee can do the e-Sign
-
if you clicked Type: Shared, the Users tab should show up, and you can input multiple user/employee who can do e-Sign
-
-
Provide the Adobe Sign API URL (e.g., https://secure.au1.adobesign.com/)
-
Specify the Client ID and Client Secret from Adobe Sign application

Connectivity check
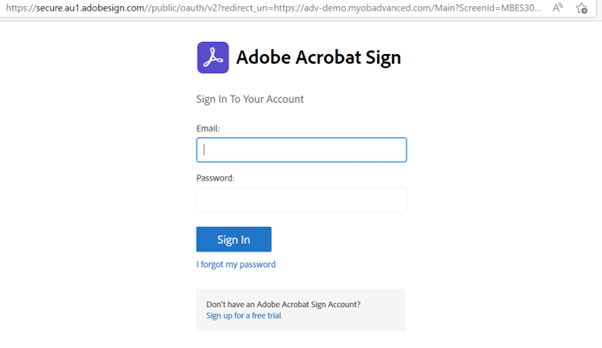
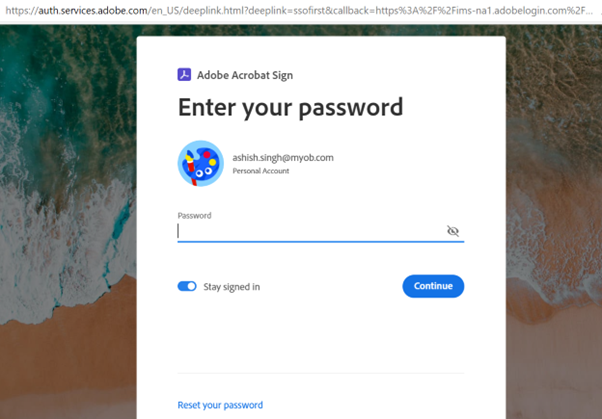
Once all the details are populated on the eSign Accounts screen, click Connect to establish a connection between MYOB Acumatica and Adobe Sign. This will pop up a window (as shown below) to allow access between these two applications. Once allowed, your Adobe Sign account is ready to use.
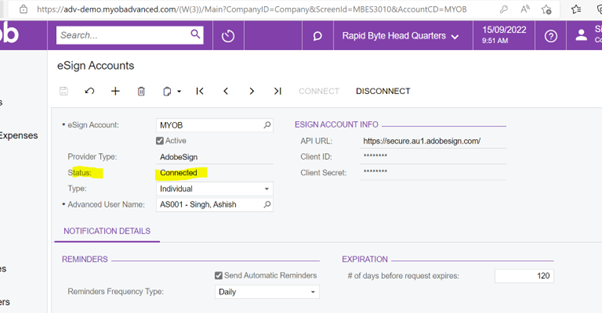
Now the status should say Connected
Functionality check
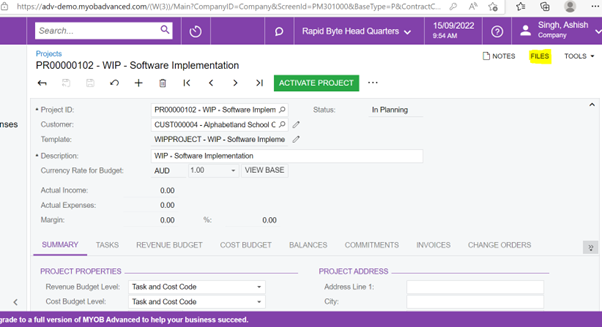
With the configuration completed, user can now send documents for signing from within MYOB Acumatica. This can be initiated from any module (Financials, CRM, Distribution) where files are handled. We have used Projects tab below to showcase the functionality.
-
Go to Projects screen

-
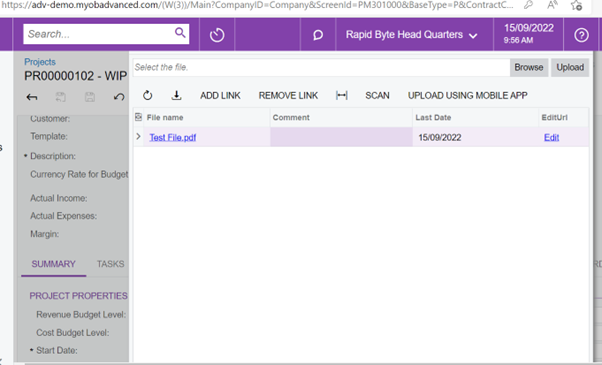
Select any project record with Files at the top right. If the project doesn’t have an attached file, then upload a file
-
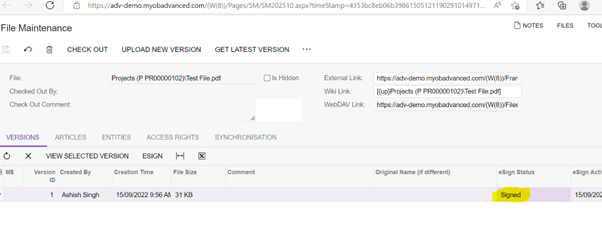
Clicking edit in the above window should navigate the user to File Maintenance screen, and you should see the Esign button

-
Click on the ESIGN option to prepare the envelope. In this dialog, specify subject and message and specify the recipients to sign the document and the ones to receive copy. You can manually add the recipients or use the contact selector to pick a contact from MYOB Acumatica. If the underlying entity had a contact specified (e.g., Contact in Opportunity), that contact will be loaded automatically. Click on Send to get the document over to Adobe Sign for signing.

-
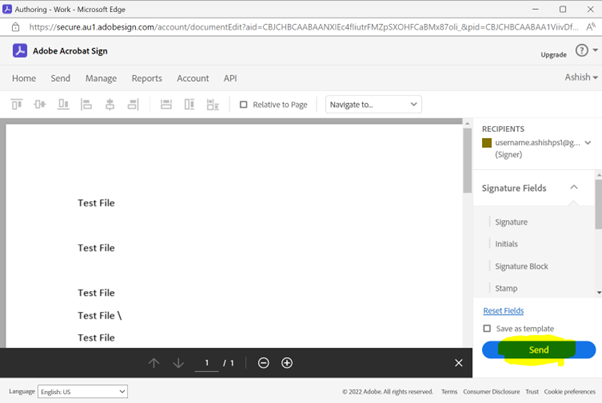
This will pop-up a provider screen to place tags (e.g., name, company info, signature) and to send it for signing. Once the document is sent for signing, the status will be updated in the File Maintenance window.
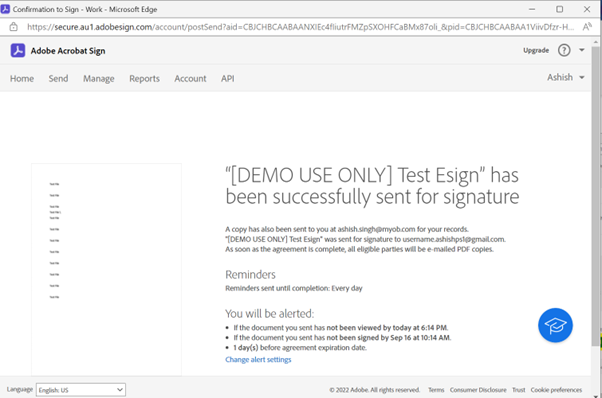
You should also get a confirmation email

-
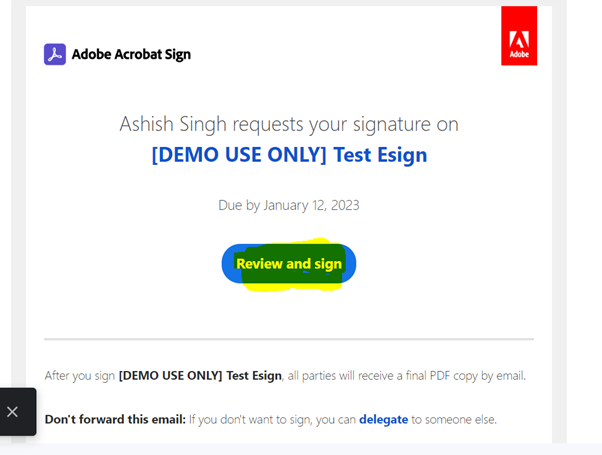
Now the receiver needs to follow simple steps to digitally sign the document.
-
As a receiver, click on Review and sign
Enter the signature and click on Click to Sign

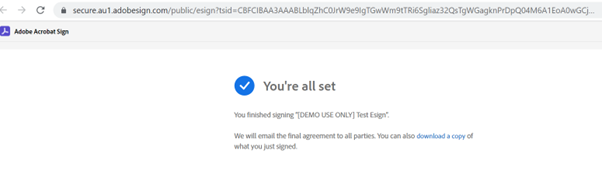
Both the sender and receiver will receive a confirmation email once the document signing is completed.

-
-
The status of the record should change to Signed in File Maintenance screen and the file should also be uploaded to the Project in MYOB Acumatica shortly.